For dancers, transporting costumes and dancewear efficiently is crucial. Commercial dance bags with garment racks, while convenient, can be quite expensive. This guide provides a step-by-step approach to creating your own “Rack And Roll Dance Bag” at a fraction of the cost, utilizing readily available materials and basic DIY skills.
Materials You’ll Need to Build Your Dance Bag Rack
To embark on this DIY project for your rack and roll dance bag, gather the following materials. You can find these items at most hardware stores or online retailers:
- PVC Pipes:
- Two 10-foot pieces of 3/4″ PVC pipe
- One 5-foot piece of 1/2″ PVC pipe
- PVC Connectors:
- 4 – ½ to ¾ “L” fittings
- 2 – ¾ “L” fittings
- 2 – ½ to ¾ “T” fittings
- 4 – ¾ straight connectors
- Rolling Duffel Bag: A 30″ rolling duffel bag (a 26″ option could also work, but 30″ offers more space)
- Spray Paint (Optional): Color of your choice for customizing the PVC rack.
- Tools:
- Measuring tape
- PVC pipe cutter or saw
- Optional: Table saw (for precise cuts, but not necessary)
Step-by-Step Instructions for Assembling Your Rack and Roll Dance Bag
Follow these detailed steps to construct your DIY rack and roll dance bag. This project is designed to be straightforward, even for those with minimal DIY experience.
1. Cutting the PVC Pipes to Size
Accurate measurements are key to ensuring your PVC rack fits perfectly within your duffel bag. Cut the PVC pipes according to the following dimensions:
¾” PVC Pipe Cuts:
- Top and Base Pieces: 3 pieces at 21 inches each
- Side Pieces: 4 pieces at 18 inches each
- Inner Bag Side Pieces: 2 pieces at 12 inches each
½” PVC Pipe Cuts:
- Vertical Connector Pieces: 4 pieces at 4 inches each
Tip for Clean Cuts: After cutting each piece of PVC, blow through it to remove any plastic shavings. This prevents debris from getting stuck inside the pipes and connectors during assembly.
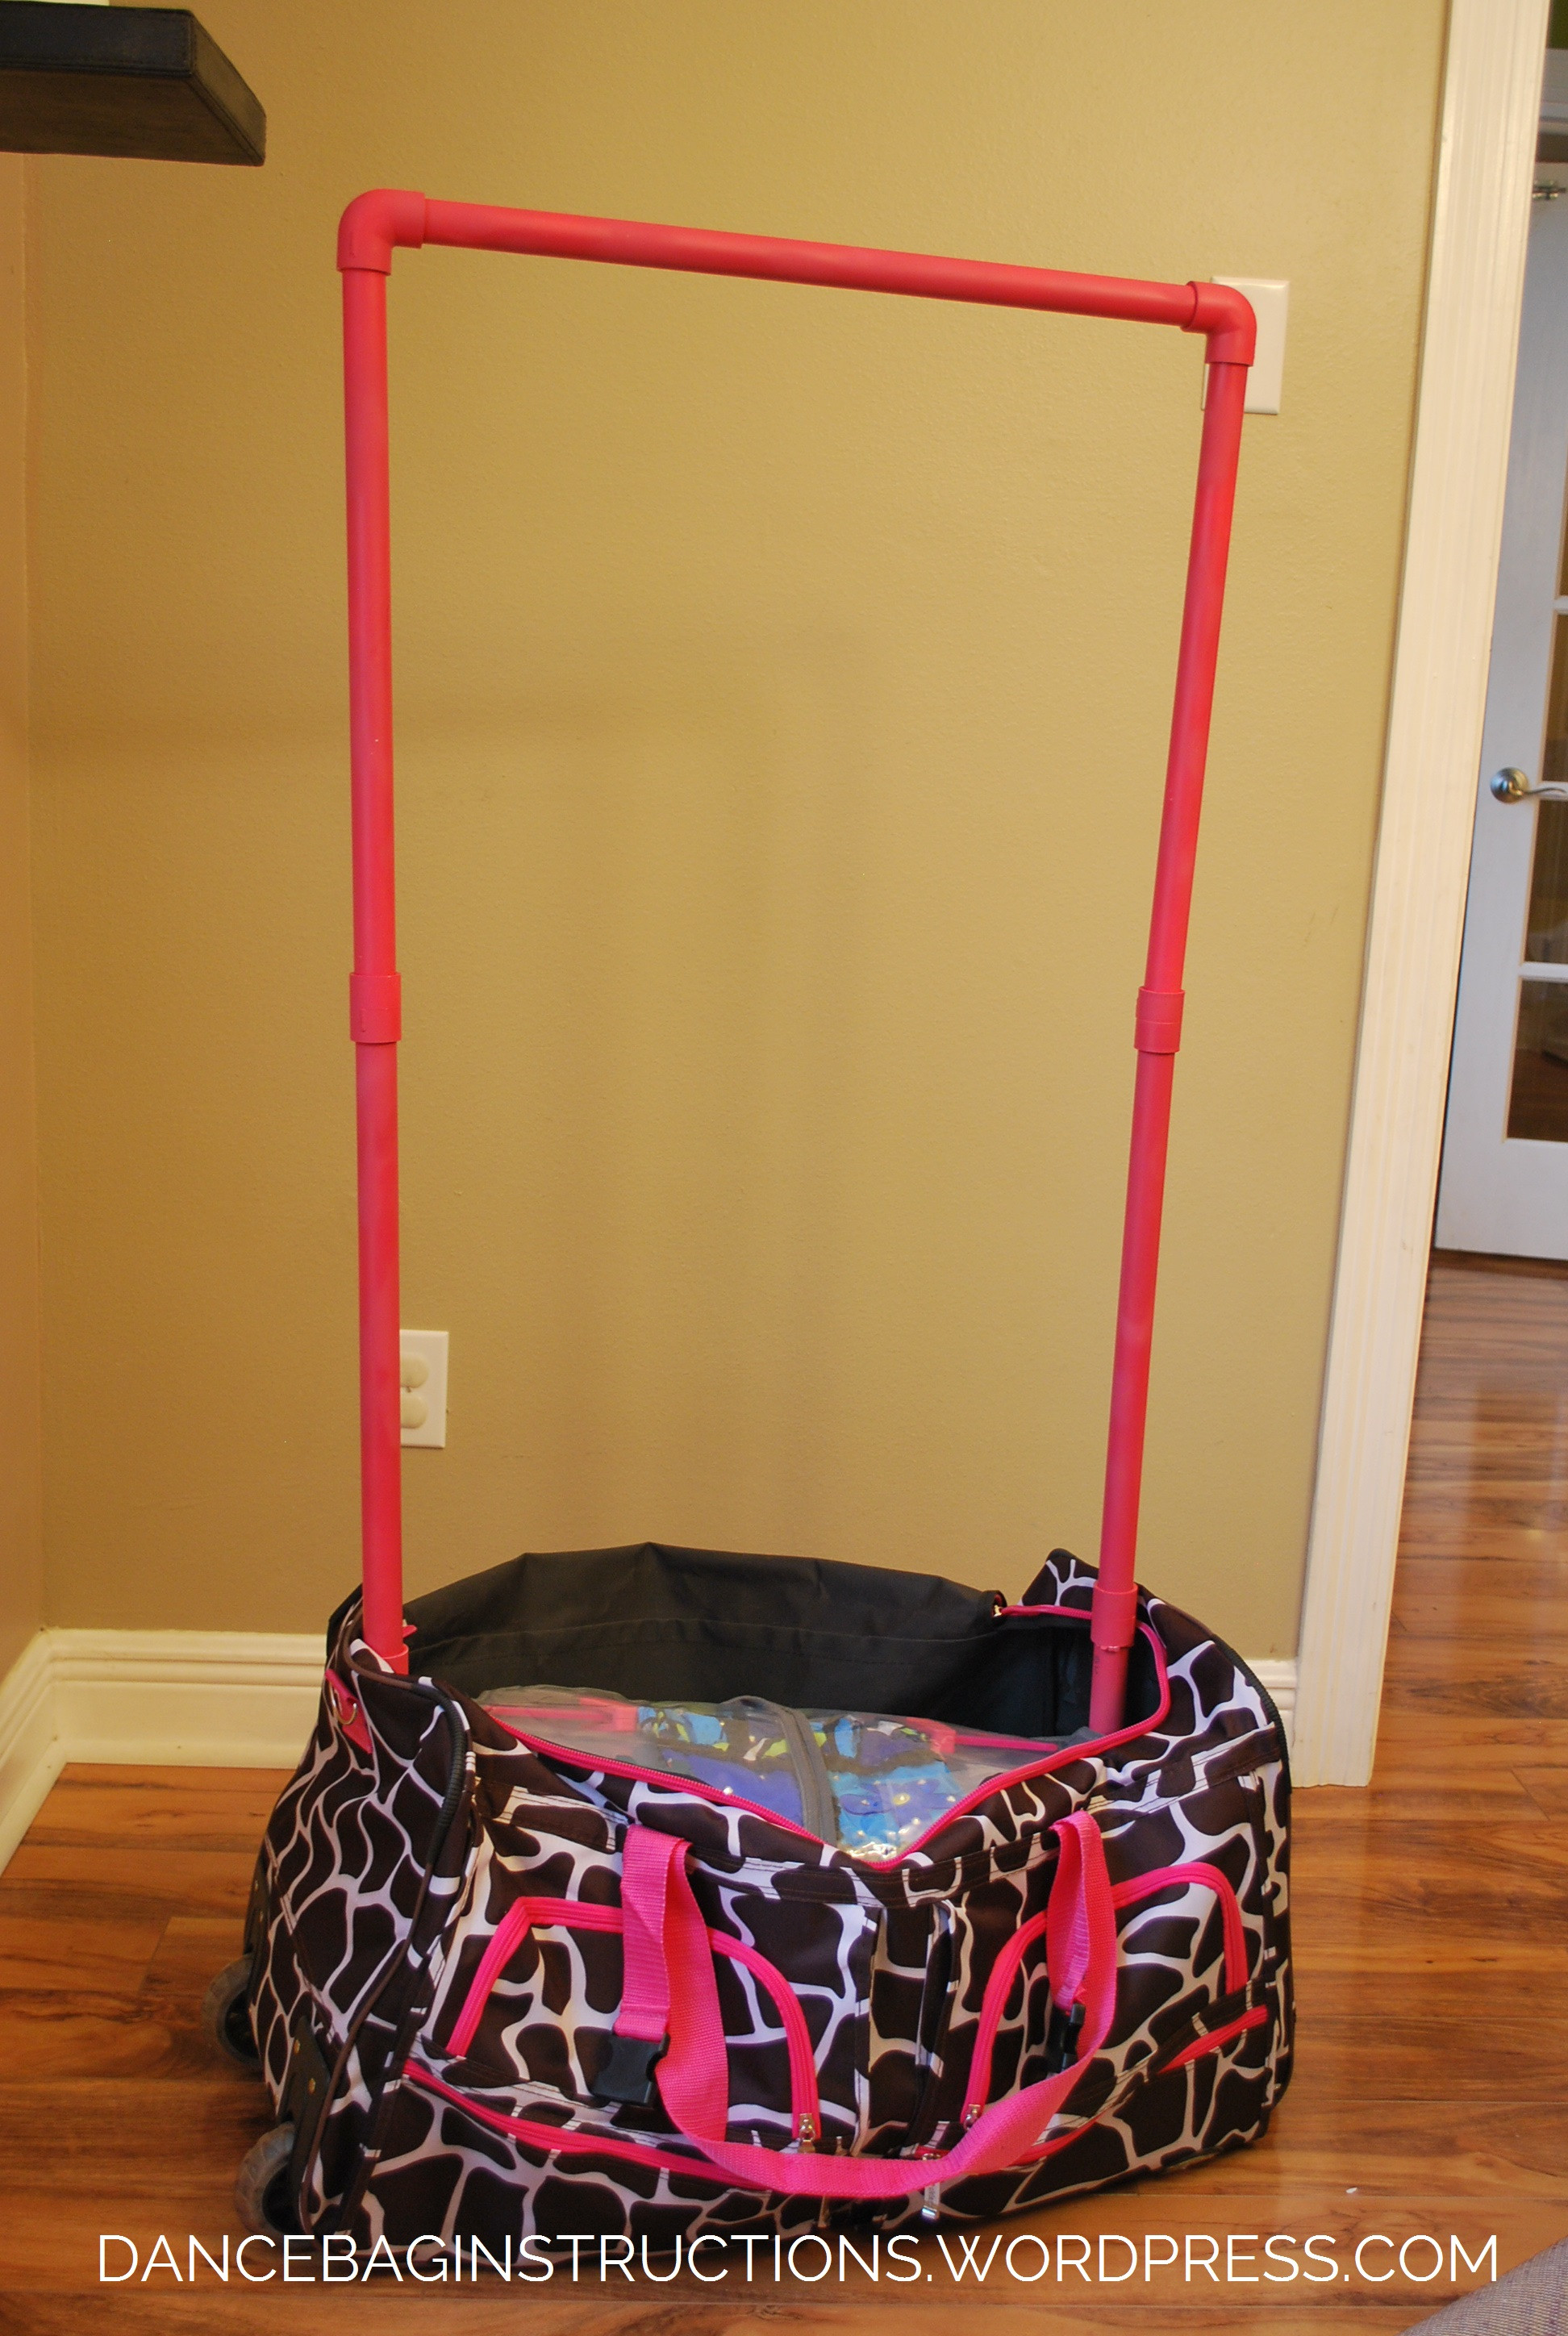
2. Assembling the PVC Rack Structure
Begin assembling the rack outside of the duffel bag to get a feel for the structure. Refer to the parts list and image for visual guidance.
- Connect the 21-inch pieces with ¾” straight connectors to form the top and base horizontal supports.
- Use the 18-inch pieces and ¾” L fittings to create the sides, attaching them to the horizontal supports.
- Incorporate the 12-inch pieces as inner supports within the bag’s frame for added stability.
- Utilize the ½” to ¾” fittings and ½” pipe pieces to create vertical extensions that will help secure the rack within the rolling handle section of the duffel bag.
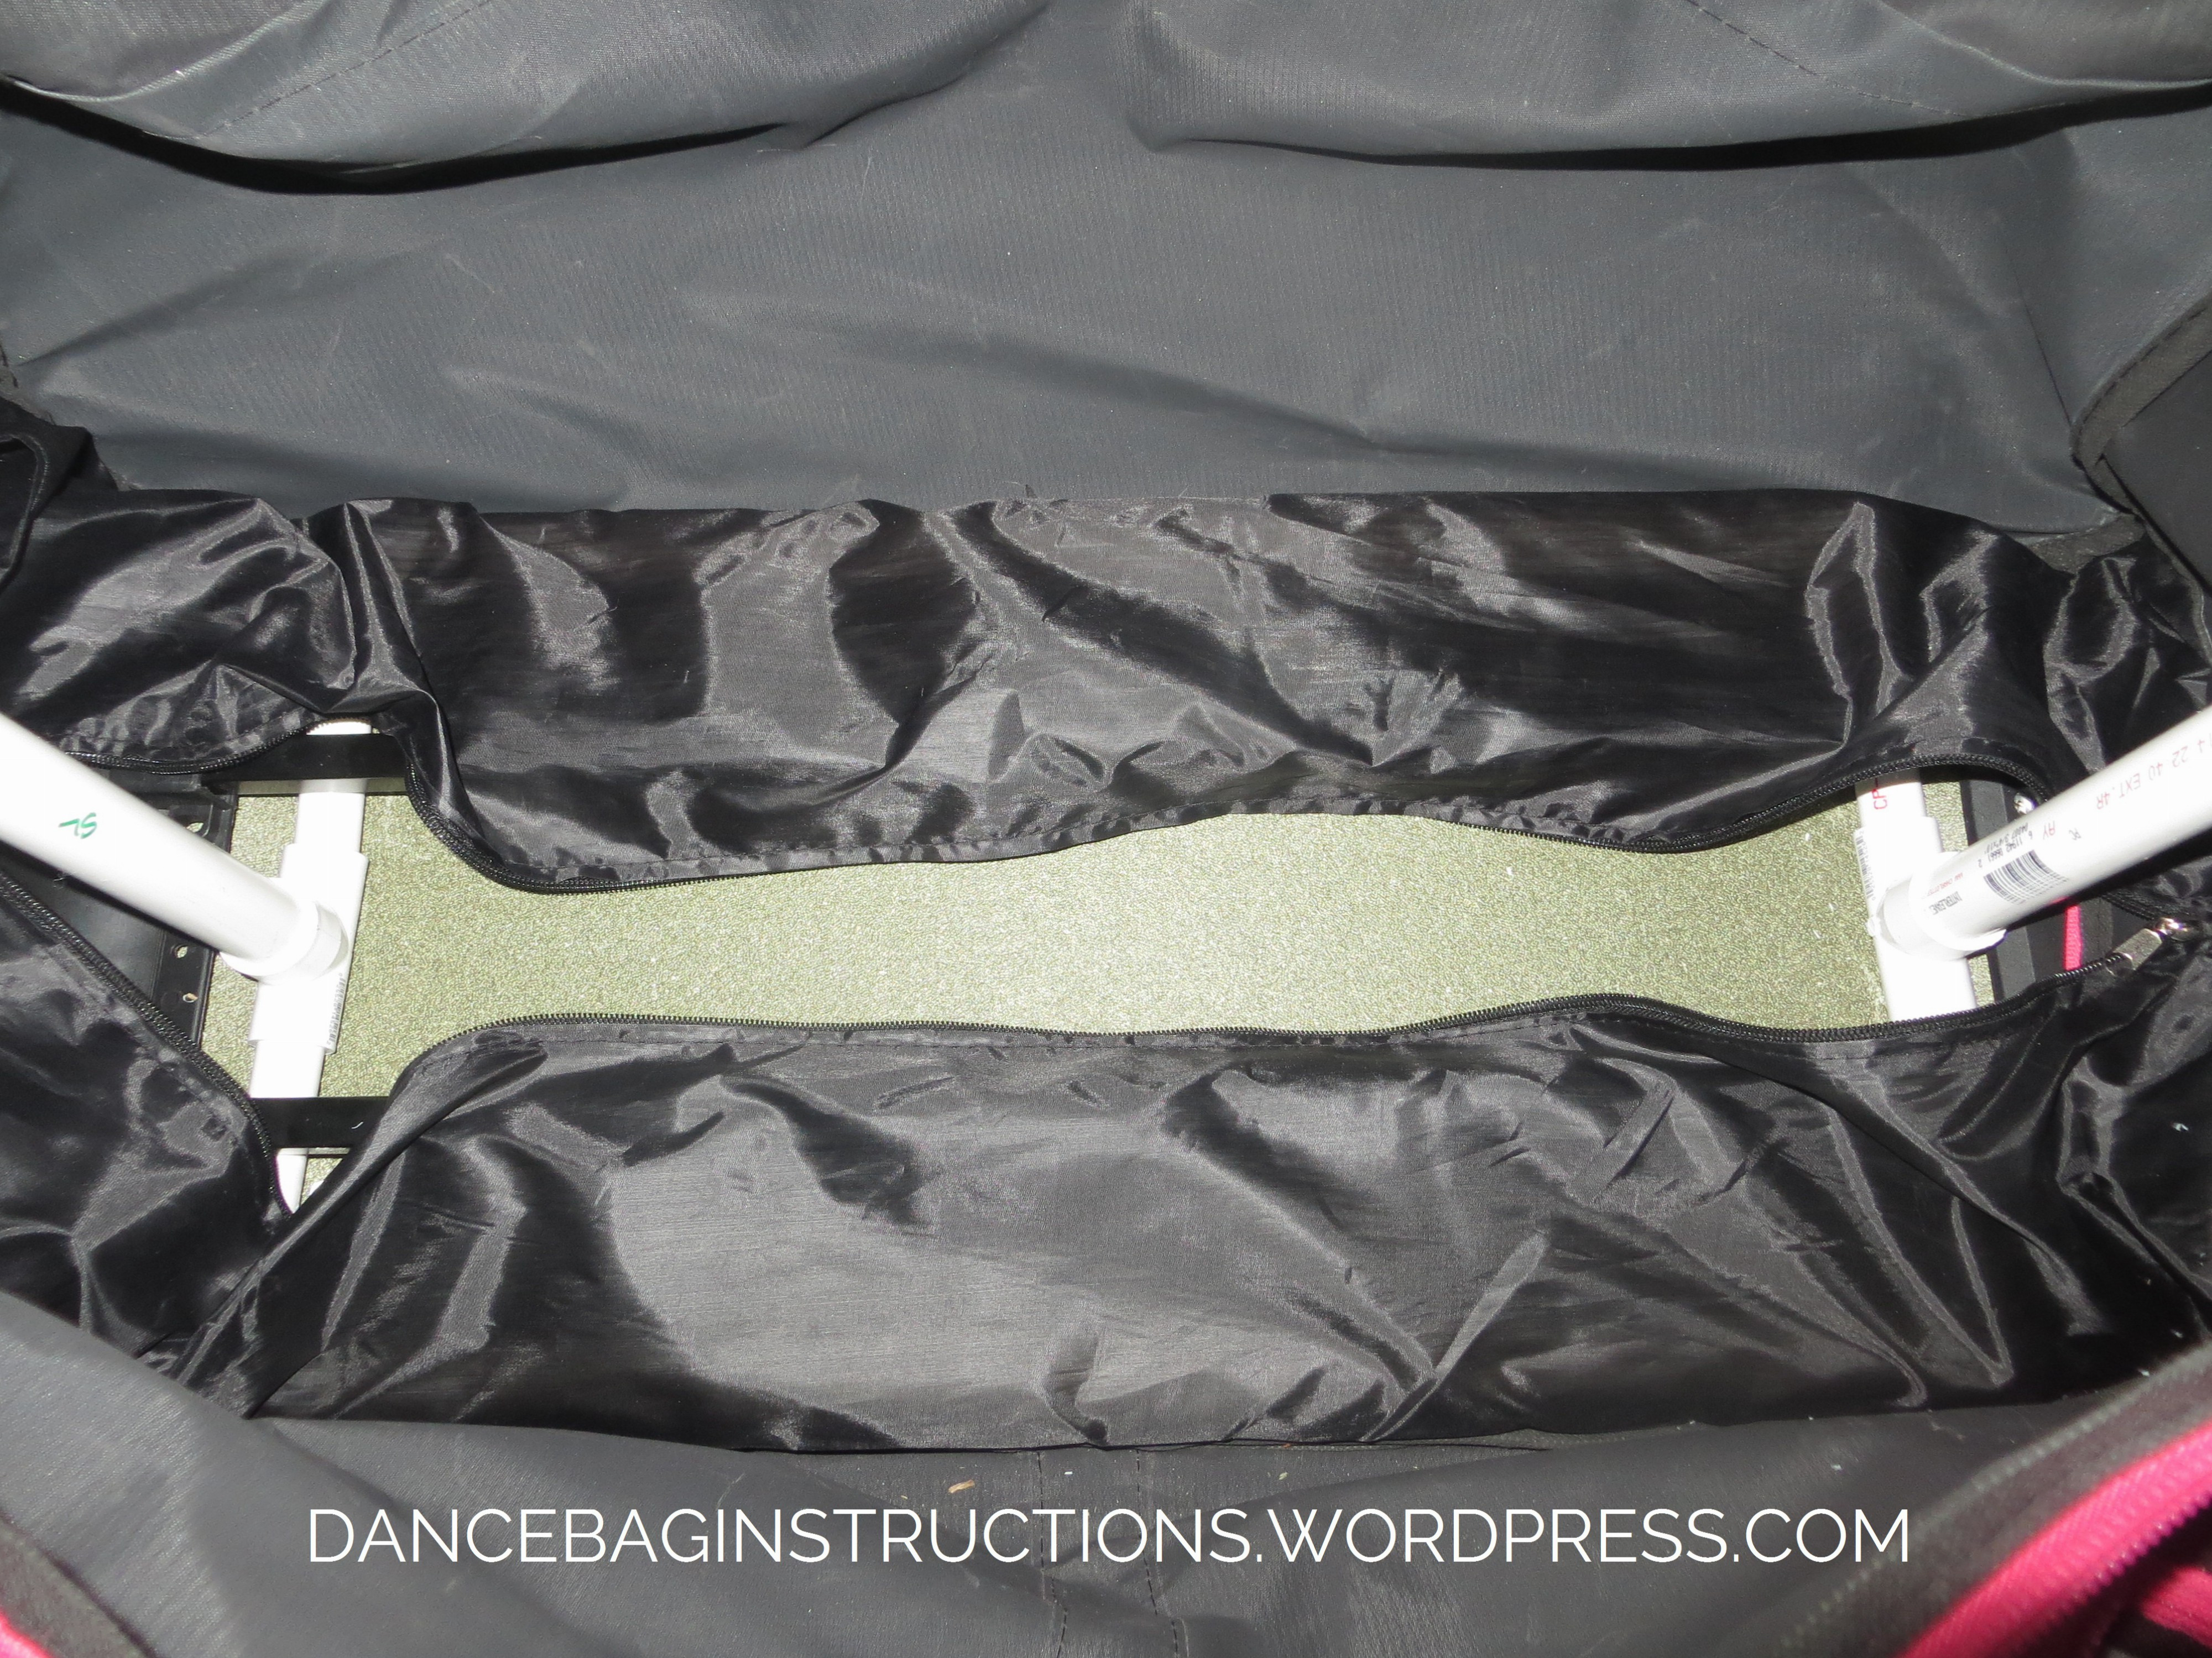
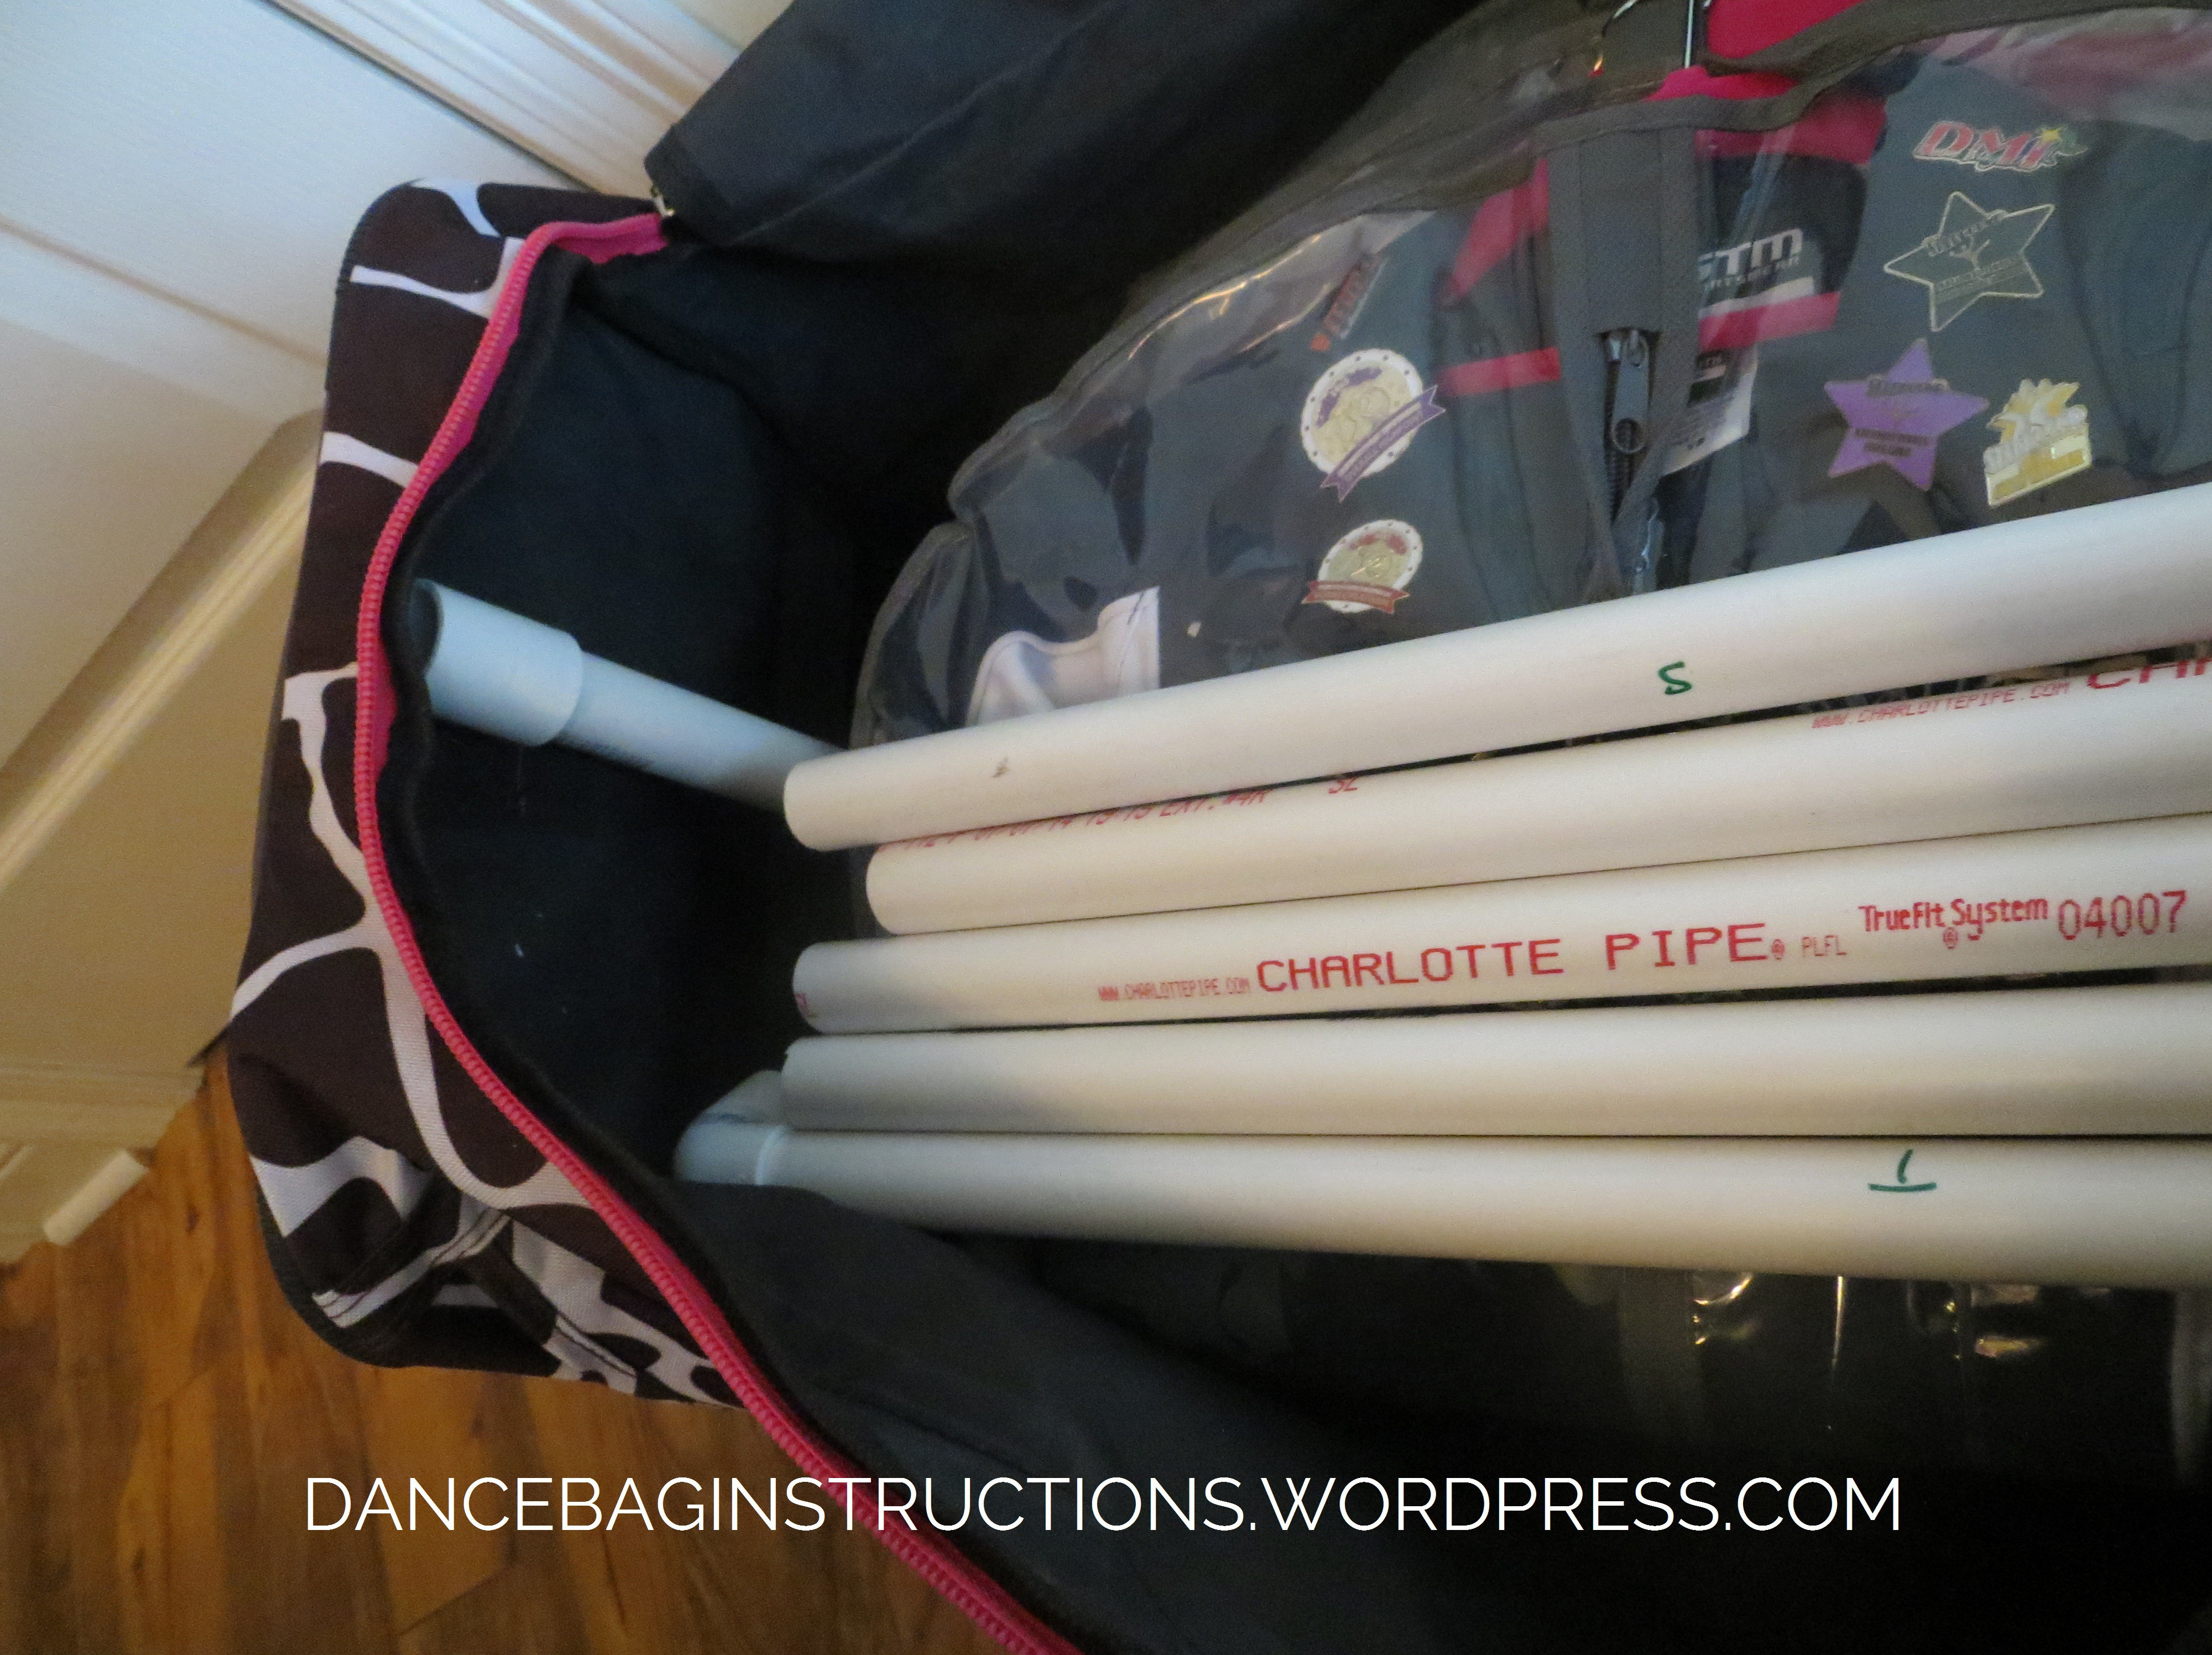
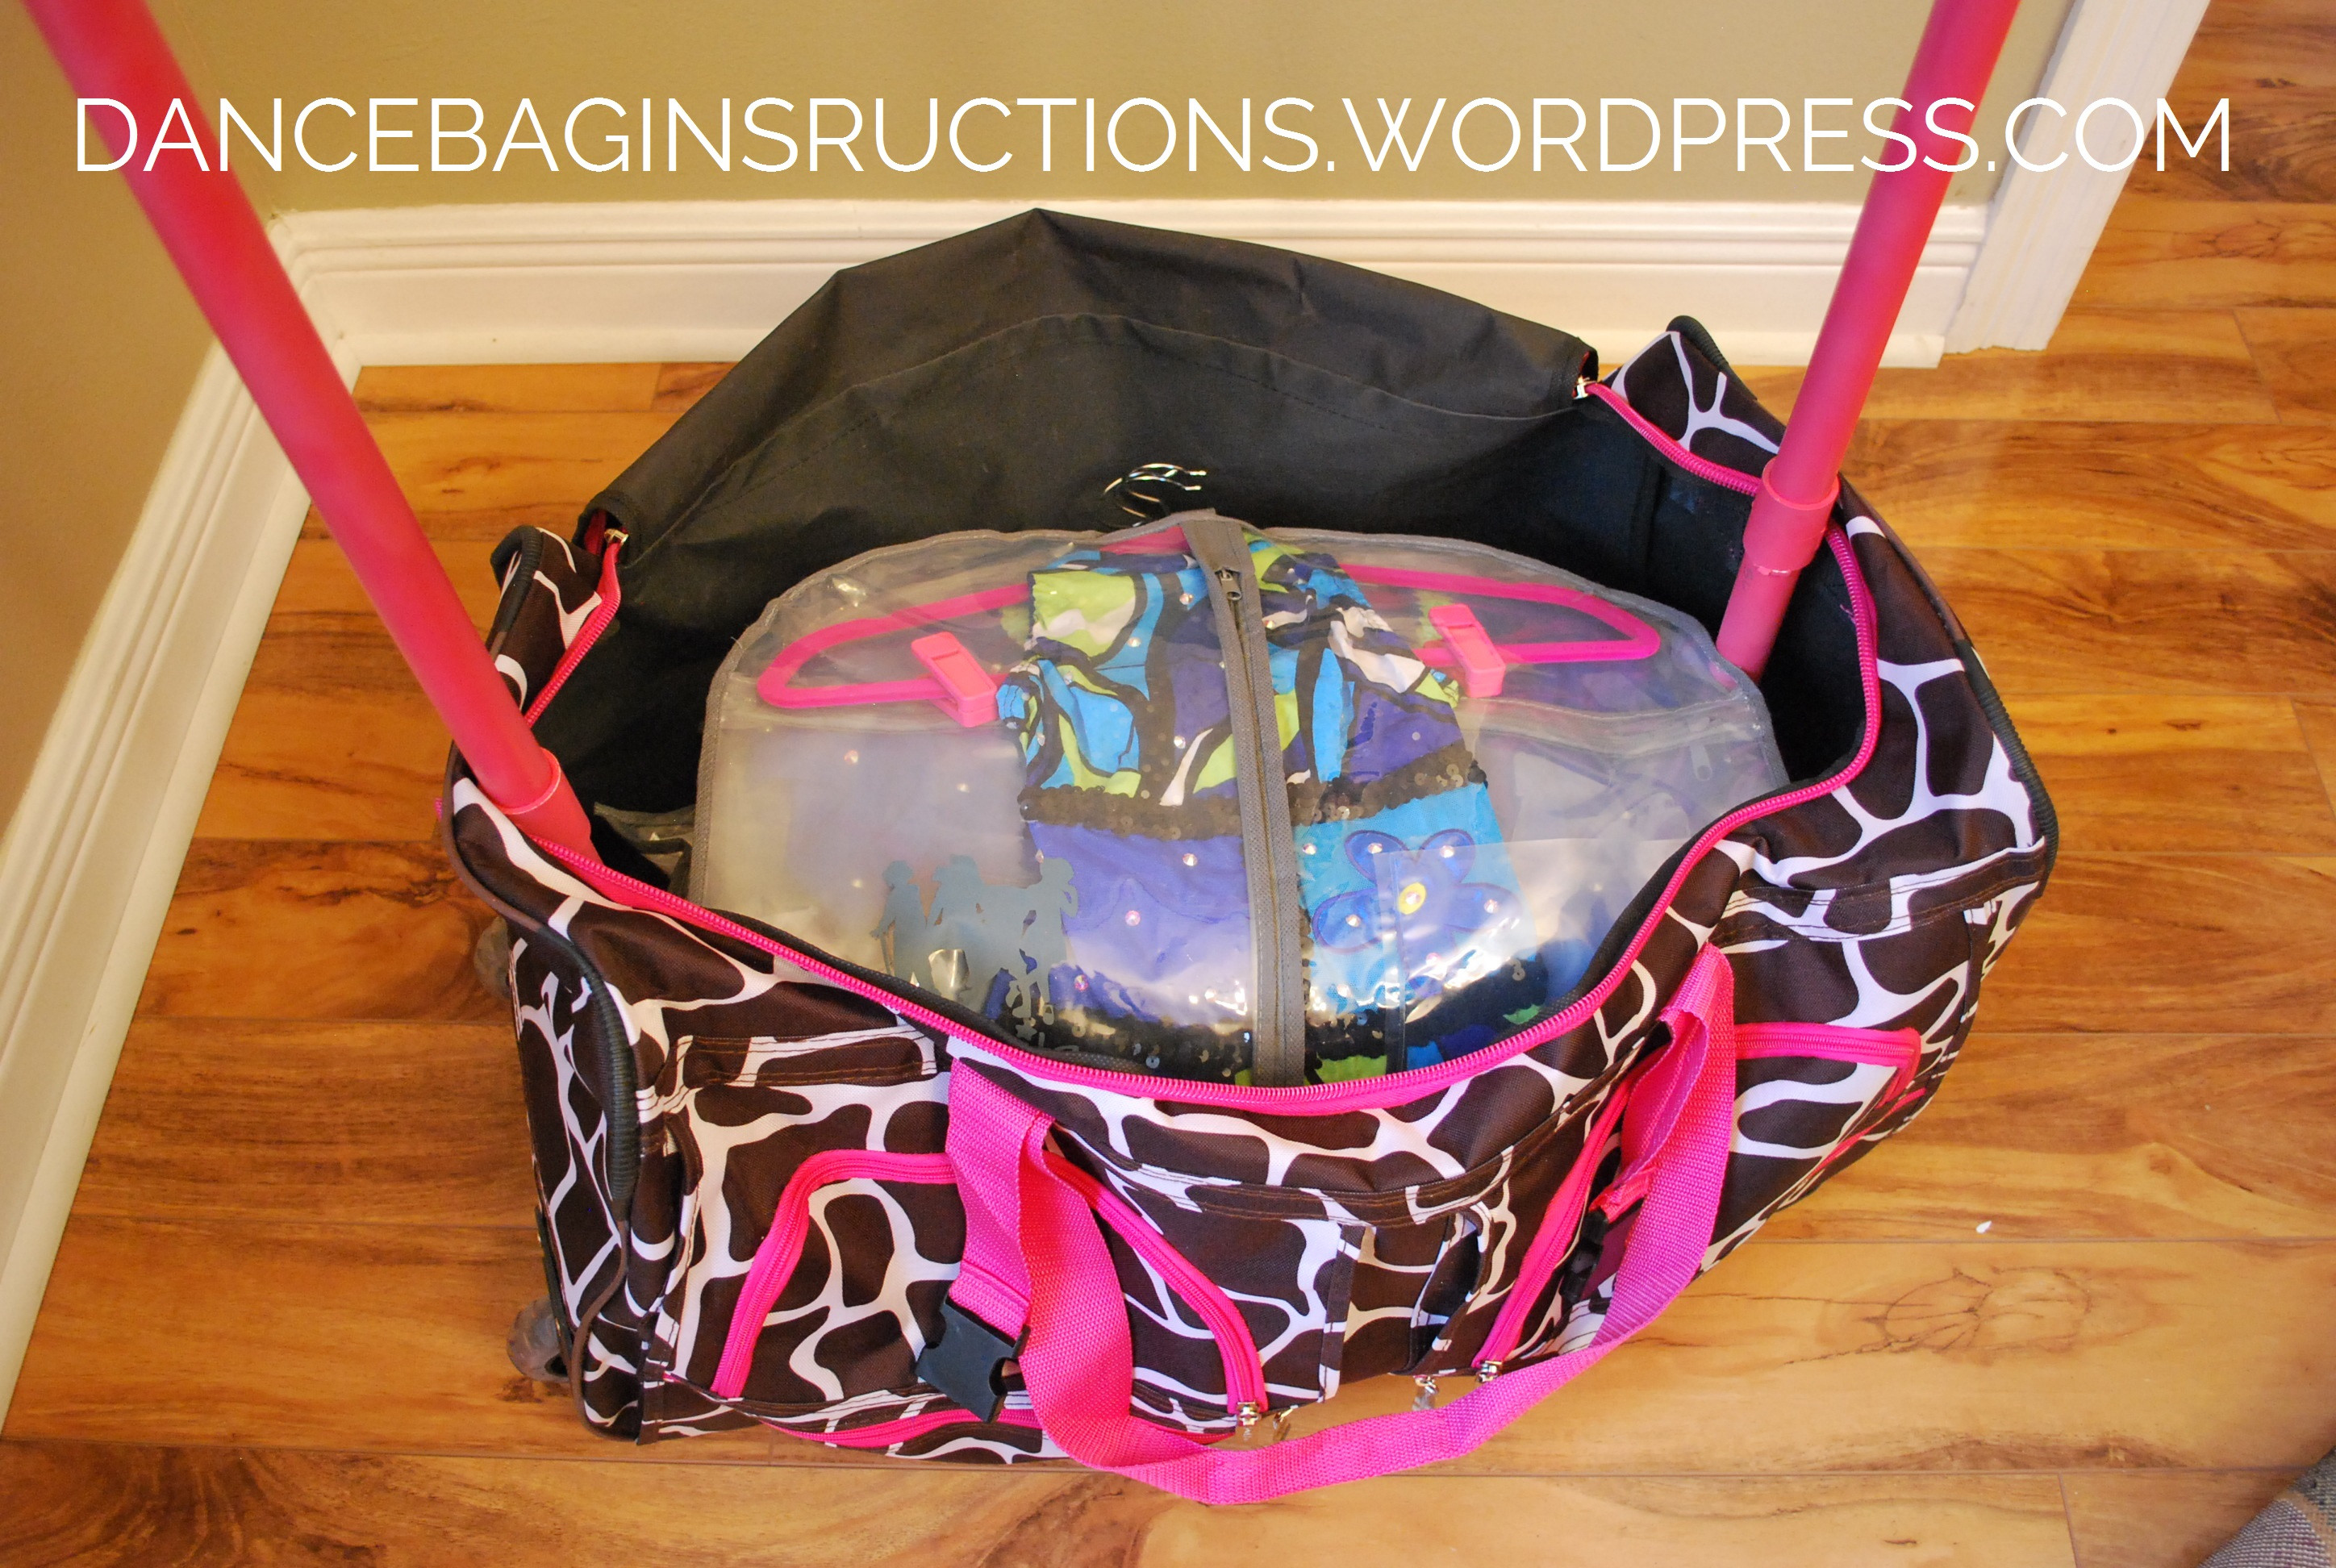
3. Fitting the Rack into the Duffel Bag
This step might require a bit of maneuvering. The goal is to fit the assembled PVC rack snugly into the base of the rolling duffel bag.
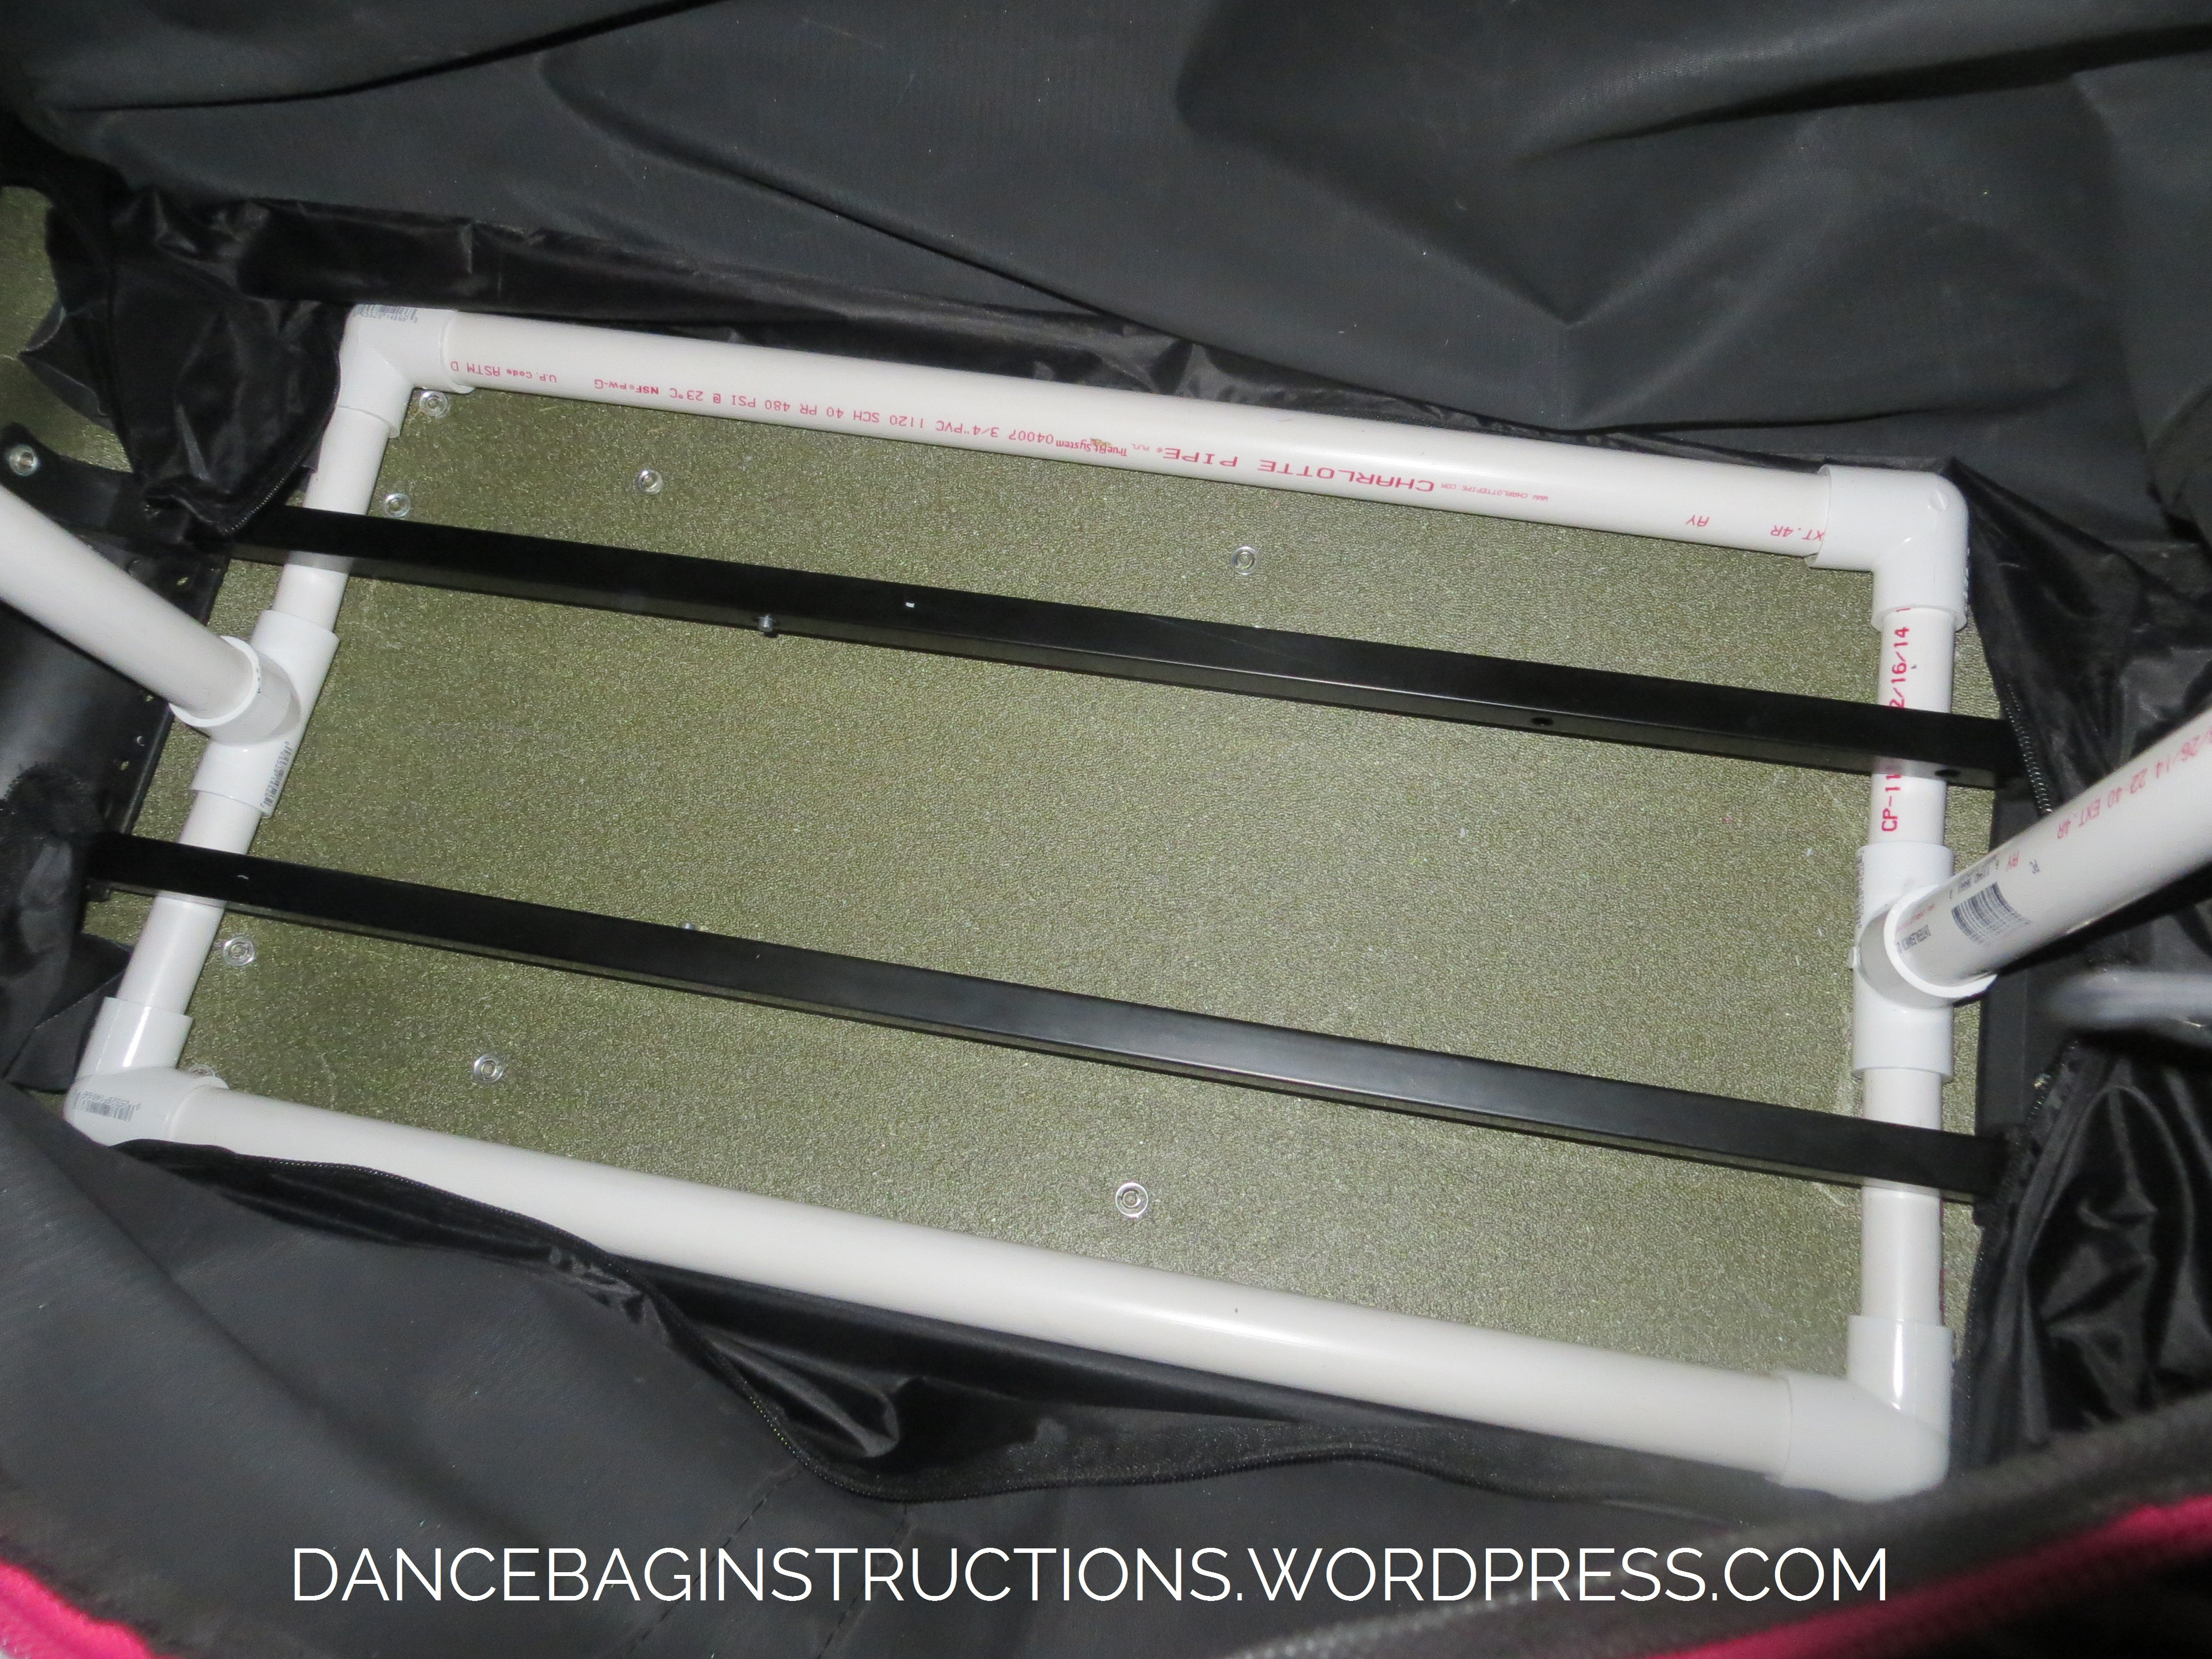
- Carefully insert the base of the rack into the duffel bag. It’s helpful to start with the corners and then gently push the rest of the structure into place.
- You may find that slightly shorter 21-inch base pieces could make insertion easier, depending on the give of your specific duffel bag model and the location of wheel housings. The aim is a snug, secure fit against the bag’s bottom and sides.
- The tight fit should naturally secure the rack, potentially eliminating the need for zip ties to the handle rails, as the pressure will hold it in place.
 base of dance duffel
Alt: Base of DIY rack and roll dance bag showing PVC pipe frame inside rolling duffel.
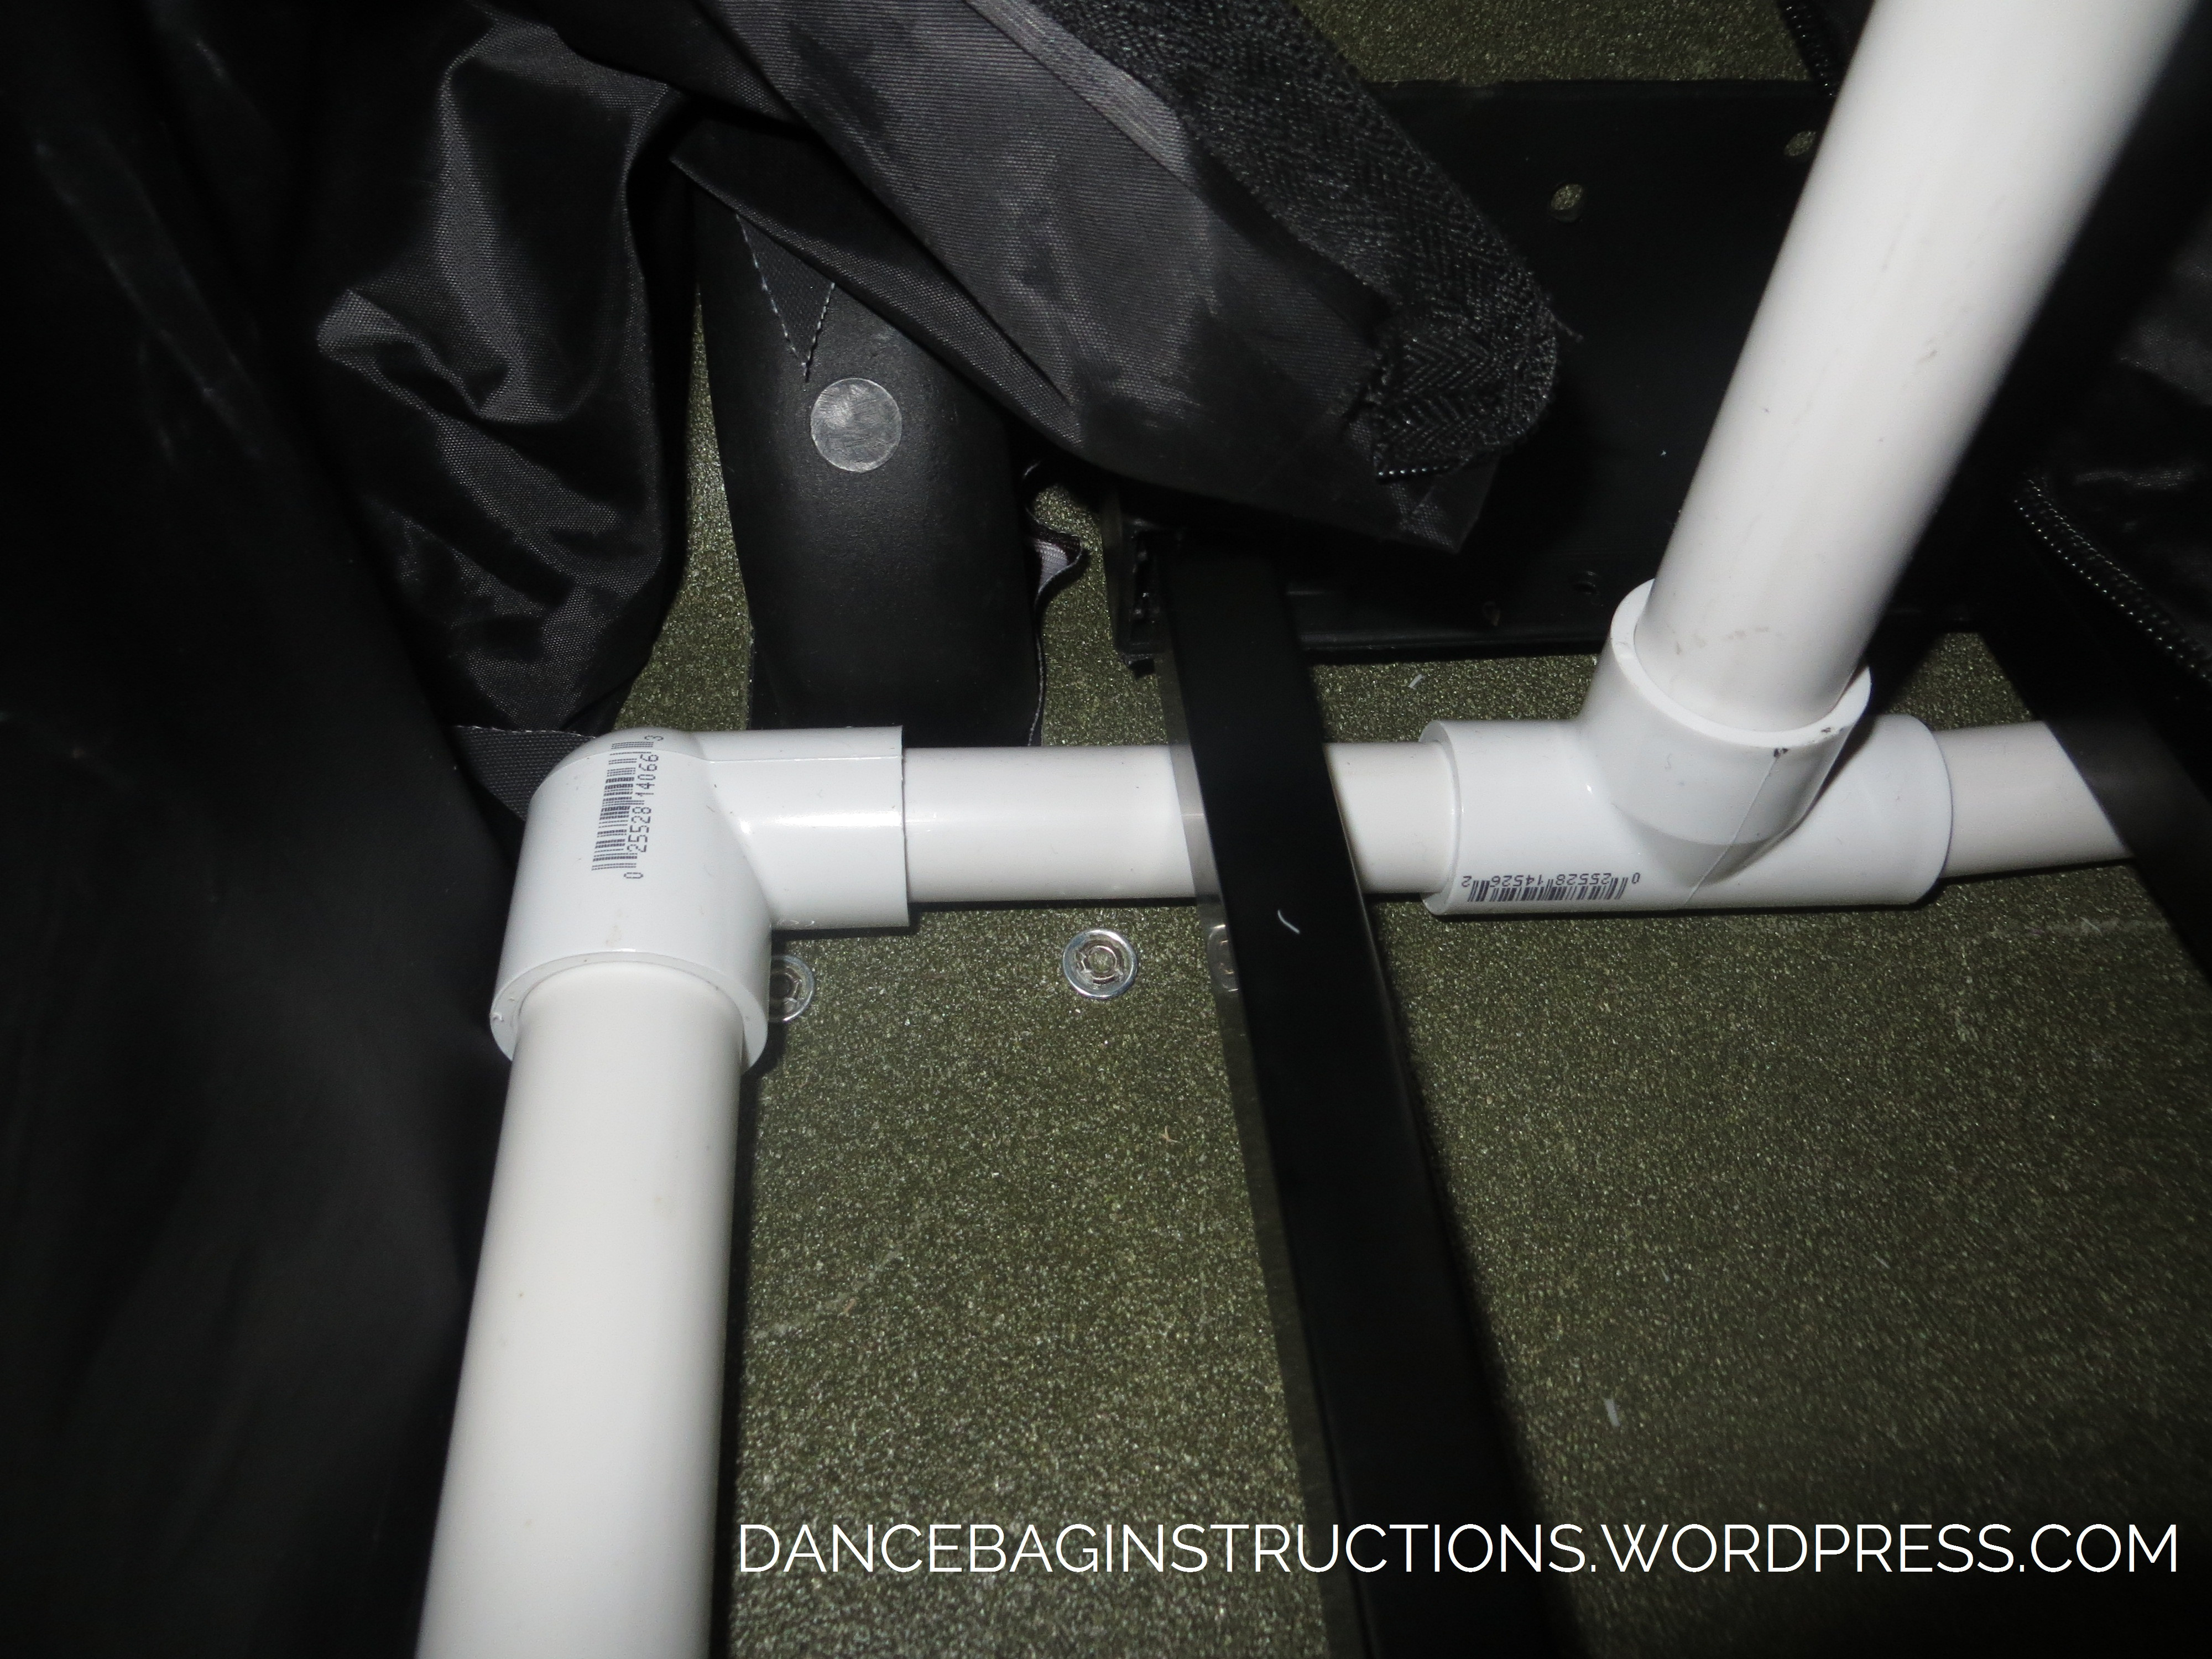 dance duffle base corner
Alt: Corner detail of homemade dance bag rack inside duffel, highlighting PVC pipe and bag corner.
 dance bag bottom
Alt: Bottom view of DIY dance duffel bag with internal PVC rack structure visible.
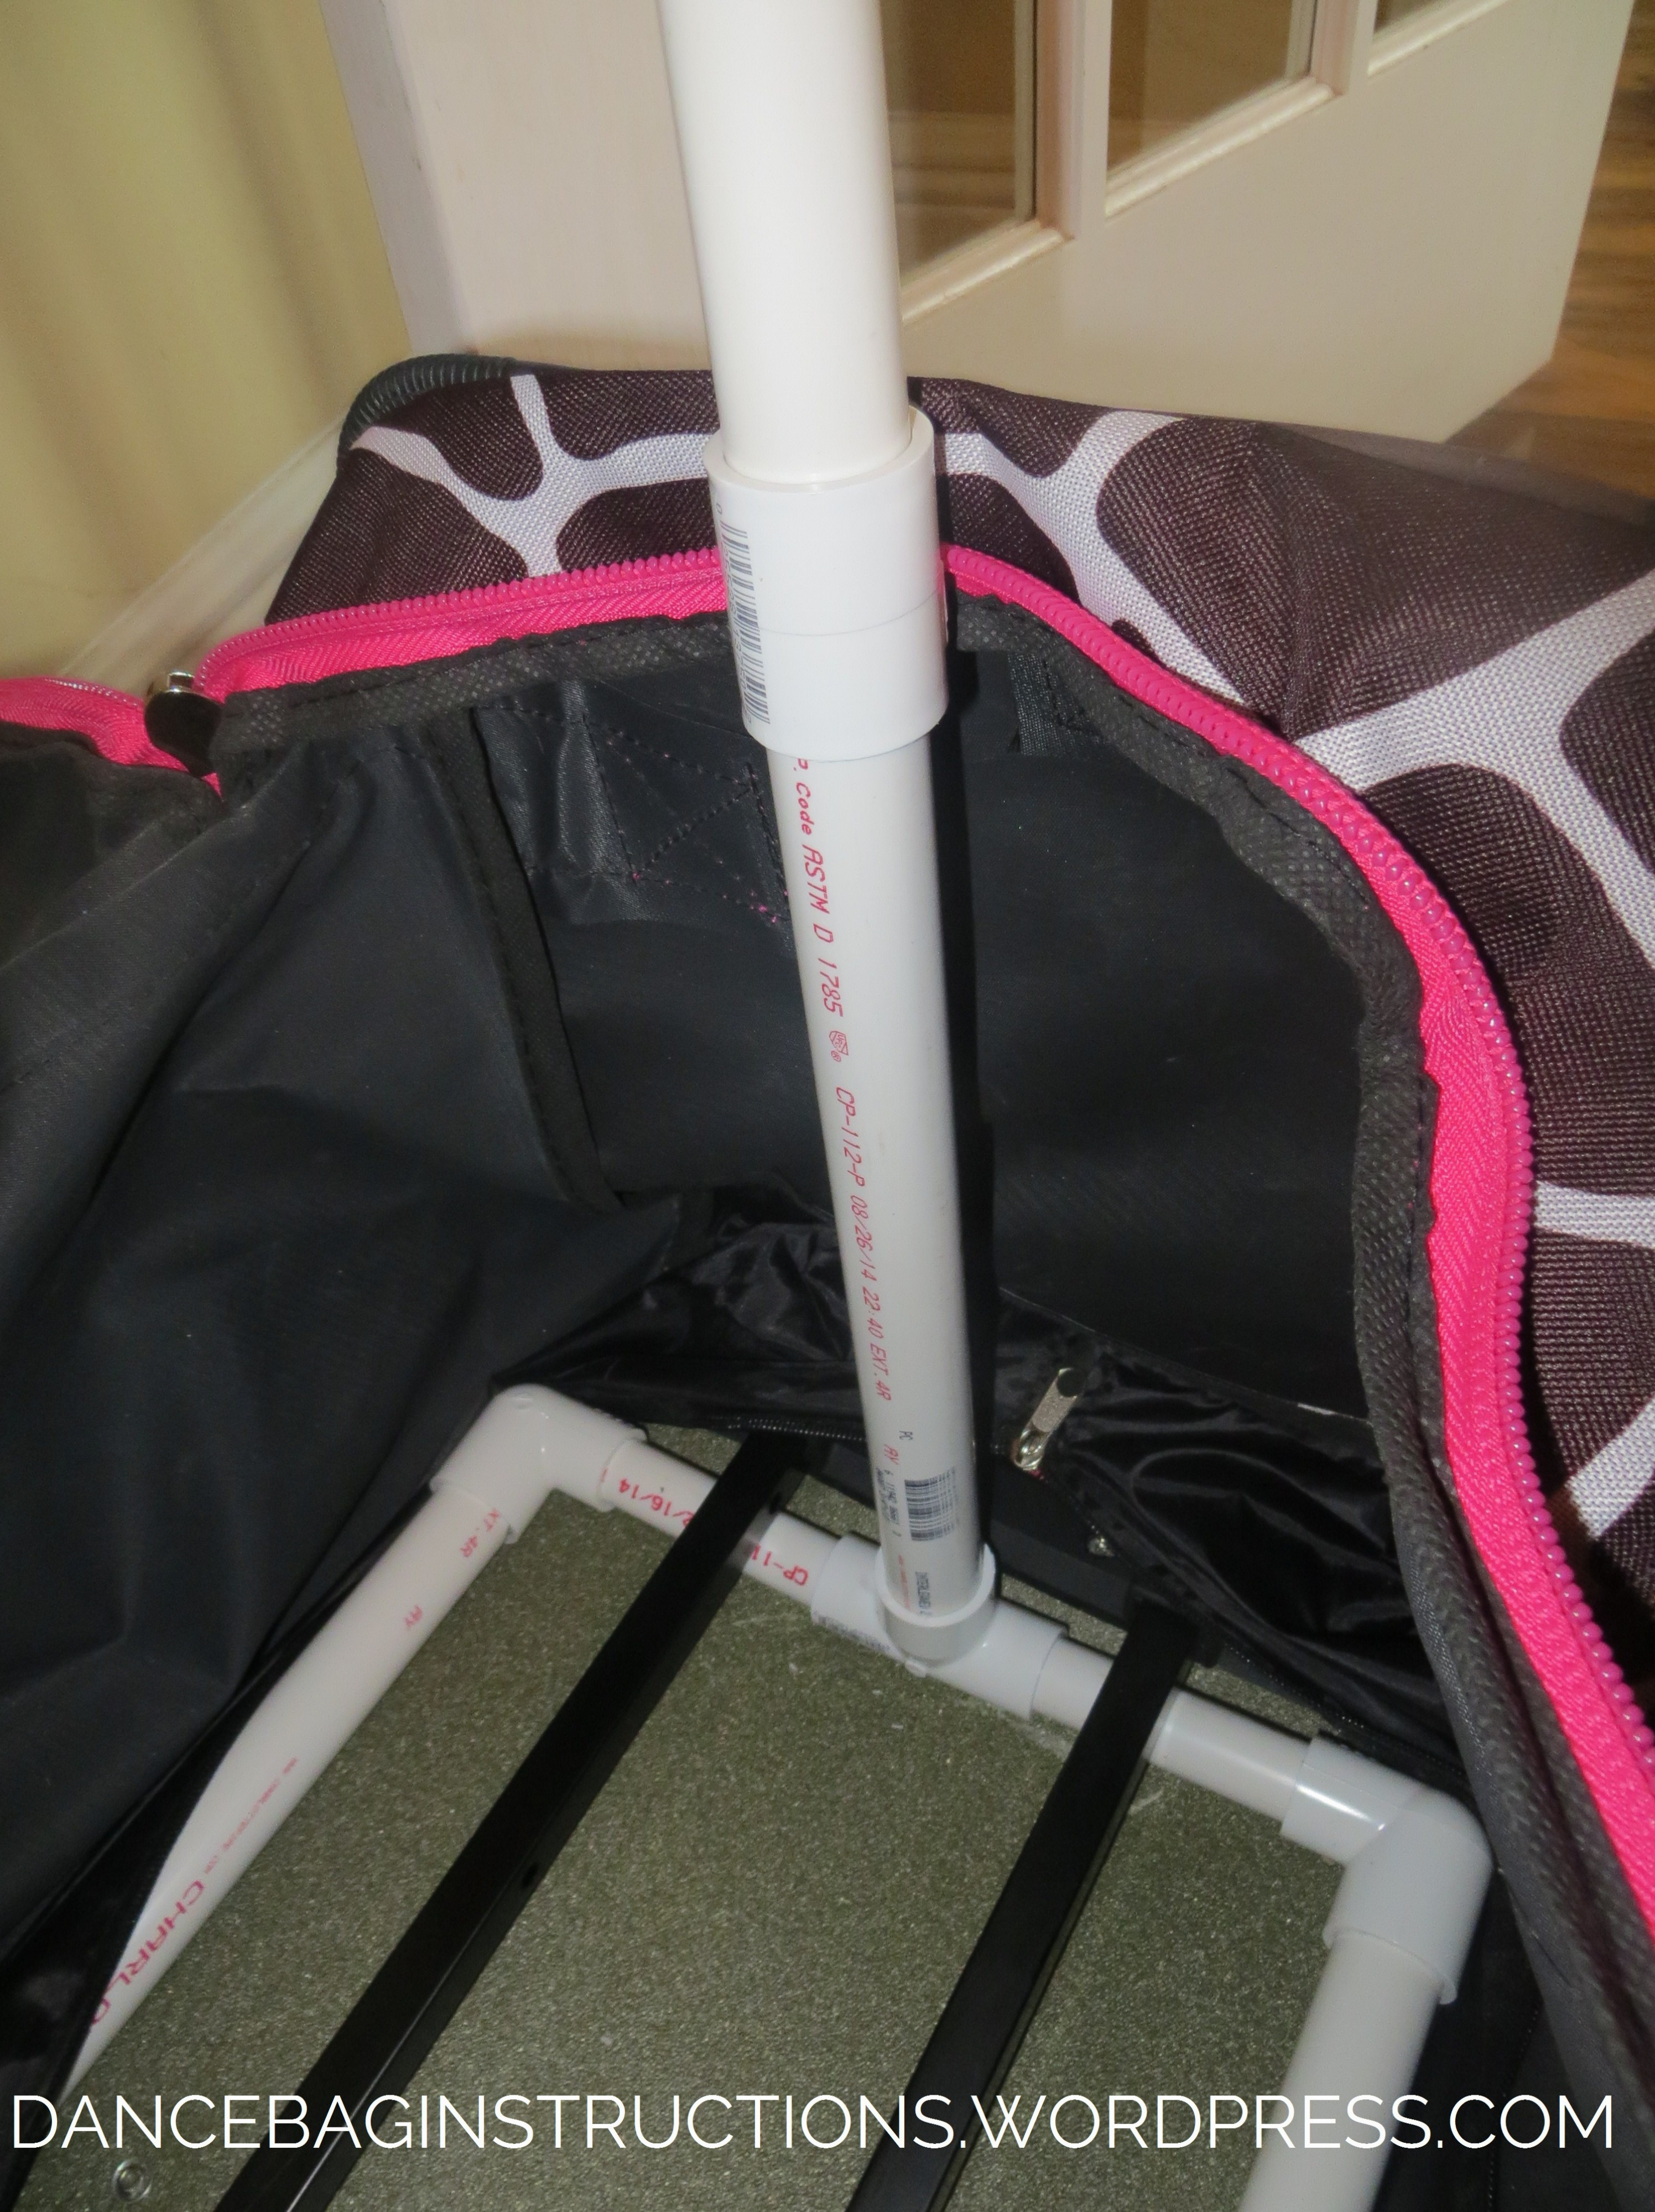
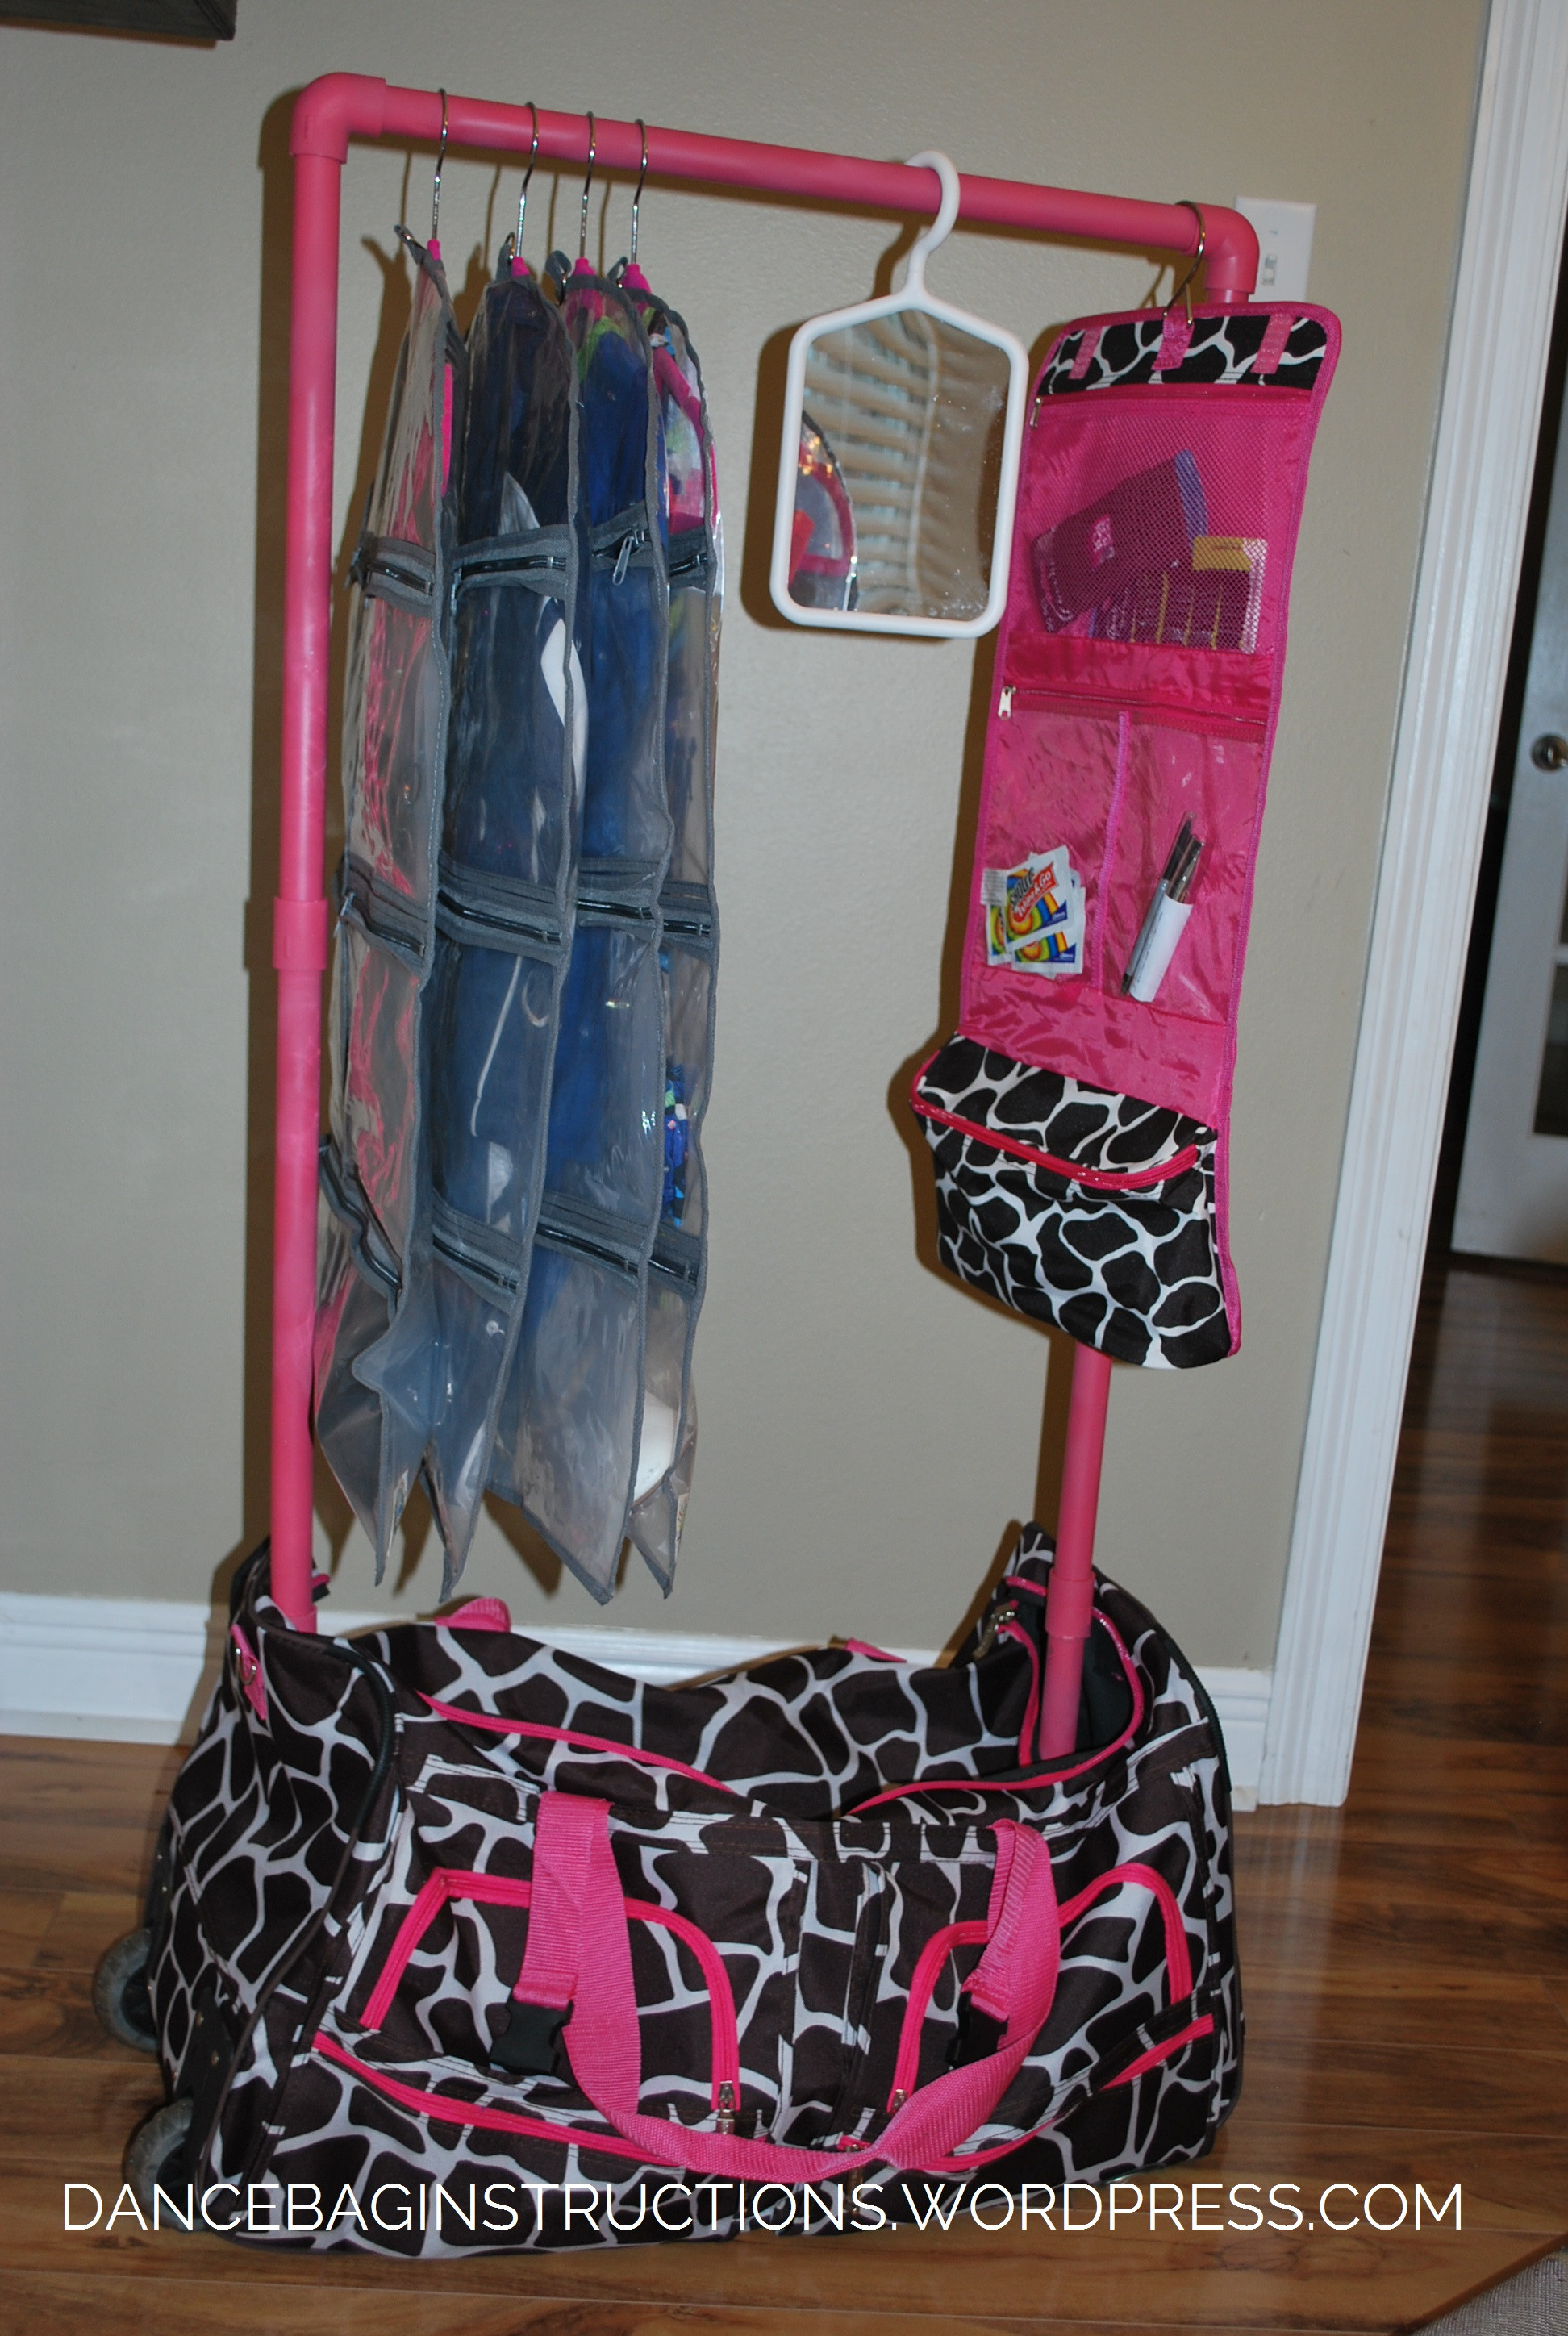
4. Adding the Vertical Extension and Top Support
The vertical PVC piece inside the bag is a unique addition that simplifies attaching poles and keeps connectors accessible, even when the bag is full of costumes.
- The 4-inch pieces of ½” PVC pipe act as connectors between the base rack and the upper horizontal support.
- This design allows you to keep the vertical piece connected, making it easier to assemble the top rack section even with costumes inside the bag, preventing connectors from being hidden or inaccessible.
 dance bag pvc
Alt: Internal PVC extension piece in DIY rack and roll dance bag, showing vertical support.
 dance duffel poles in bag
Alt: DIY dance bag in use, demonstrating garment rack function with costumes hanging inside duffel.
5. Painting and Customization (Optional)
Personalize your rack and roll dance bag by painting the PVC rack.
- If desired, spray paint the PVC rack in your chosen color after assembly but before inserting it into the duffel bag. Ensure you use paint suitable for plastic or prime the PVC for better paint adhesion.
- Consider Krylon Covermaxx paint for general use, or Krylon Fusion for Plastic for enhanced durability on plastic surfaces.
- Be aware that paint may chip with use, especially at connection points. Options to improve durability include sanding the PVC before painting, applying a sealant after painting, or using duct tape to cover the pipes for a more robust finish.
 homemadedanceduffel
Alt: Finished homemade rack and roll dance duffel bag in watermelon pink color.
 dancebackwithrack
Alt: Rear view of DIY dance bag with rack extended, showing garment rack functionality.
 dancebagwithcostumerack
Alt: DIY rack and roll dance bag with costumes hanging on garment rack, ready for transport.
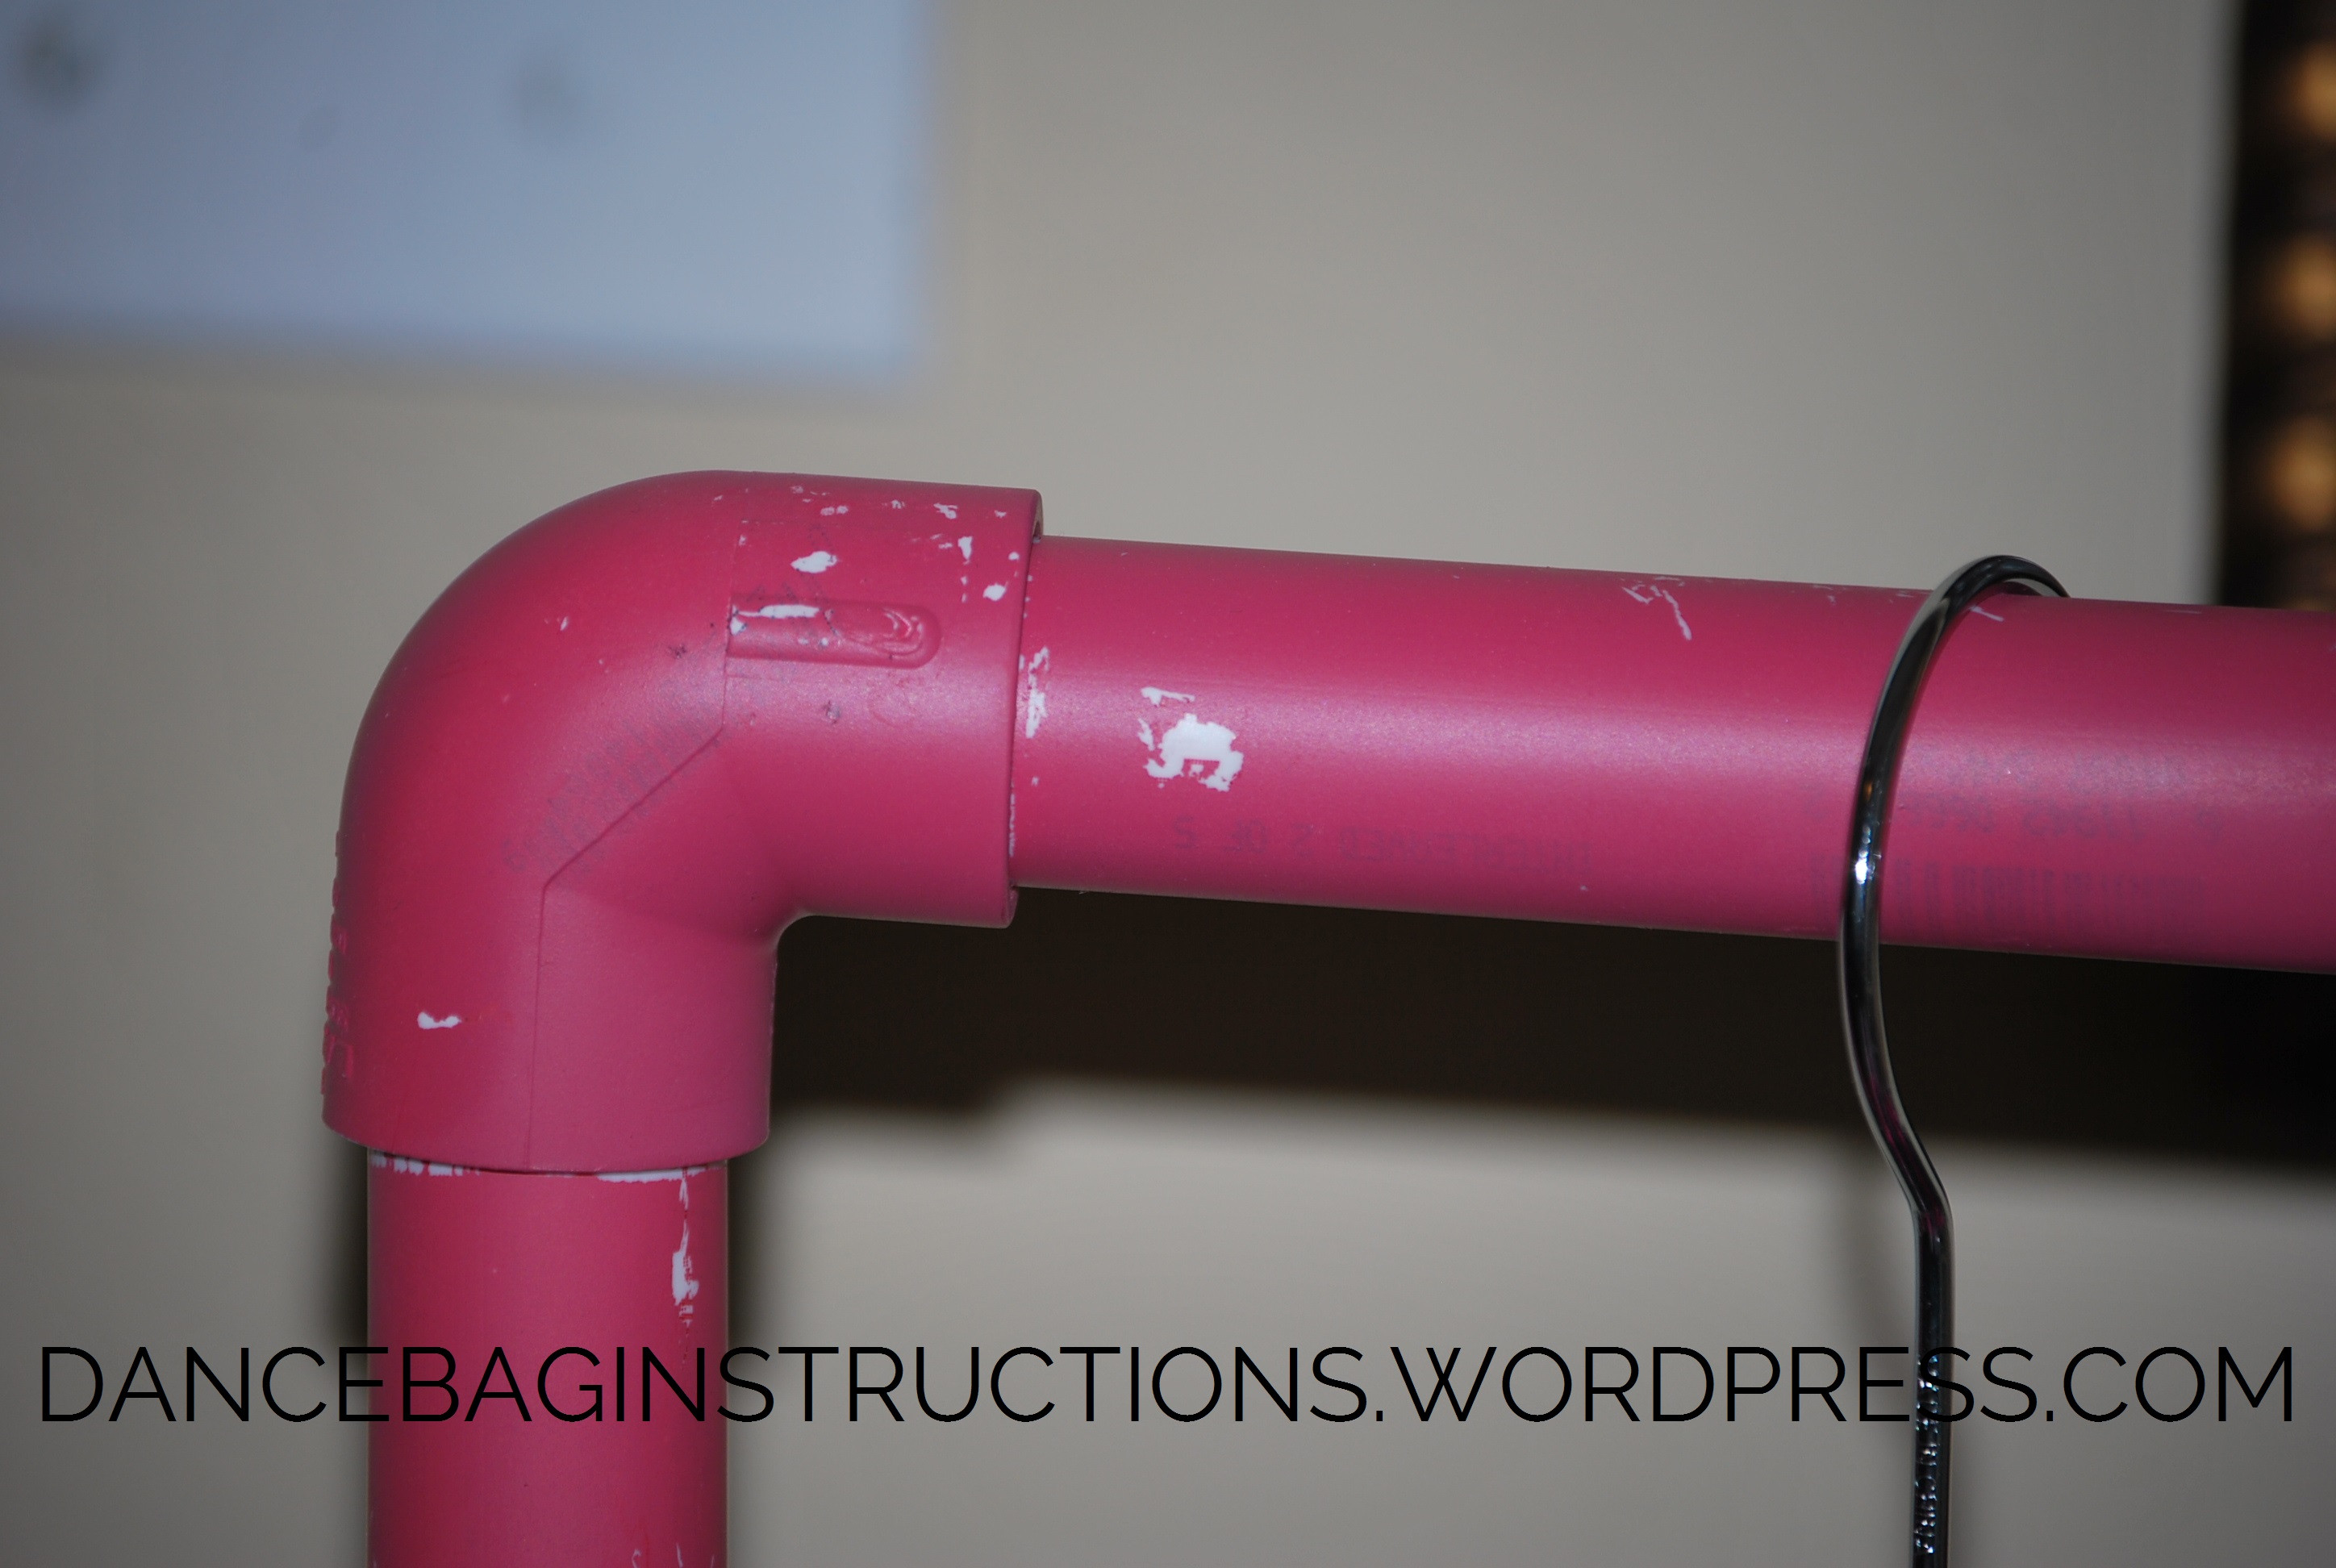 kryloncovermaxxonpvc
Alt: Close-up of Krylon Covermaxx paint on PVC pipe, showing paint application on DIY dance bag rack.
Conclusion: Your DIY Rack and Roll Dance Bag is Ready
By following these steps, you can create your own functional and affordable rack and roll dance bag. This DIY project offers a practical alternative to expensive commercial options, allowing you to transport your dance costumes and accessories with ease and style. While some minor adjustments might be needed based on your chosen duffel bag, the core design provides a solid foundation for a customized dance bag solution.