
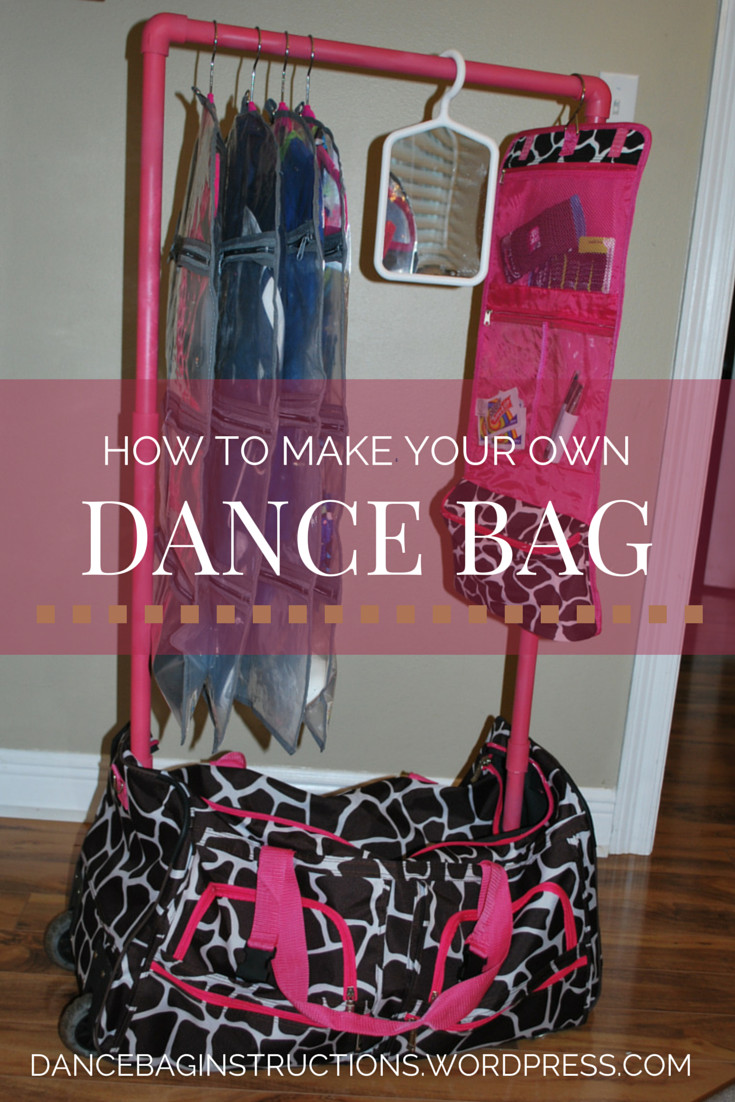
Dream Duffel Dance Bags are the gold standard for dancers needing to transport costumes and gear in style and with organization. However, the price tag can be a significant hurdle for many. If you’ve been eyeing a Dream Duffel but are looking for a more budget-friendly alternative, this DIY guide is for you. We’ll show you how to create your own rolling dance bag with a garment rack, achieving similar functionality at a fraction of the cost.
After exploring various dance bag options, I decided to take the DIY route. Initially considering both 26″ and 30″ duffel bags, I opted for the 30″ model. While it turned out to be quite spacious – even with all my dance essentials, there’s still ample room – the extra space is appreciated, especially for neatly folding garment bags.
The total cost for this DIY project came to around $48: $13 for PVC pipes and connectors, $32 for the duffel bag itself, and $3 for spray paint. Comparing this to the price of a brand-name Dream Duffel dance bag, the savings are substantial. The assembly time was minimal, approximately 15 minutes, excluding paint drying time.
To build your own dream duffel alternative, you’ll need the following materials:
Materials List:
- PVC Pipes:
- 2 x 10-foot pieces of 3/4″ PVC pipe
- 1 x 5-foot piece of 1/2″ PVC pipe
- PVC Connectors:
- 4 x 1/2″ to 3/4″ “L” fittings
- 2 x 3/4″ “L” fittings
- 2 x 1/2″ to 3/4″ “T” fittings
- 4 x 3/4″ straight connectors
- Rolling Duffel Bag: A 30″ rolling duffel bag (like the Rockland Luggage Rolling Duffel Bag)
- Spray Paint (Optional): Krylon Covermaxx in your desired color (originally Watermelon was used)
Tools:
- Measuring tape
- PVC pipe cutter or saw
- Optional: Table saw (for precise cuts)
Step-by-Step Instructions:
-
Cut the PVC Pipes: Using the measurements below, cut your PVC pipes. A pipe cutter provides clean cuts, but a table saw can also be used. Important tip: After each cut, blow into the pipe to remove plastic shavings.
- 3/4″ PVC Pipe:
- Top & Base Pieces: 3 pieces at 21″ each
- Side Pieces: 4 pieces at 18″ each
- Inner Bag Side Pieces: 2 pieces at 12″ each
- 1/2″ PVC Pipe:
- Vertical Pieces: 4 pieces at 4″ each
- 3/4″ PVC Pipe:
-
Assemble the Base Rack: Connect two of the 21″ pieces with two 3/4″ straight connectors. Attach 18″ side pieces to each end using 3/4″ “L” fittings. This forms the rectangular base of your rack.
-
Create Vertical Supports: Attach the 4″ pieces of 1/2″ PVC pipe to the open ends of the 18″ side pieces using the 1/2″ to 3/4″ “L” fittings. These will act as the vertical supports inside your bag.
-
Construct the Top Bar: Connect the remaining 21″ piece to the top of the vertical supports using the 1/2″ to 3/4″ “T” fittings. Use the 12″ pieces of 3/4″ PVC and 3/4″ straight connectors to extend the sides of the top bar slightly inwards. These inner pieces help stabilize the rack within the bag.
-
Insert the Rack into the Duffel Bag: This step might require some maneuvering. The goal is to fit the assembled PVC rack inside the base of the duffel bag. Start by angling the rack and carefully pushing it into the bag. It might be a snug fit, but once in place, it should be secure. Slightly shorter 21″ base pieces might make this step easier depending on your bag.
 PVC rack for DIY dance duffel bag
 -
Secure and Adjust: Once the rack is inside, position it so that the base rests firmly at the bottom of the duffel. The snug fit should hold it in place without needing zip ties, pressing against the wheel housings for extra stability.
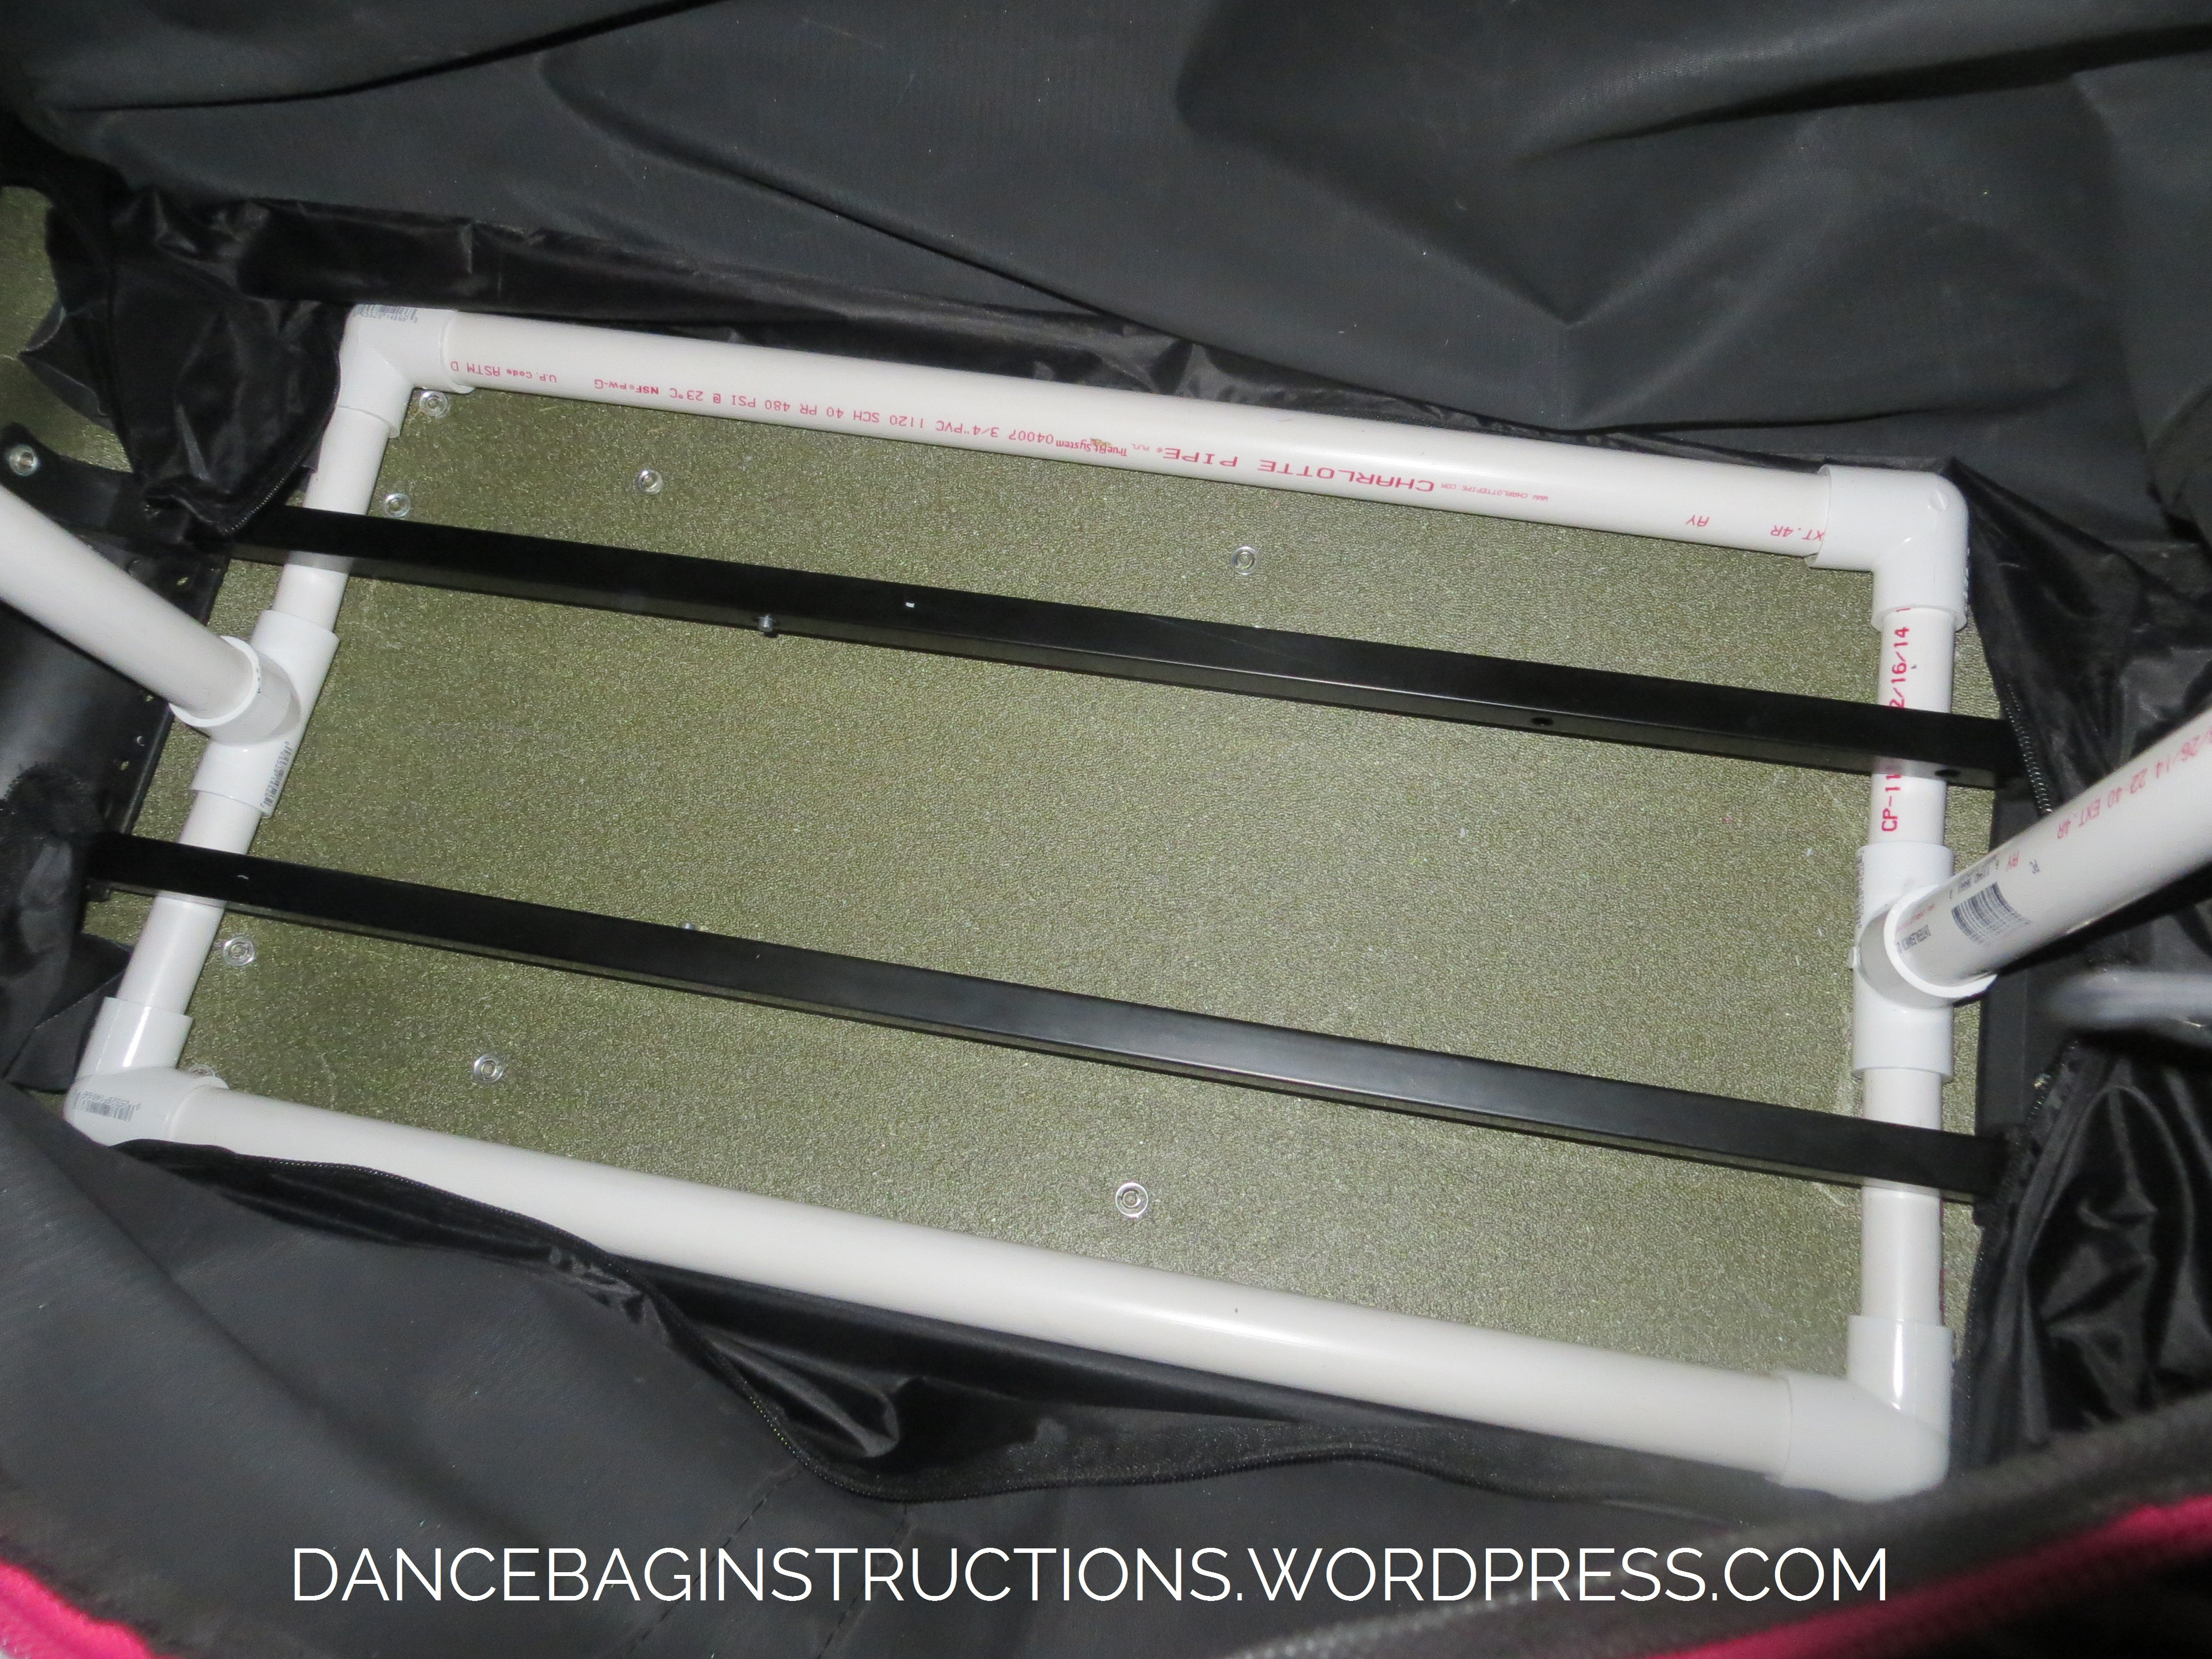 Base of DIY dance duffel bag with PVC rack
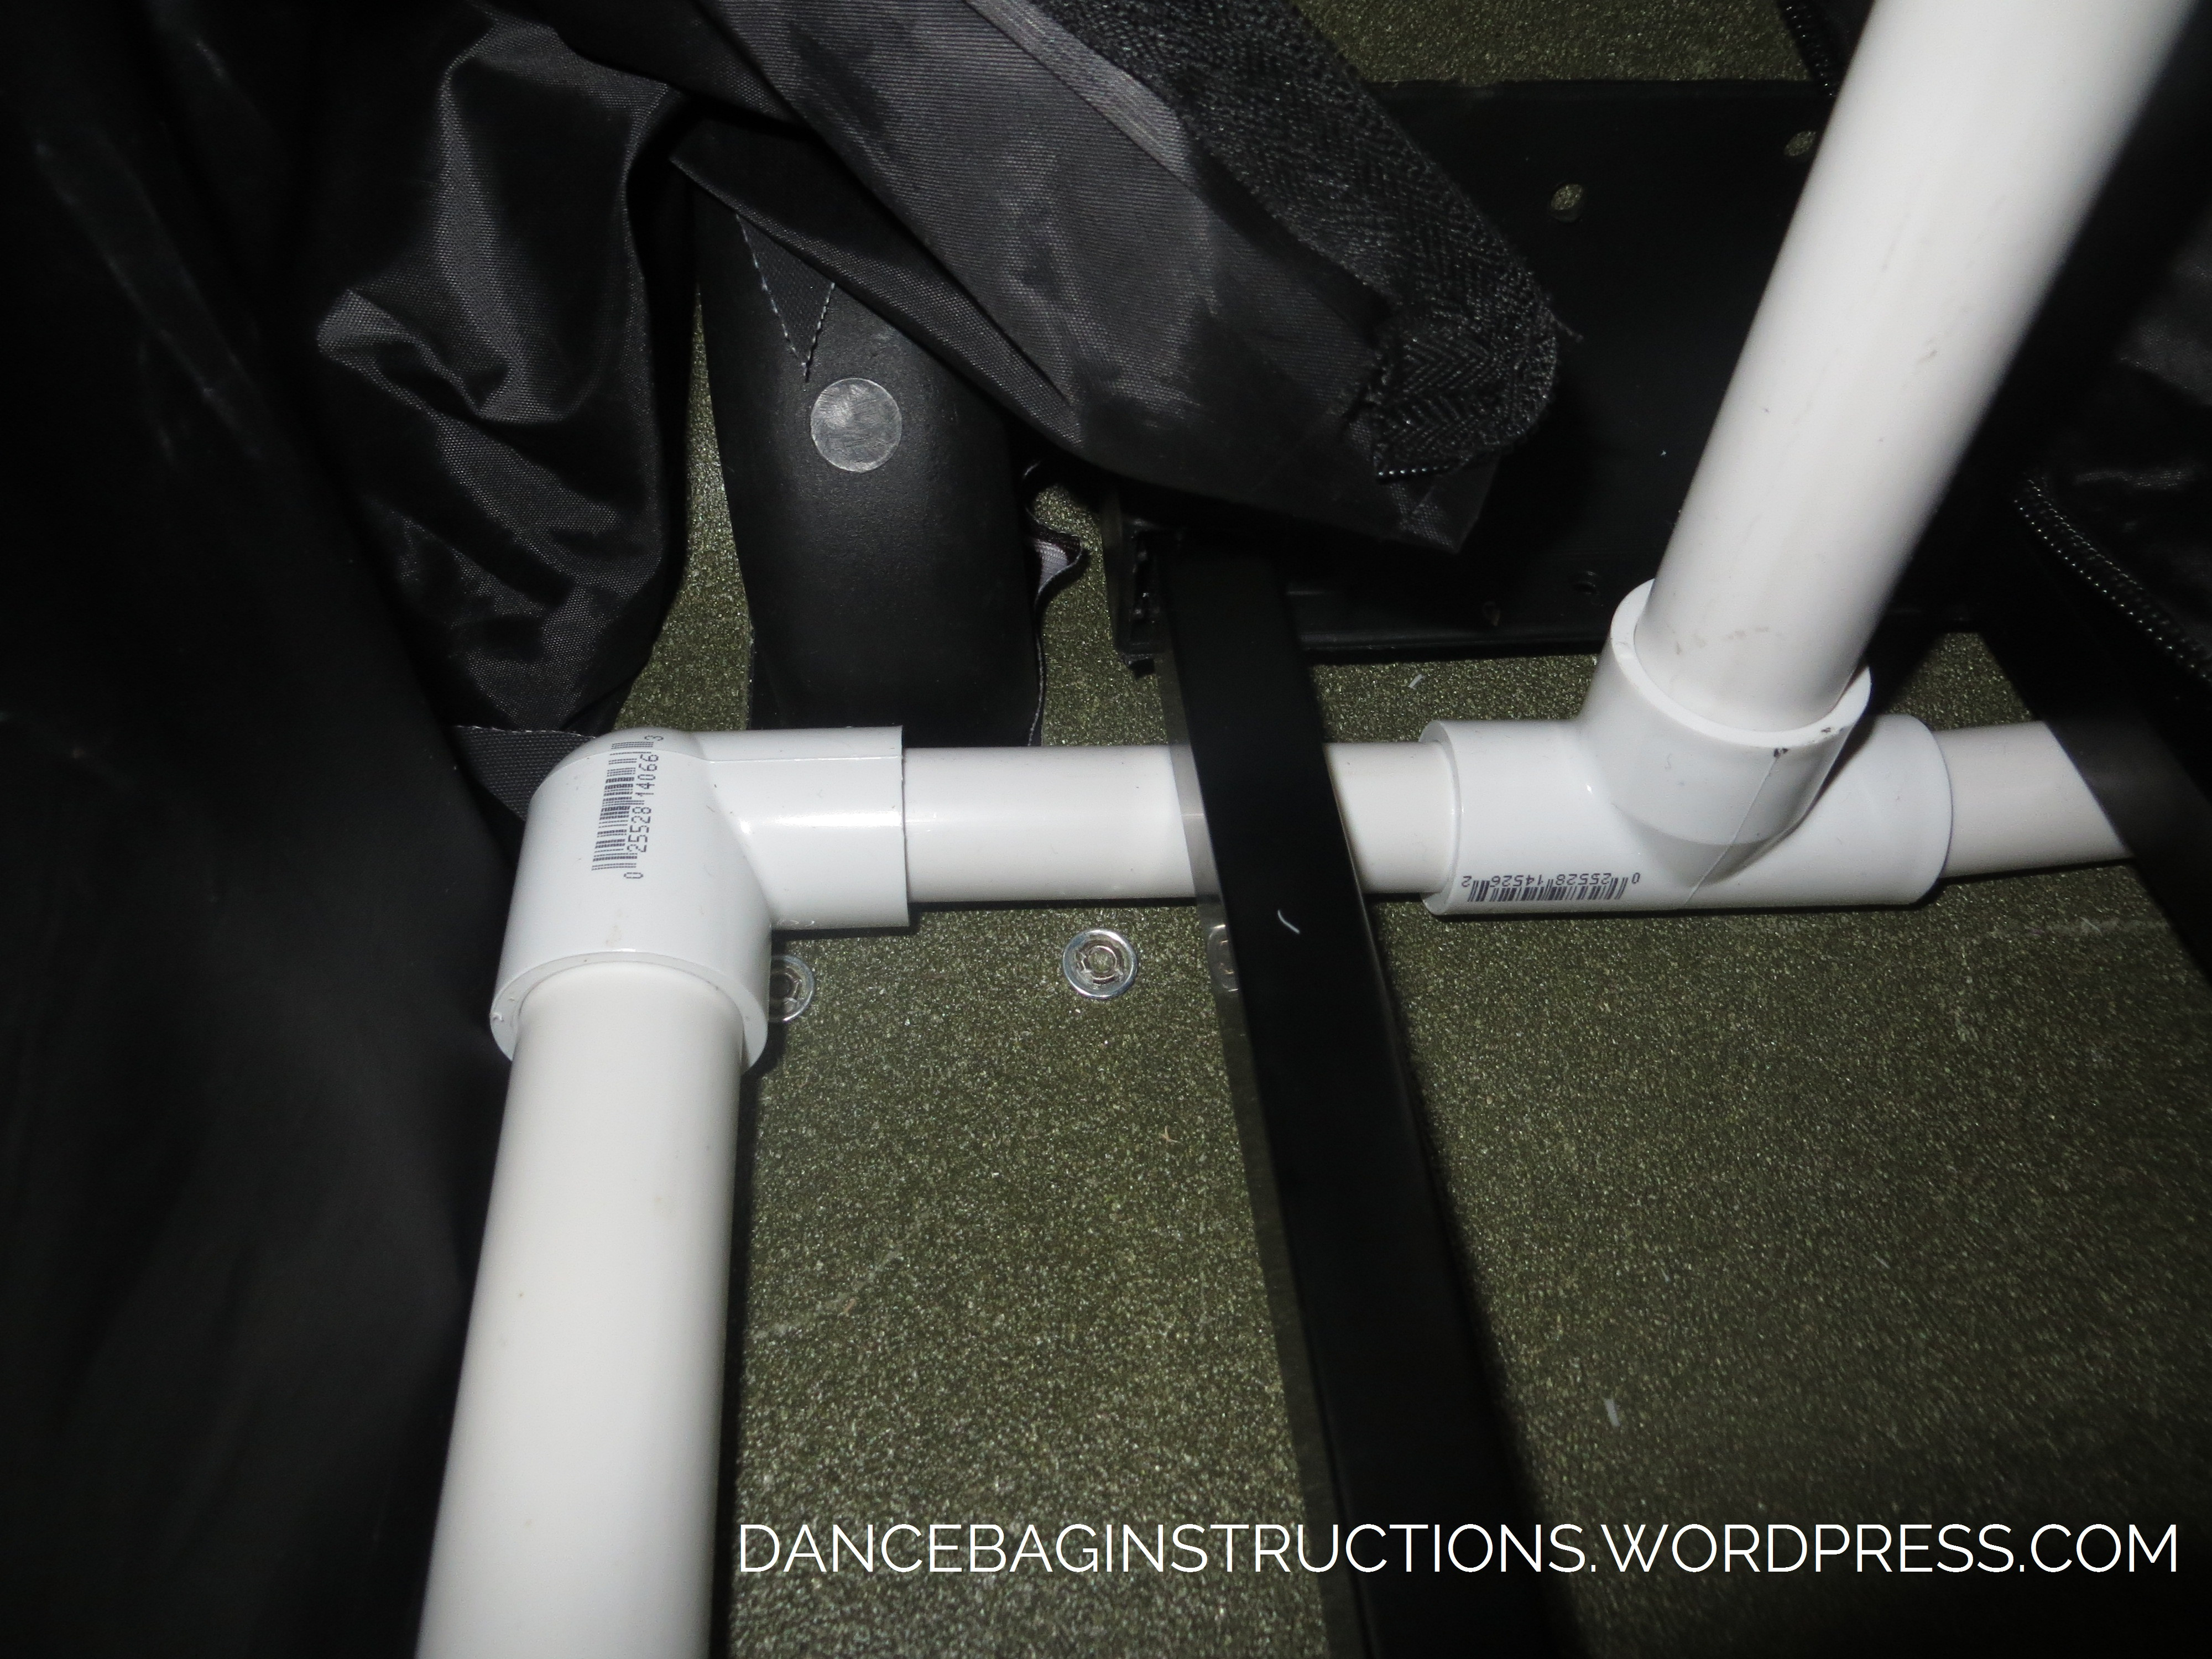 Corner detail of DIY dance duffel base
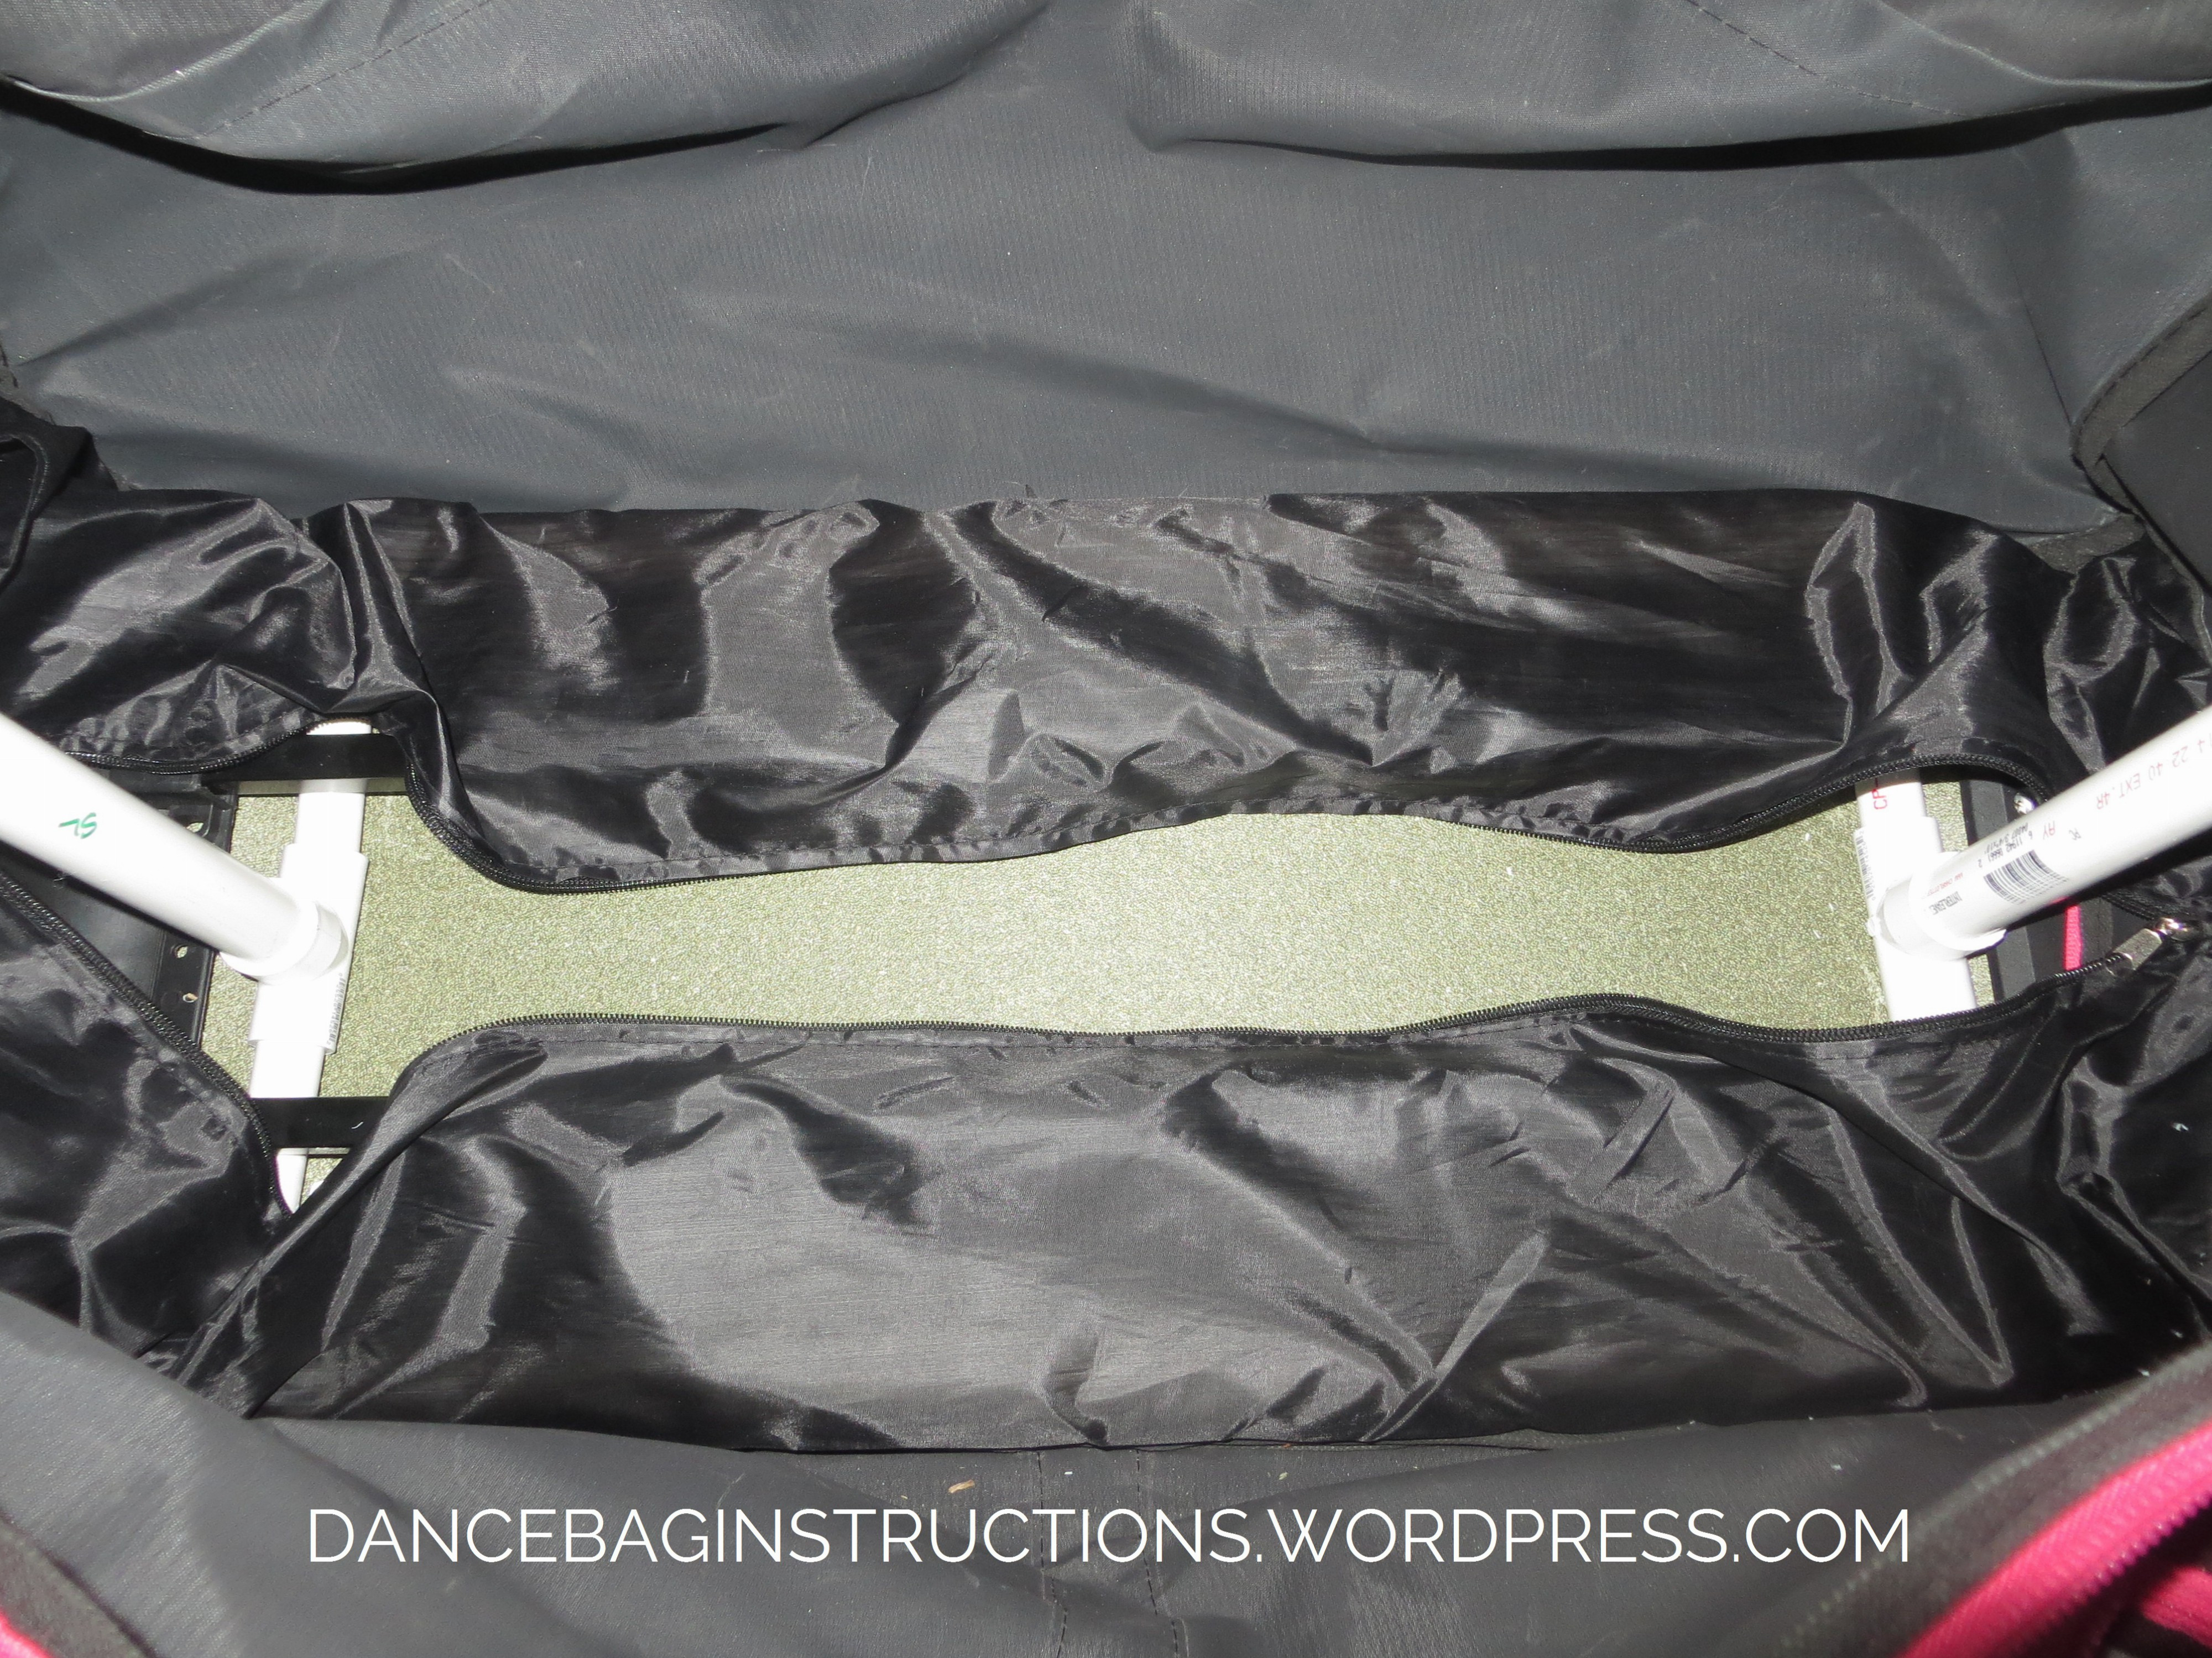 Bottom view of DIY dance bag with PVC rack
 -
Vertical Support Advantage: The internal vertical supports are a key feature. By keeping these connected, it becomes simpler to re-attach the horizontal poles, even when costumes are already inside the bag. This prevents connectors from being hidden or inaccessible under layers of fabric.
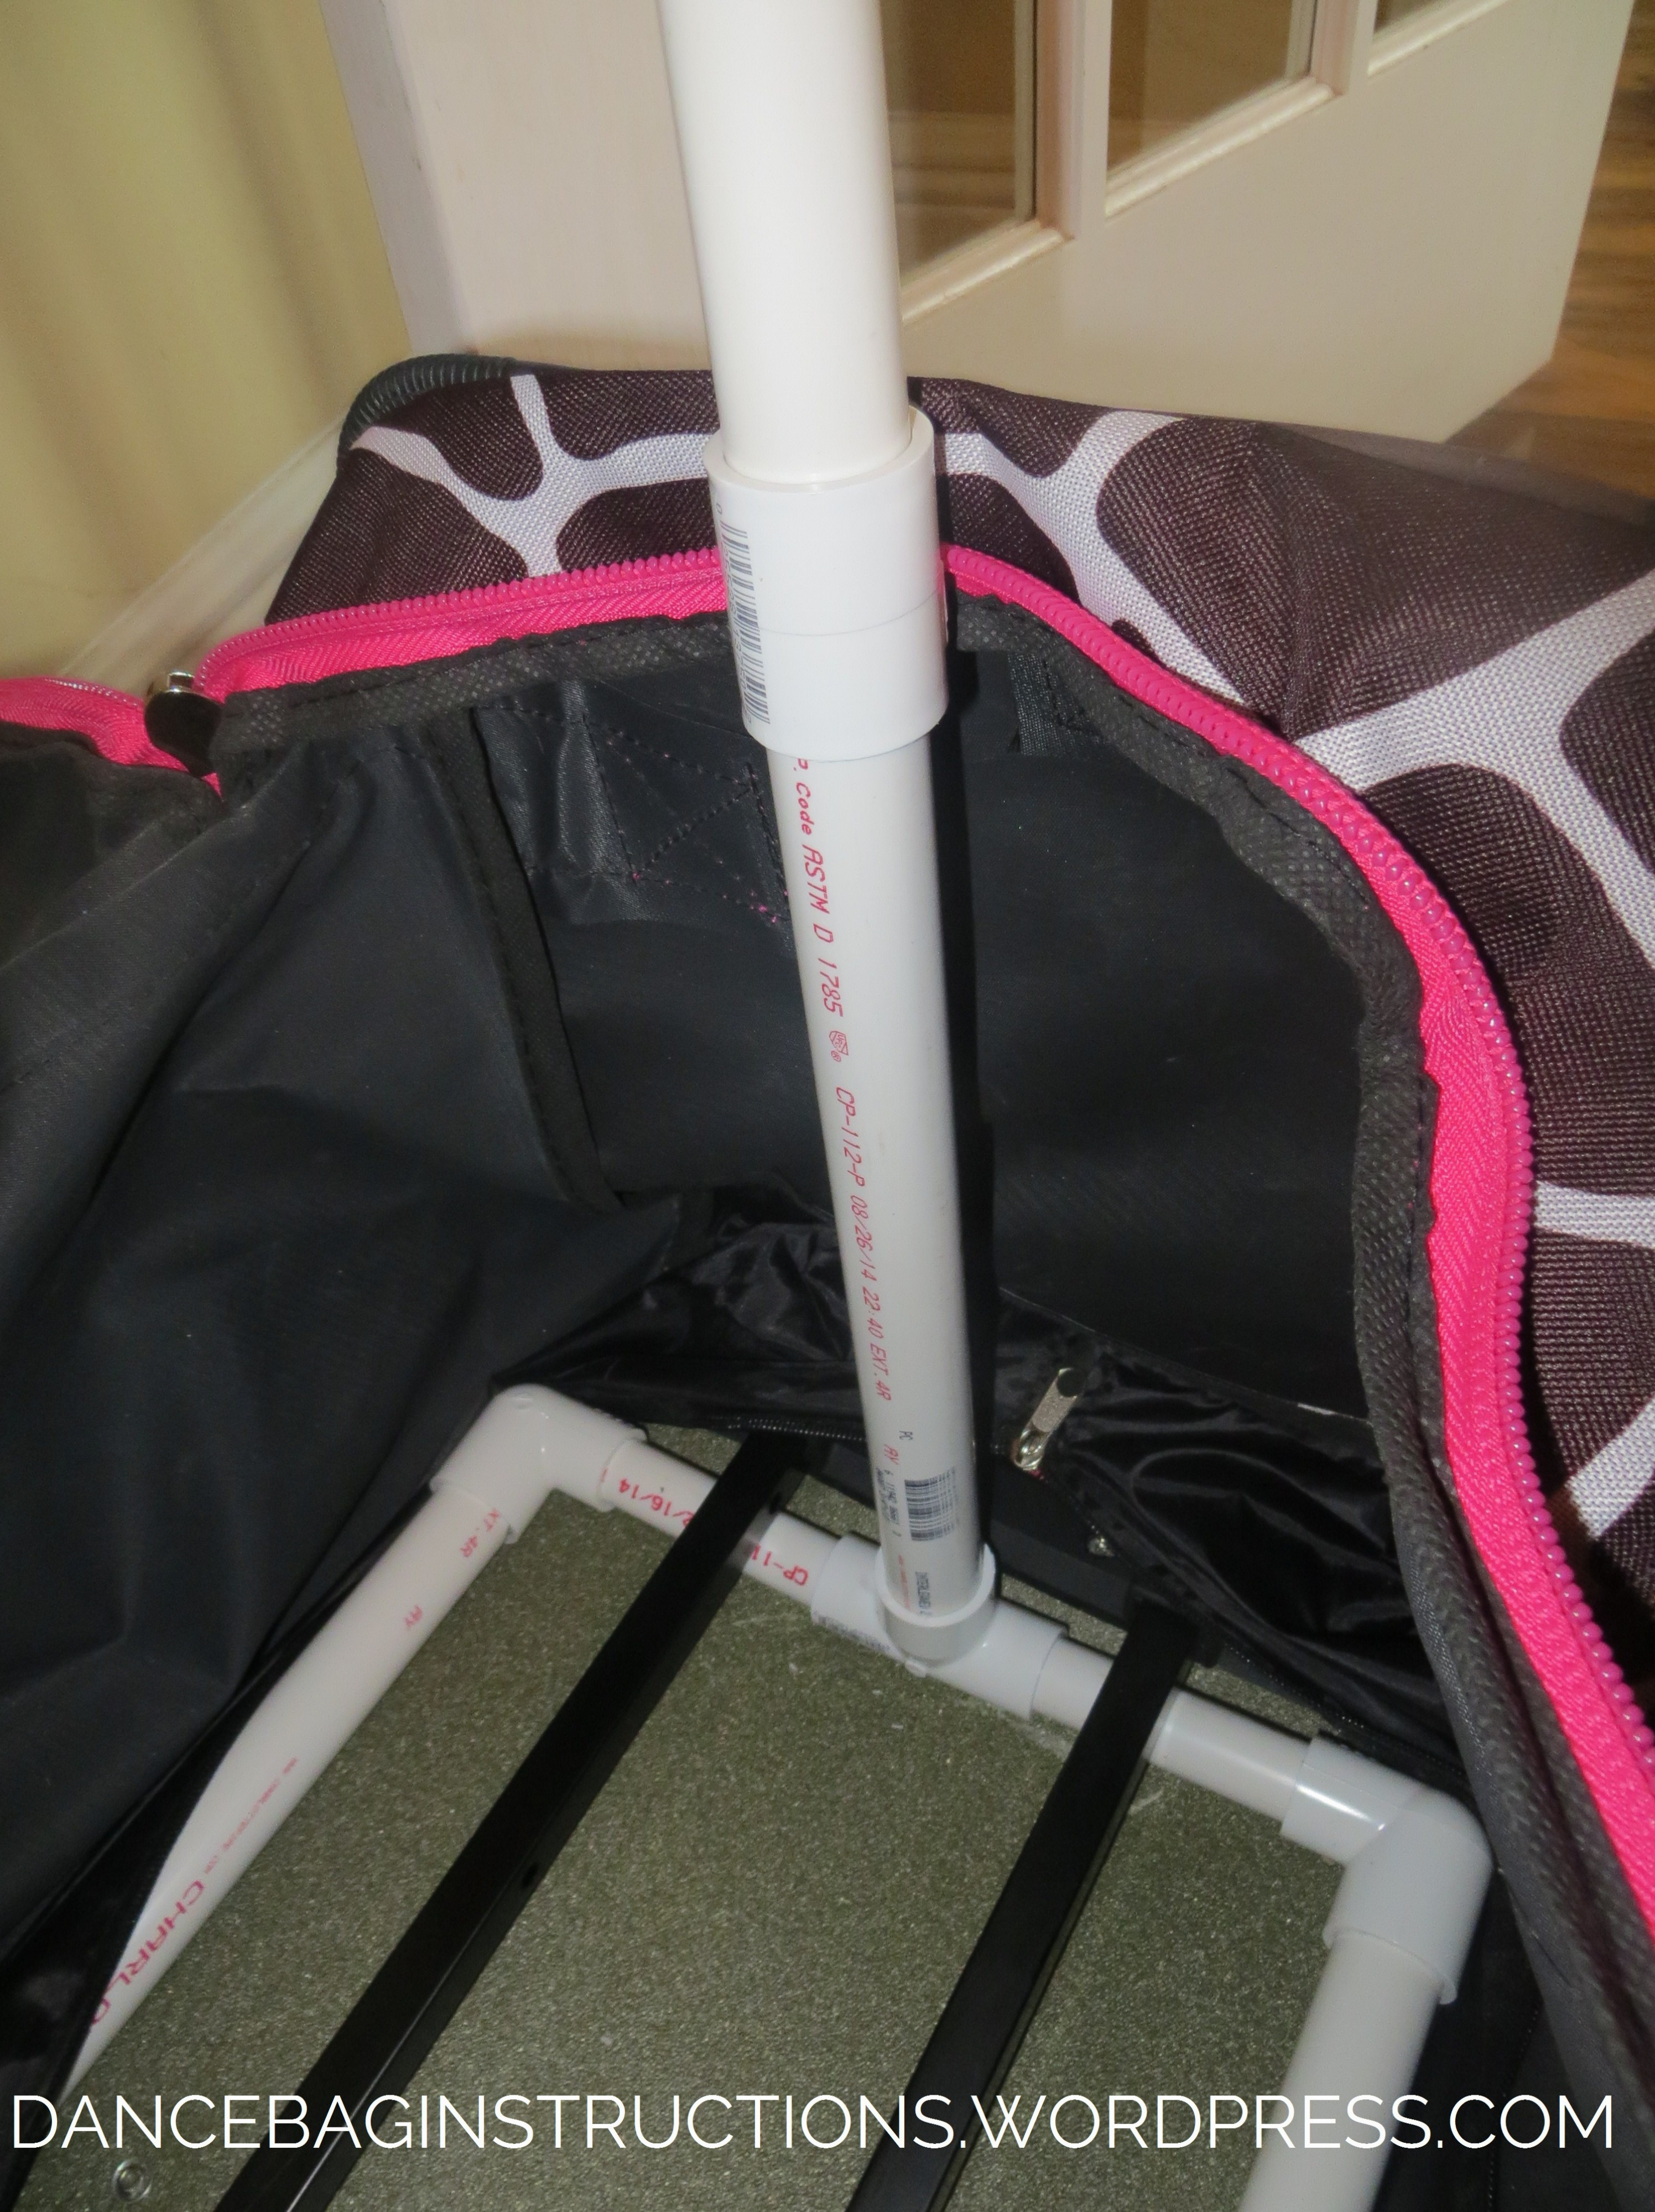 Internal PVC support in DIY dance bag
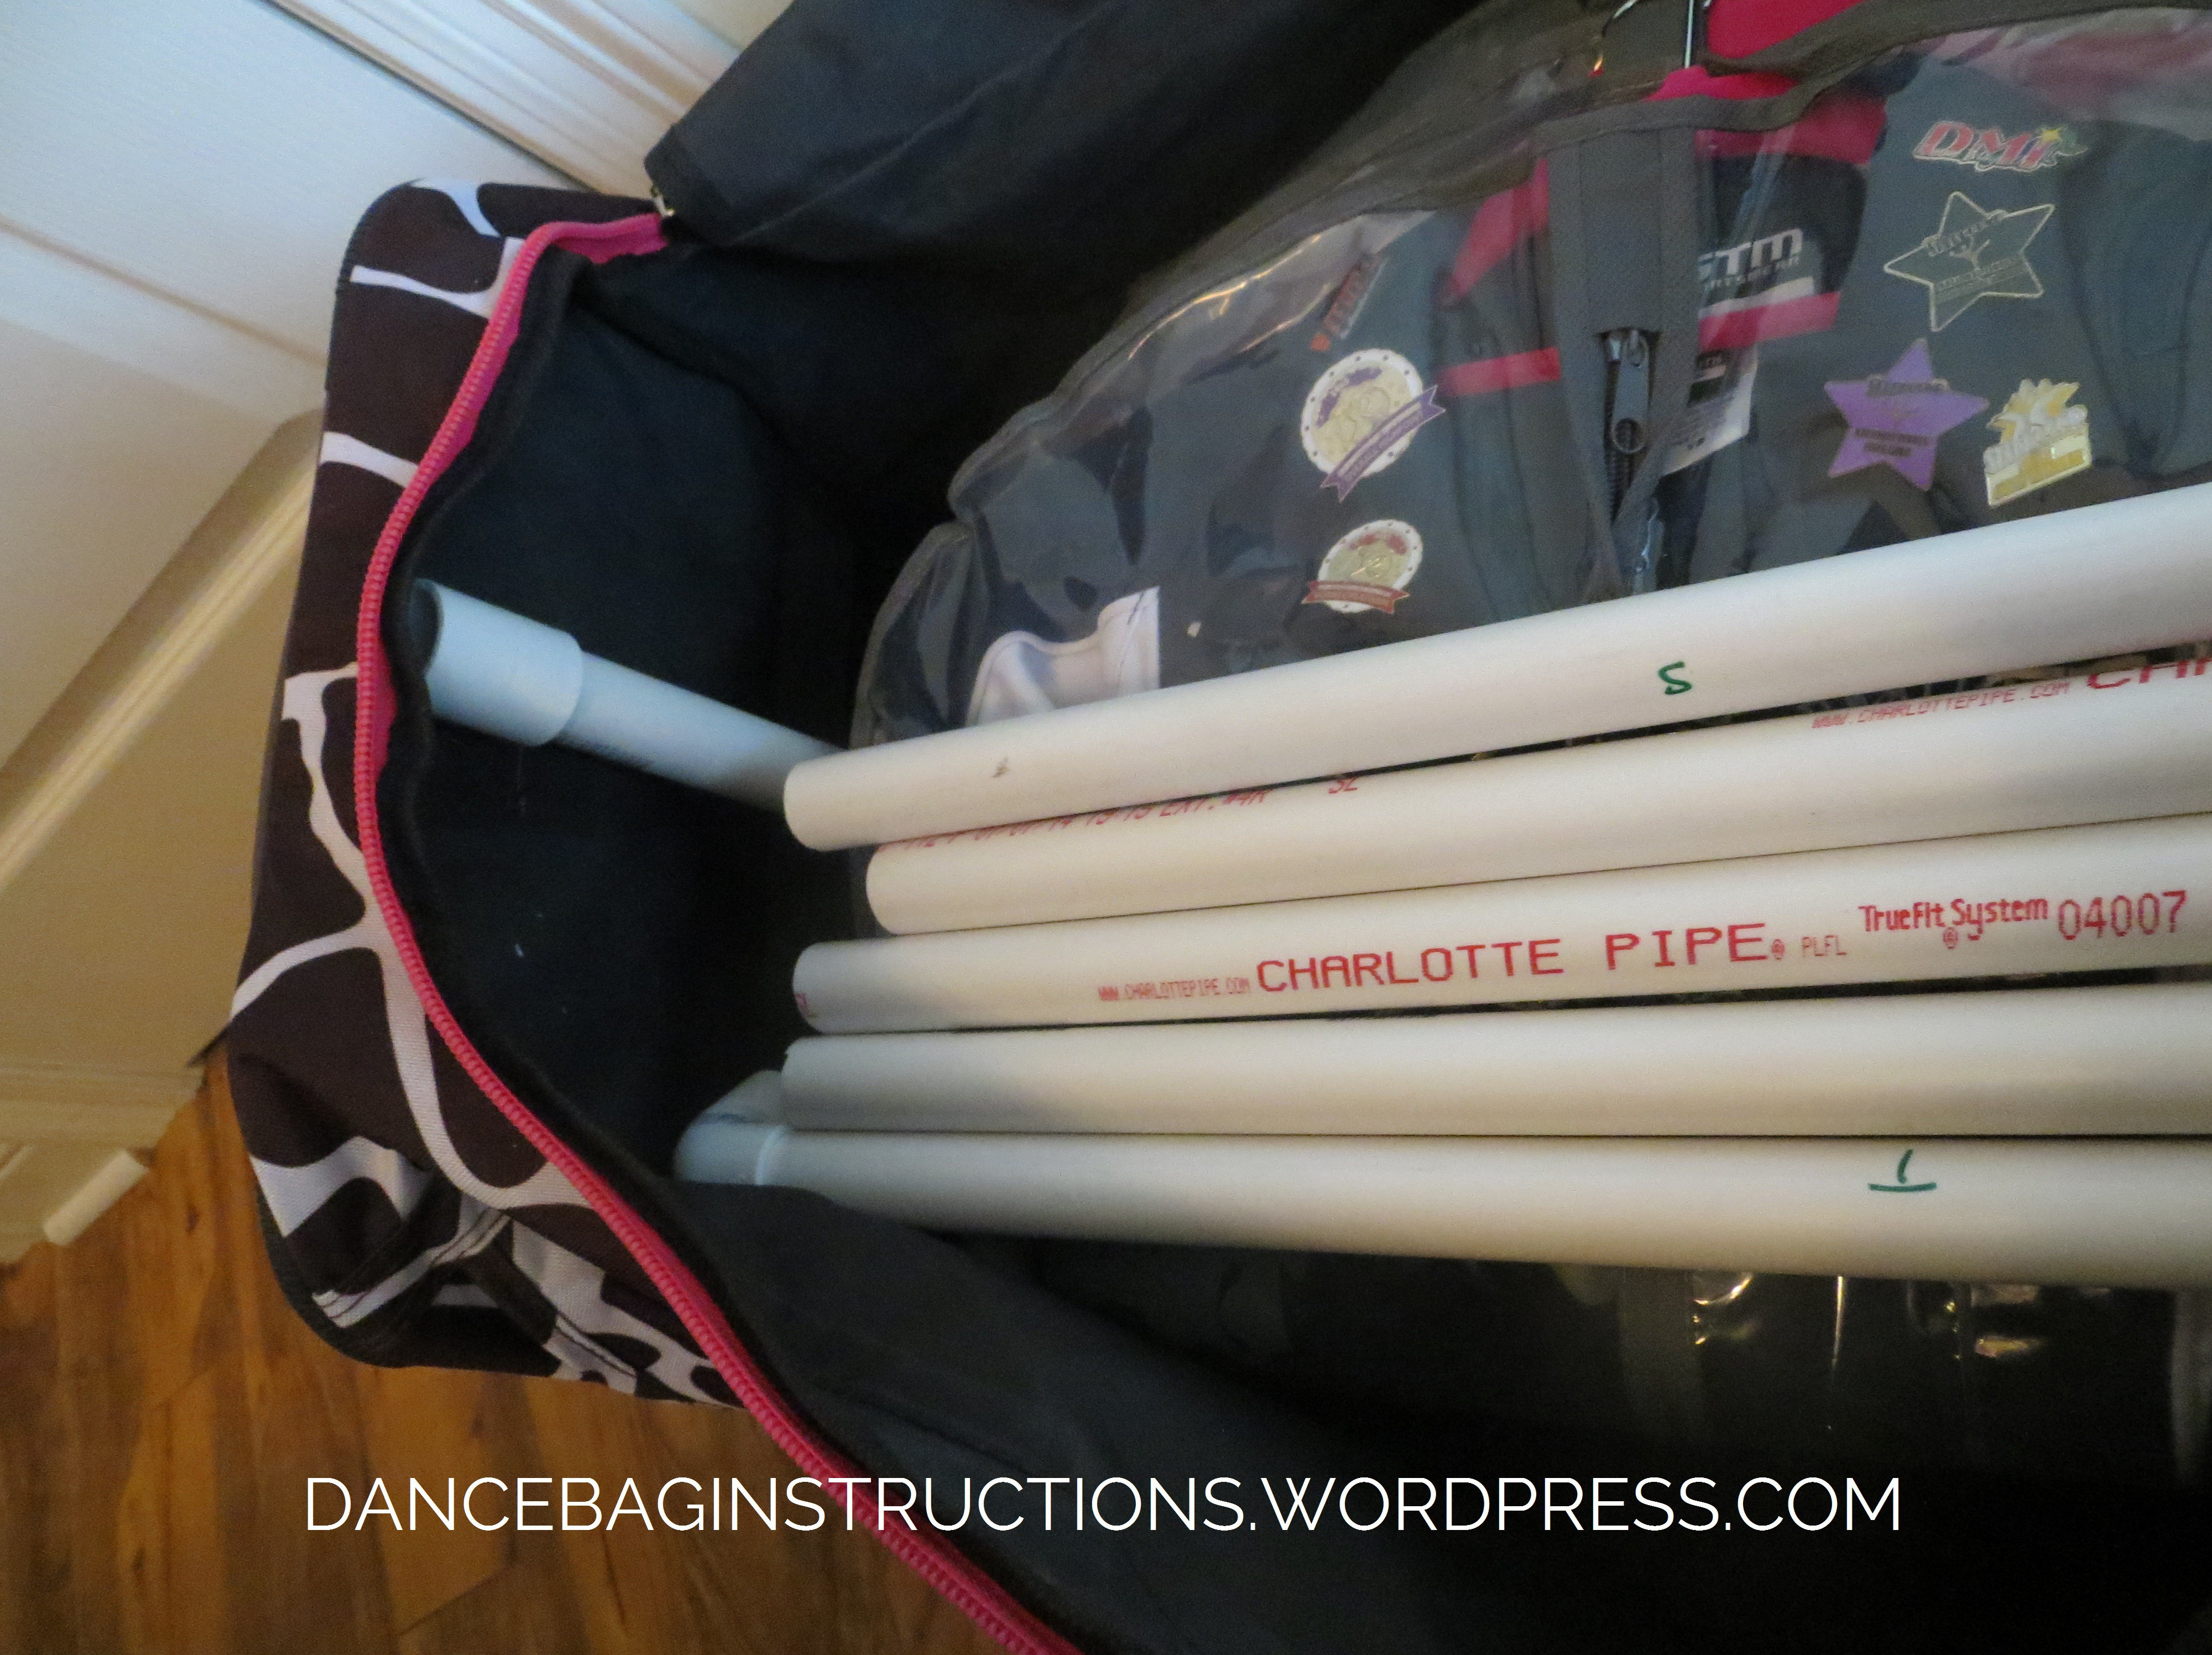 Dance costumes transported in DIY duffel bag
 -
Painting (Optional): If desired, spray paint the PVC rack. Krylon Covermaxx paint was used in the original project for its color options. For better adhesion and durability, consider sanding the PVC lightly before painting and applying a sealant afterward. Note: Krylon Fusion for Plastic might be a better option for plastic adhesion, but color availability may vary.
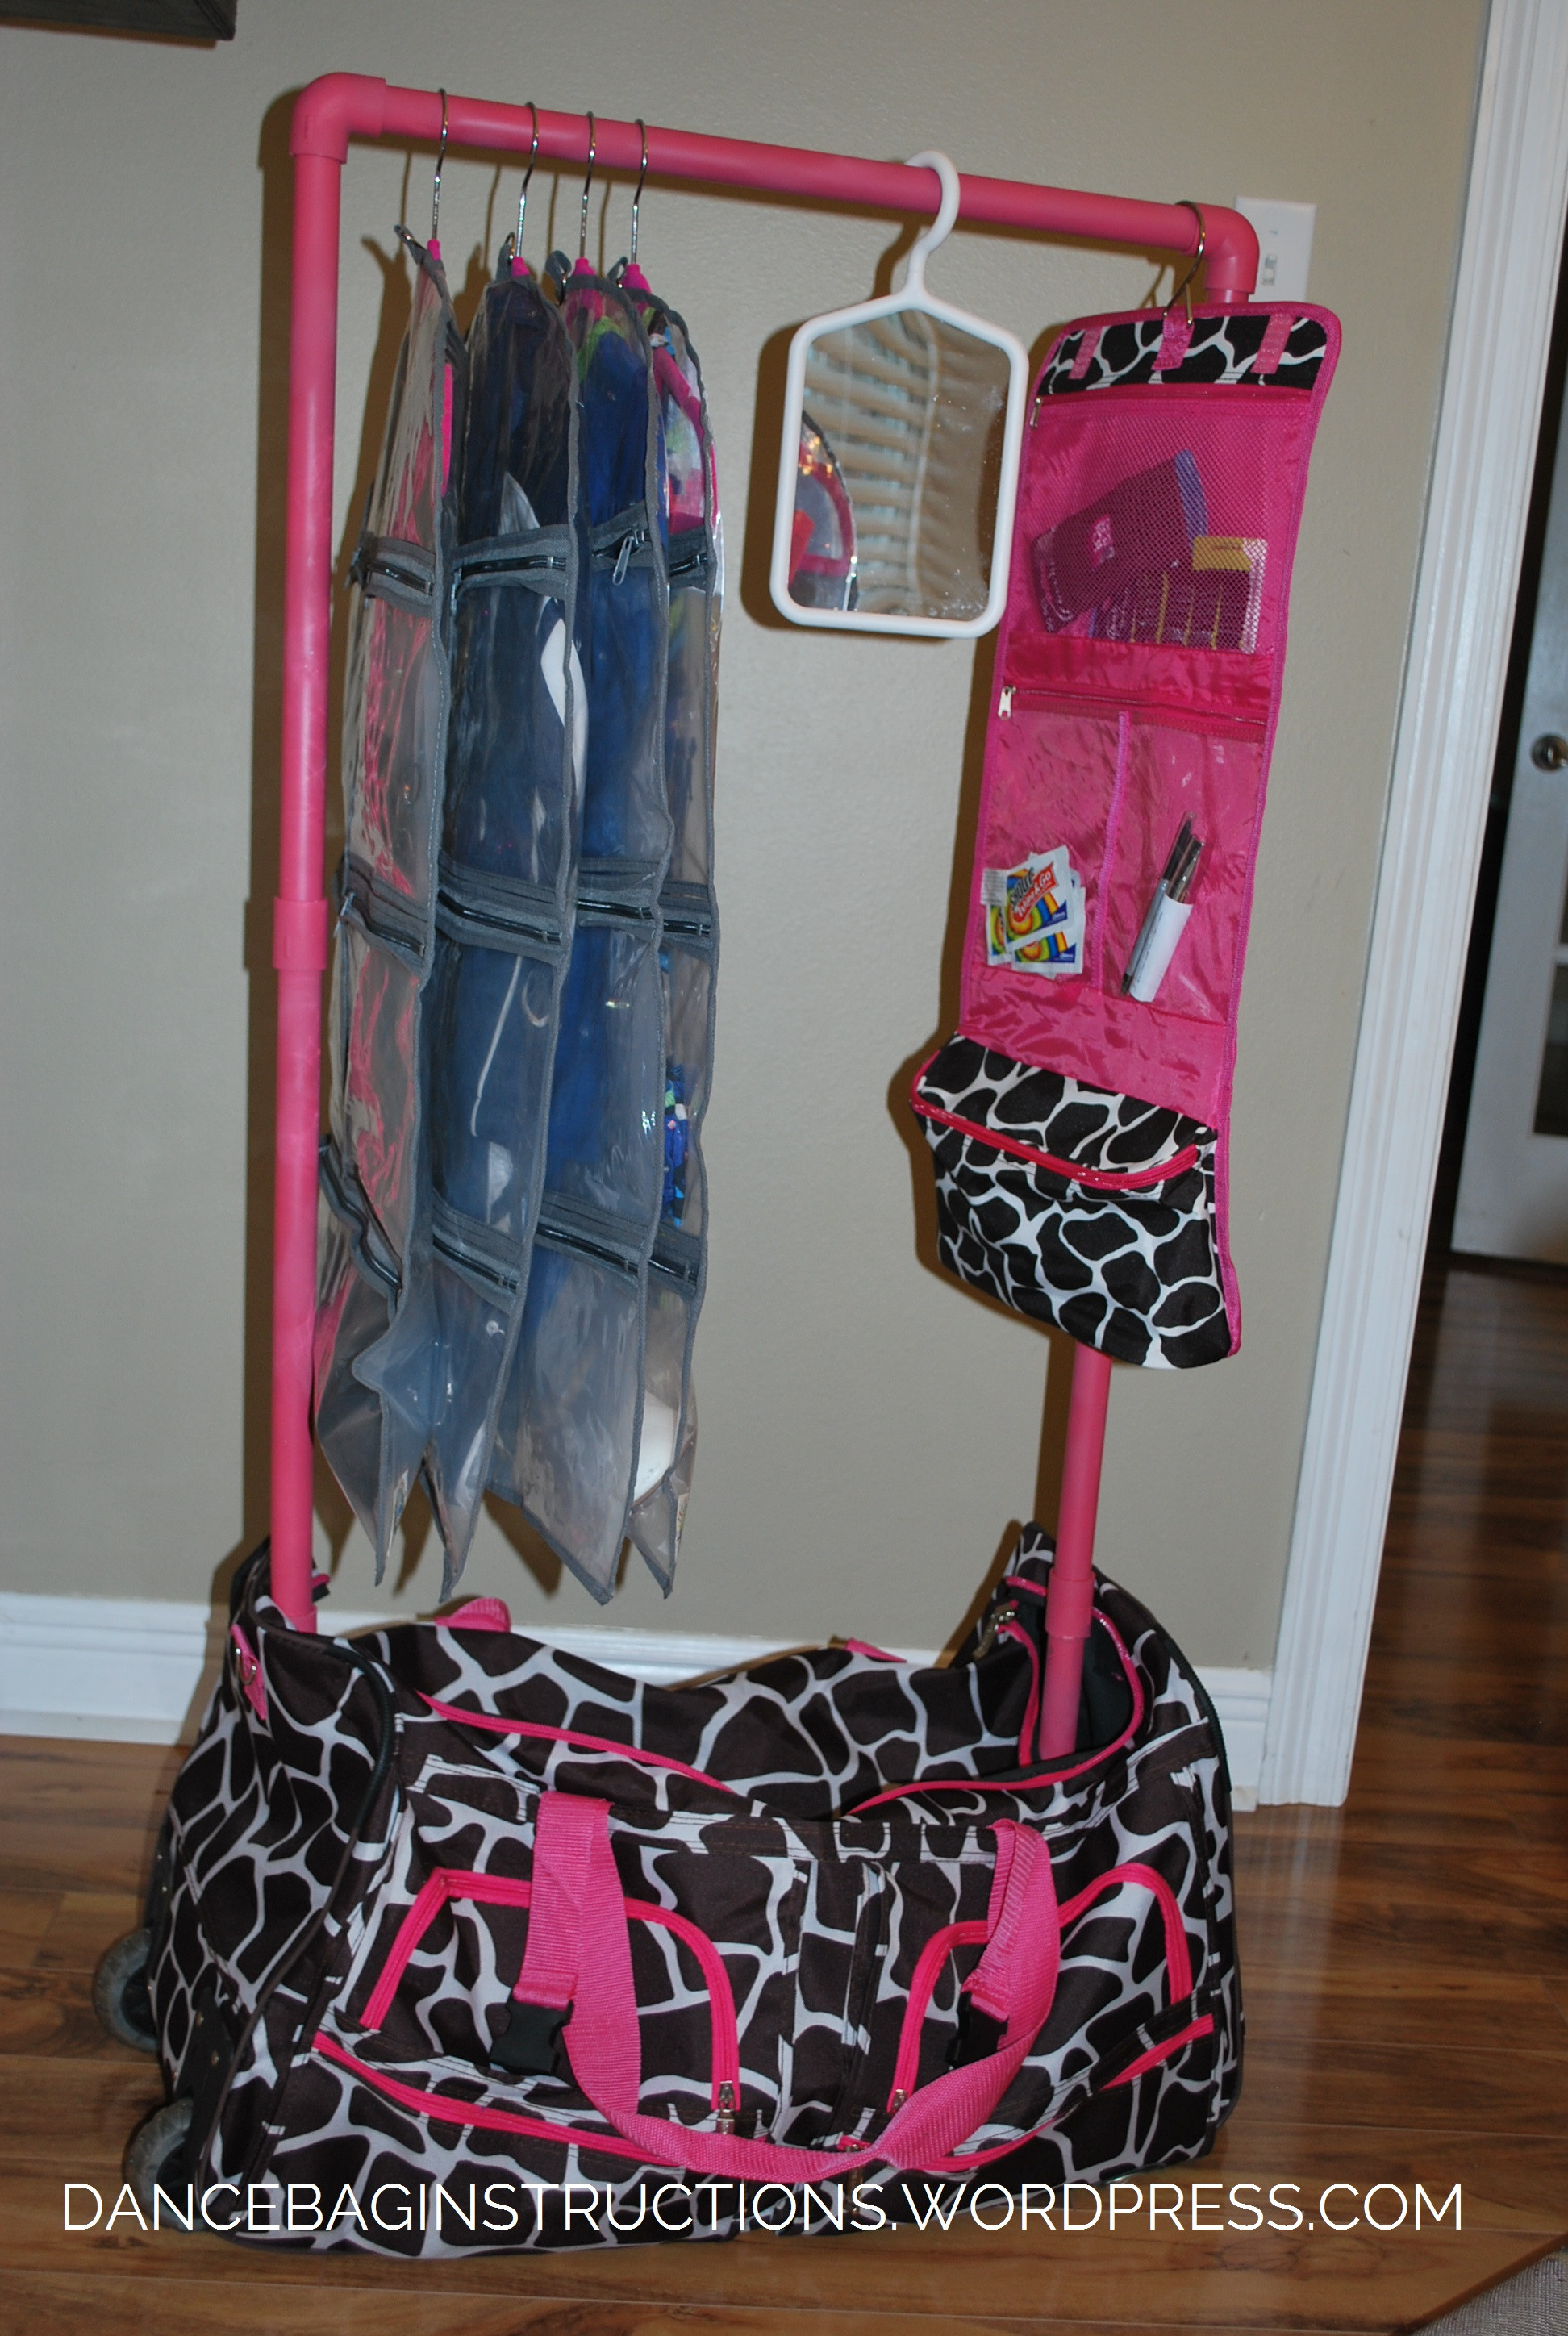 Homemade painted dance duffel bag
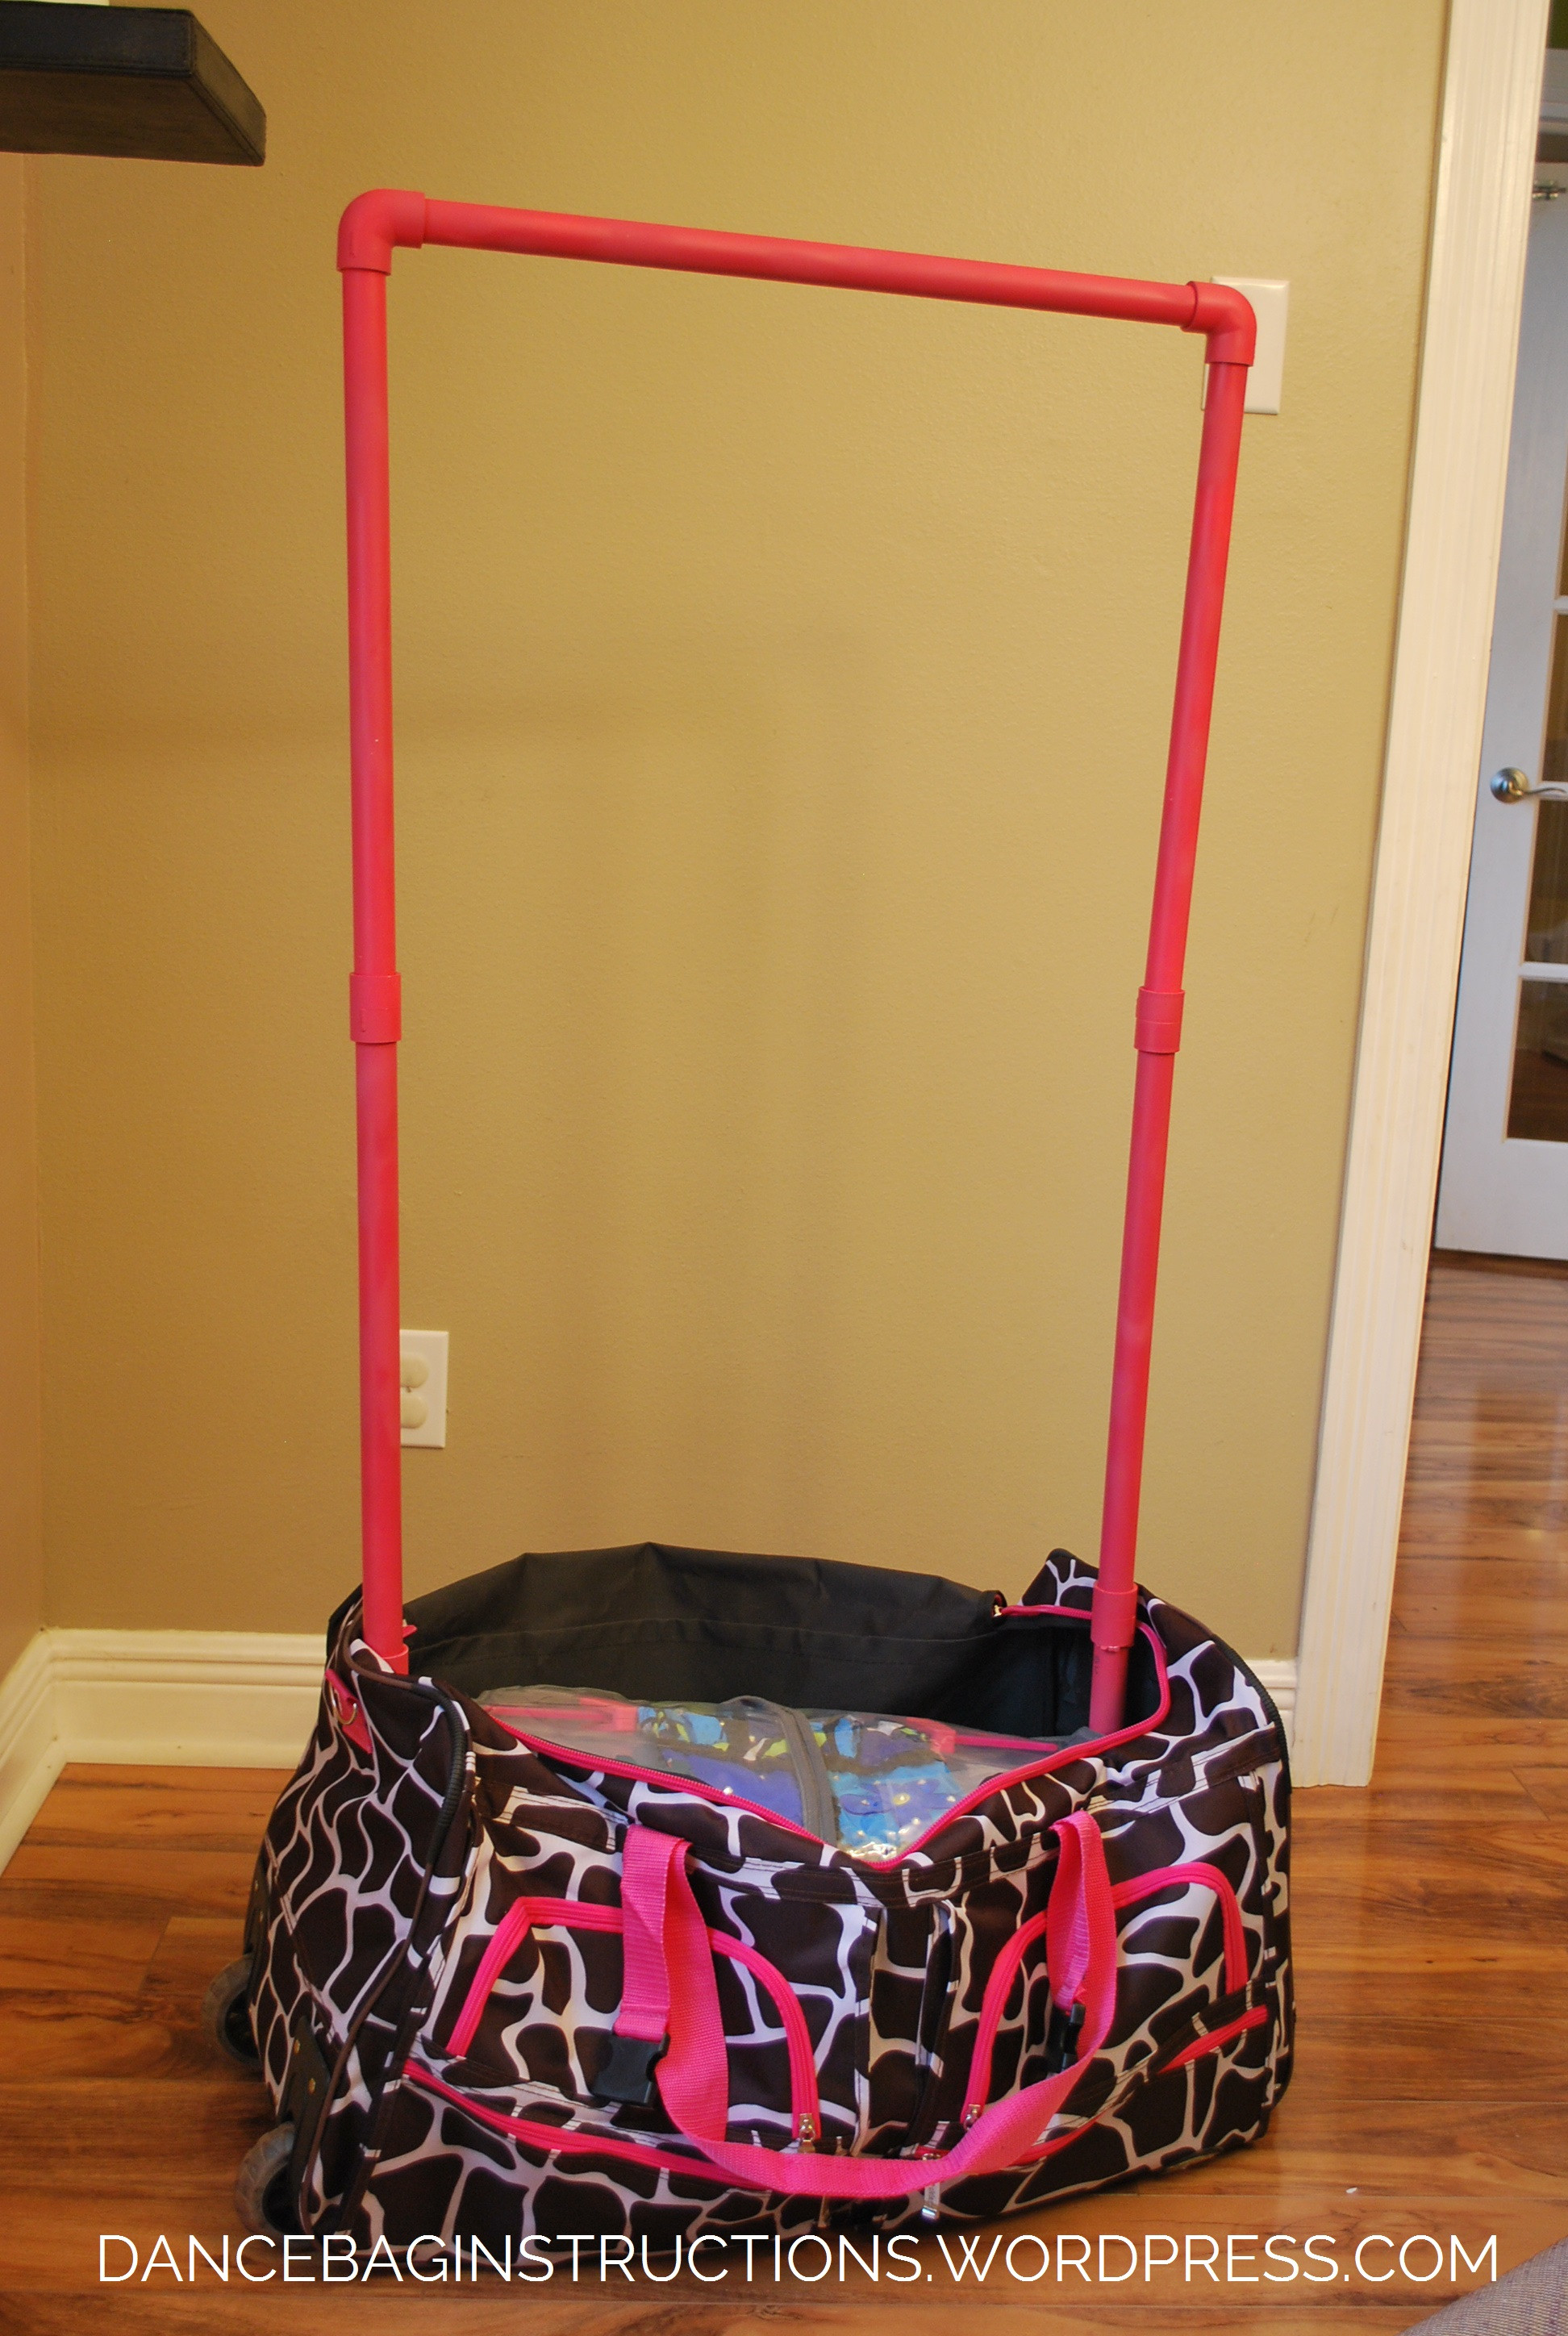 Dance bag with custom rack
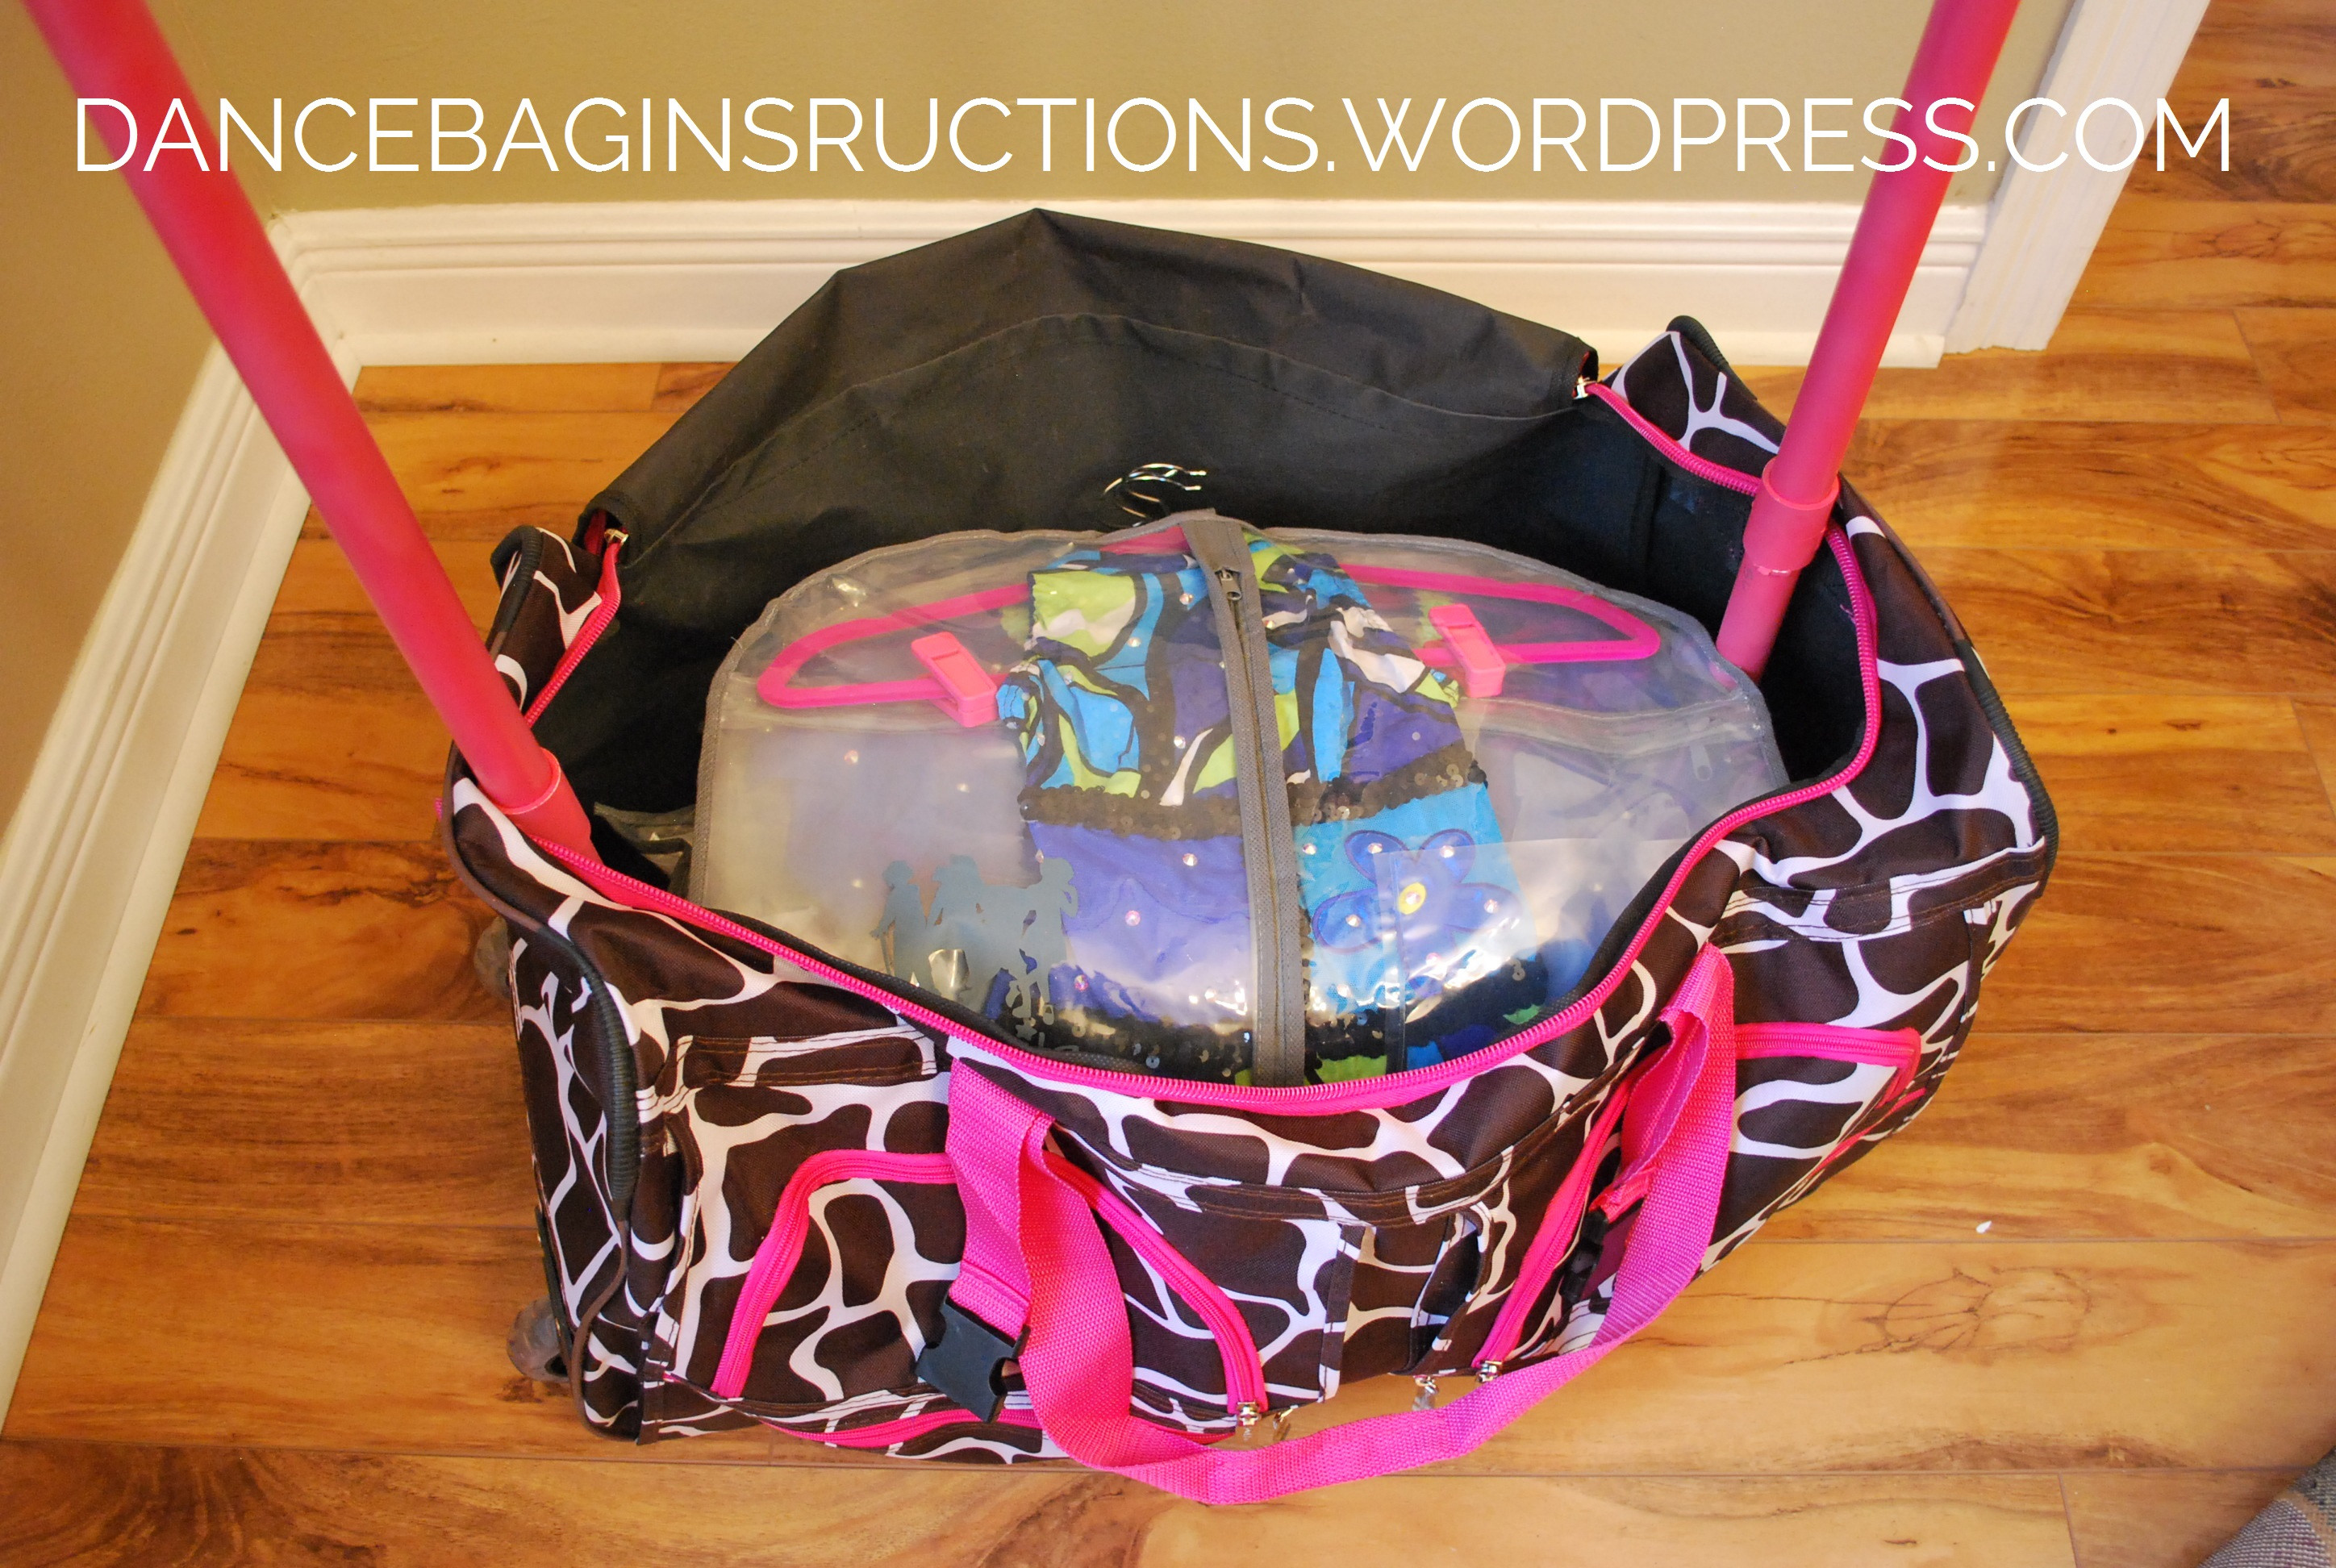 Dance bag with costume rack feature
Durability and Potential Improvements:
While the Krylon Covermaxx paint provided the desired color, it was noted to chip after initial use. For increased durability, sanding the PVC before painting and sealing afterward is recommended. Alternatively, wrapping the PVC pipes in duct tape could be a more robust and faster solution for color-coding or protection. Also, ensure the 4″ vertical pieces don’t make the base fabric too taut to zip. Adjusting these slightly shorter may resolve this.
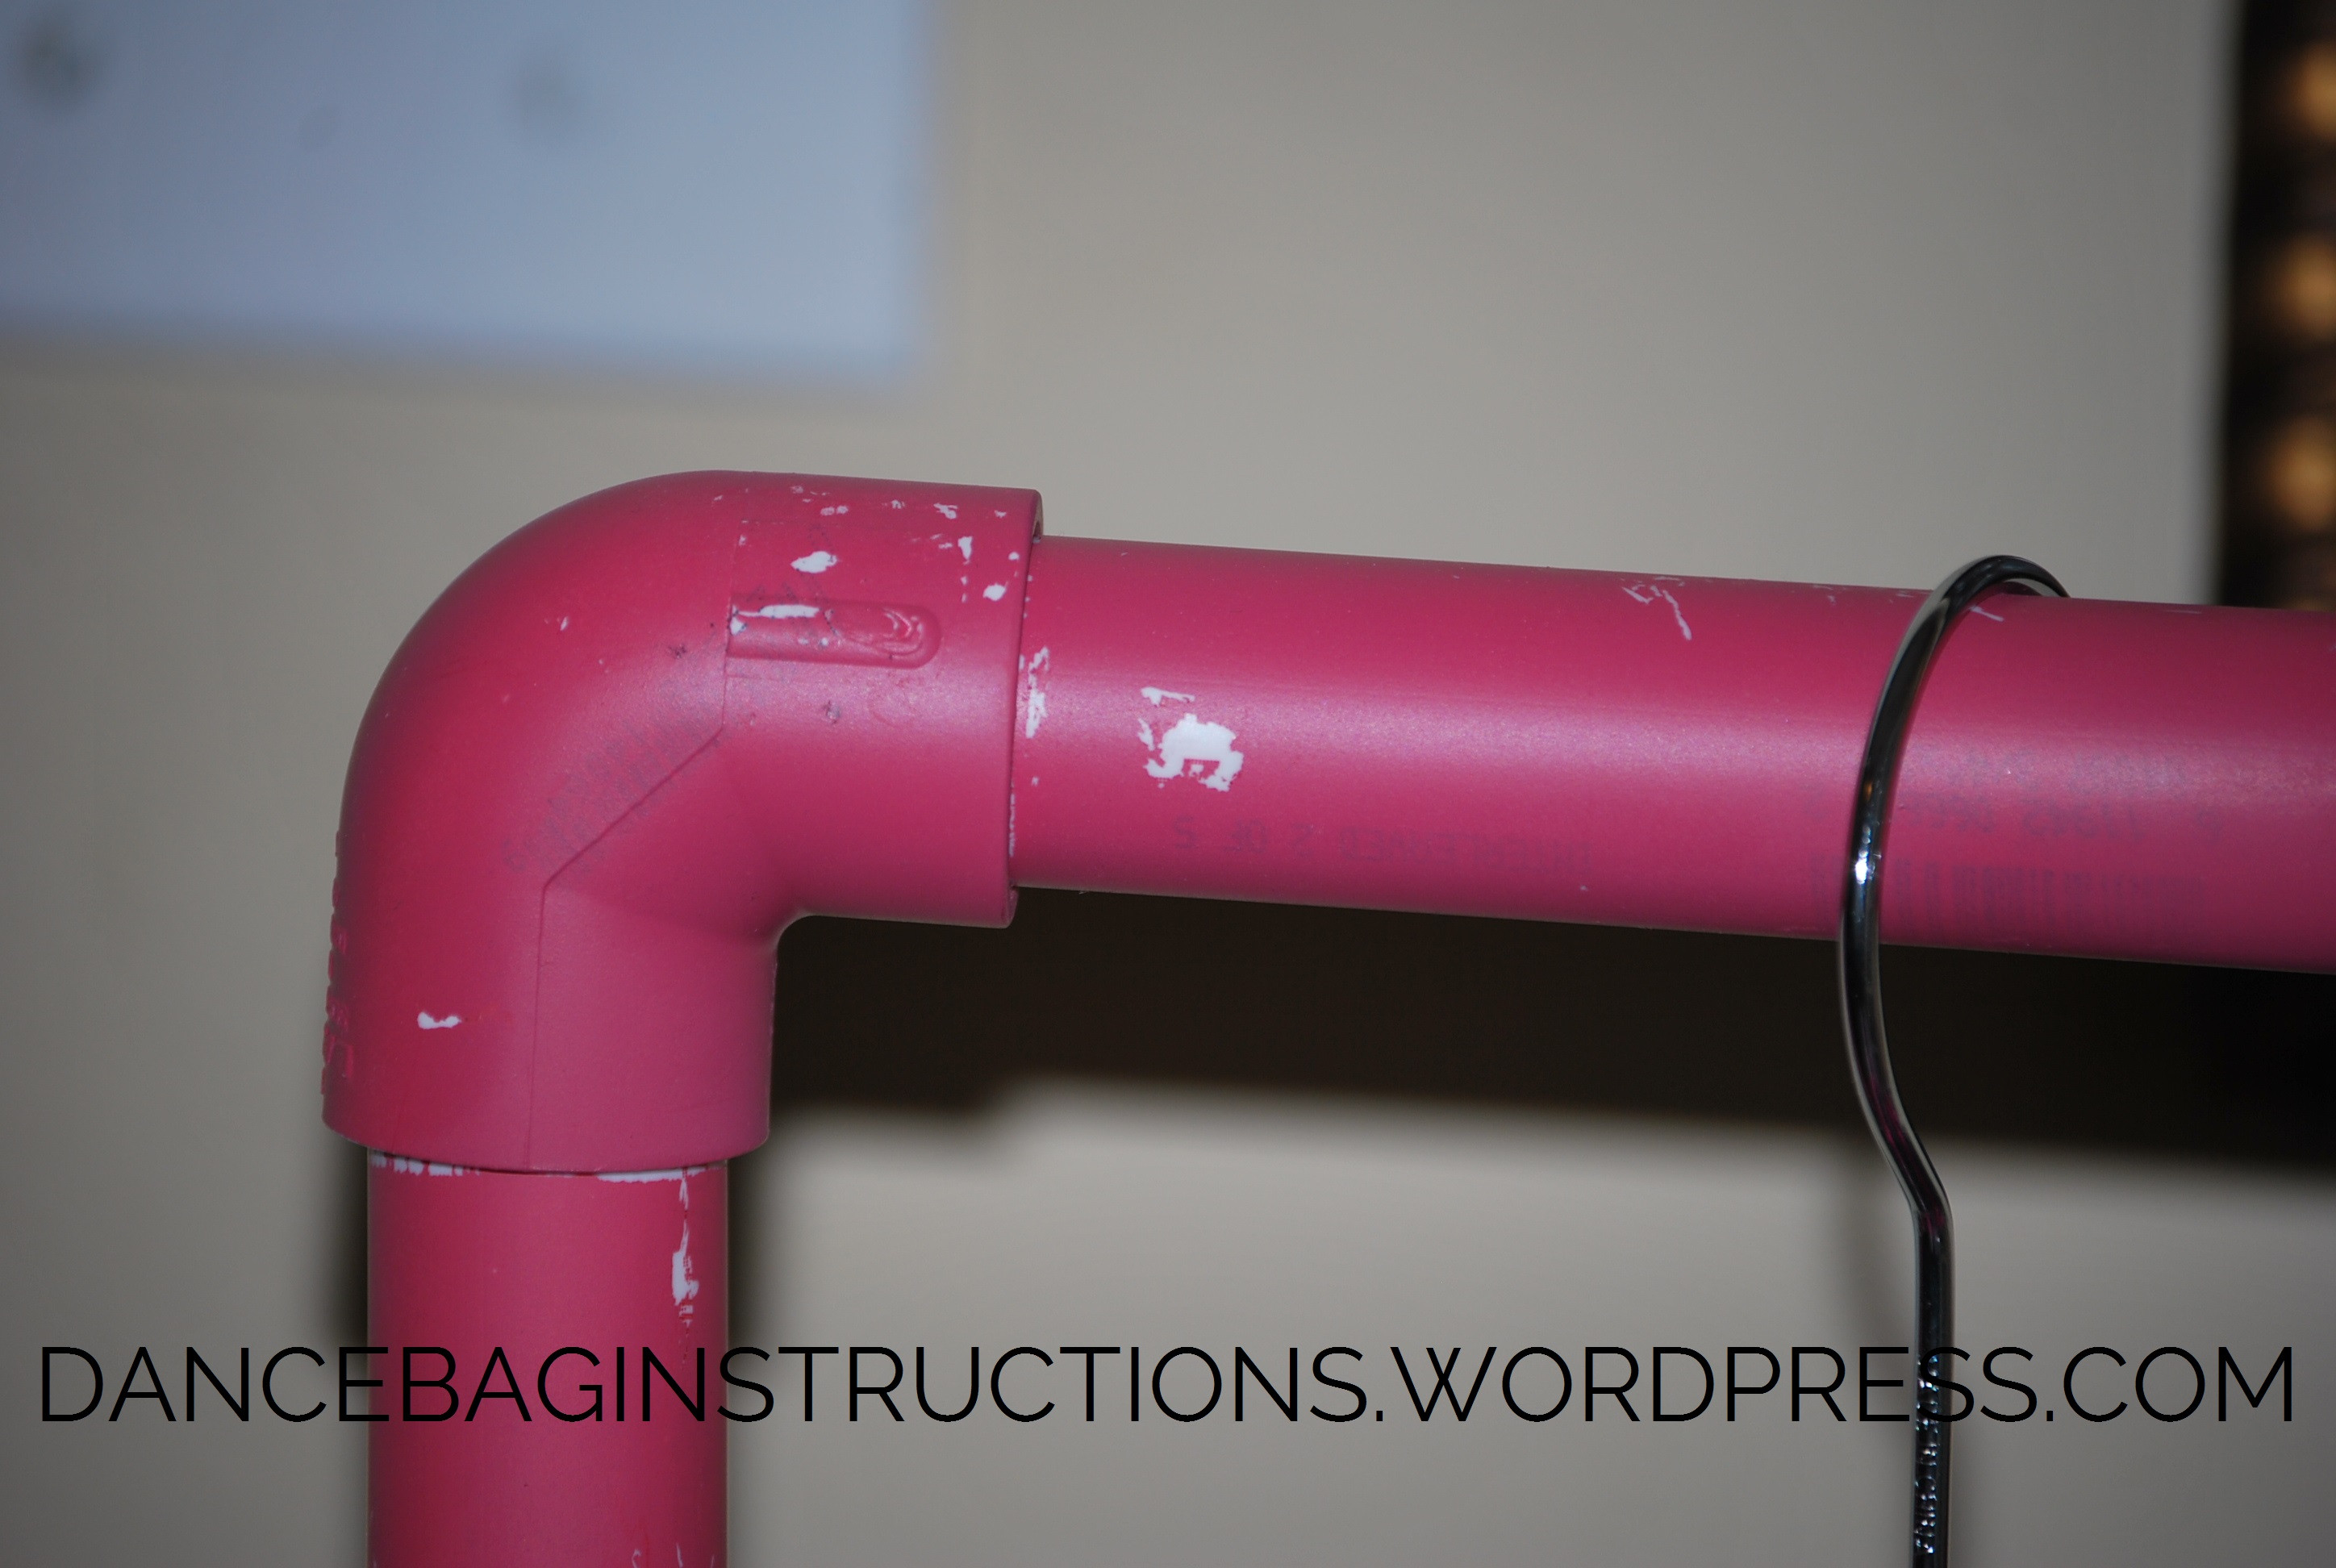 Krylon Covermaxx paint on PVC pipes
Conclusion:
Creating your own DIY dream duffel dance bag is a rewarding and cost-effective project. For around $50 and a short amount of assembly time, you can have a functional rolling dance bag with a garment rack, rivaling the features of much pricier options. This DIY approach allows for customization and offers a practical solution for dancers needing to transport costumes and gear without breaking the bank. Give it a try and enjoy the convenience of your homemade dance travel companion!