
Dance Dance Revolution (DDR) holds a special place in gaming history. For many, it’s a nostalgic blast from the past, while for dedicated players, it remains a challenging and enjoyable rhythm game, especially through platforms like StepMania. However, as DDR’s mainstream popularity waned, the availability of high-quality dance pads for home use has dwindled. While options like the Omega GX pads exist, they can be expensive. For those seeking a more affordable and hands-on approach, building your own Ddr Dance Pad is the perfect solution.
This guide provides a comprehensive, step-by-step approach to constructing a superior ddr dance pad at home. This design, refined over years of development and testing, addresses the common shortcomings of many DIY and commercial pads. We’ll delve into creating a pad that not only saves you money but also offers exceptional durability, sensitivity, and a truly arcade-like experience, all centered around a unique, robust sensor system.
If you happen to be near northern Baltimore, MD, feel free to reach out and try out the pad in person!
Why Build Your Own DDR Dance Pad?
For enthusiasts, the appeal of a ddr dance pad lies in replicating the arcade experience at home. However, many commercially available and DIY dance pad designs fall short. Common issues include poor corner sensitivity, requiring excessive pressure to register steps, and bulky, heavy constructions that are difficult to move and store. Some DIY attempts utilize foam spacers, which often lack the consistent and precise response needed for serious play. Furthermore, many designs suffer from reliability problems, with sensors susceptible to dust, wear, and tear. Sharp edges and exposed hardware can also make barefoot play uncomfortable.
Building your own ddr dance pad offers numerous advantages:
- Cost-Effectiveness: DIY construction can significantly reduce the cost compared to high-end commercial pads.
- Superior Performance: This design prioritizes sensitivity and accuracy, essential for competitive play and enjoying challenging StepMania charts.
- Durability and Reliability: The unique sensor design is completely sealed and solid-state, eliminating common failure points and ensuring long-lasting performance for your ddr dance pad.
- Customization and Satisfaction: Building your own pad is a rewarding project, allowing for personalization and a deeper connection to your gaming setup. You gain complete control over the feel and responsiveness of your ddr dance pad.
Addressing Common Dance Pad Problems
This DIY ddr dance pad design directly tackles the typical issues found in other pads, ensuring a superior playing experience.
The Problem with Traditional Pads
Many existing ddr dance pad designs, whether DIY or commercial, struggle with several key areas:
- Edge and Corner Sensitivity: Often, steps need to be pressed directly in the center to register reliably, hindering gameplay, especially for complex patterns.
- High Pressure Requirements: Pads that require significant force to activate can lead to fatigue and make fast, light steps difficult to execute.
- Bulk and Weight: Heavy, cumbersome pads are inconvenient for storage and transportation.
- Inconsistent Sensor Behavior: Foam-based spacers can degrade over time and lack the precision needed for accurate step registration.
- Durability Concerns: Exposed sensors, moving parts, and fragile components can lead to premature failure.
Our Solution: The Velostat Sensor and Slim Design
This design revolutionizes the ddr dance pad experience by employing a unique, solid-state sensor based on a material called “Velostat.” This innovative approach offers several key benefits:
- Unmatched Sensitivity: Velostat sensors are incredibly sensitive, responding to mere ounces of pressure. This allows for light, effortless step registration, crucial for high-level play.
- Complete Sealed Design: The sensors are fully sealed, eliminating any entry points for dust, dirt, or moisture. This drastically improves reliability and longevity.
- Solid-State Durability: With no moving parts within the sensor itself, there’s nothing to wear out, tear, or degrade over time. This ensures your ddr dance pad is built to last.
- Slim and Lightweight: By minimizing bulk and complexity, this design results in a slim, easily portable ddr dance pad without compromising performance.
- Adjustable Sensitivity: The sensitivity of the pad can be easily fine-tuned after construction to match your personal preferences.
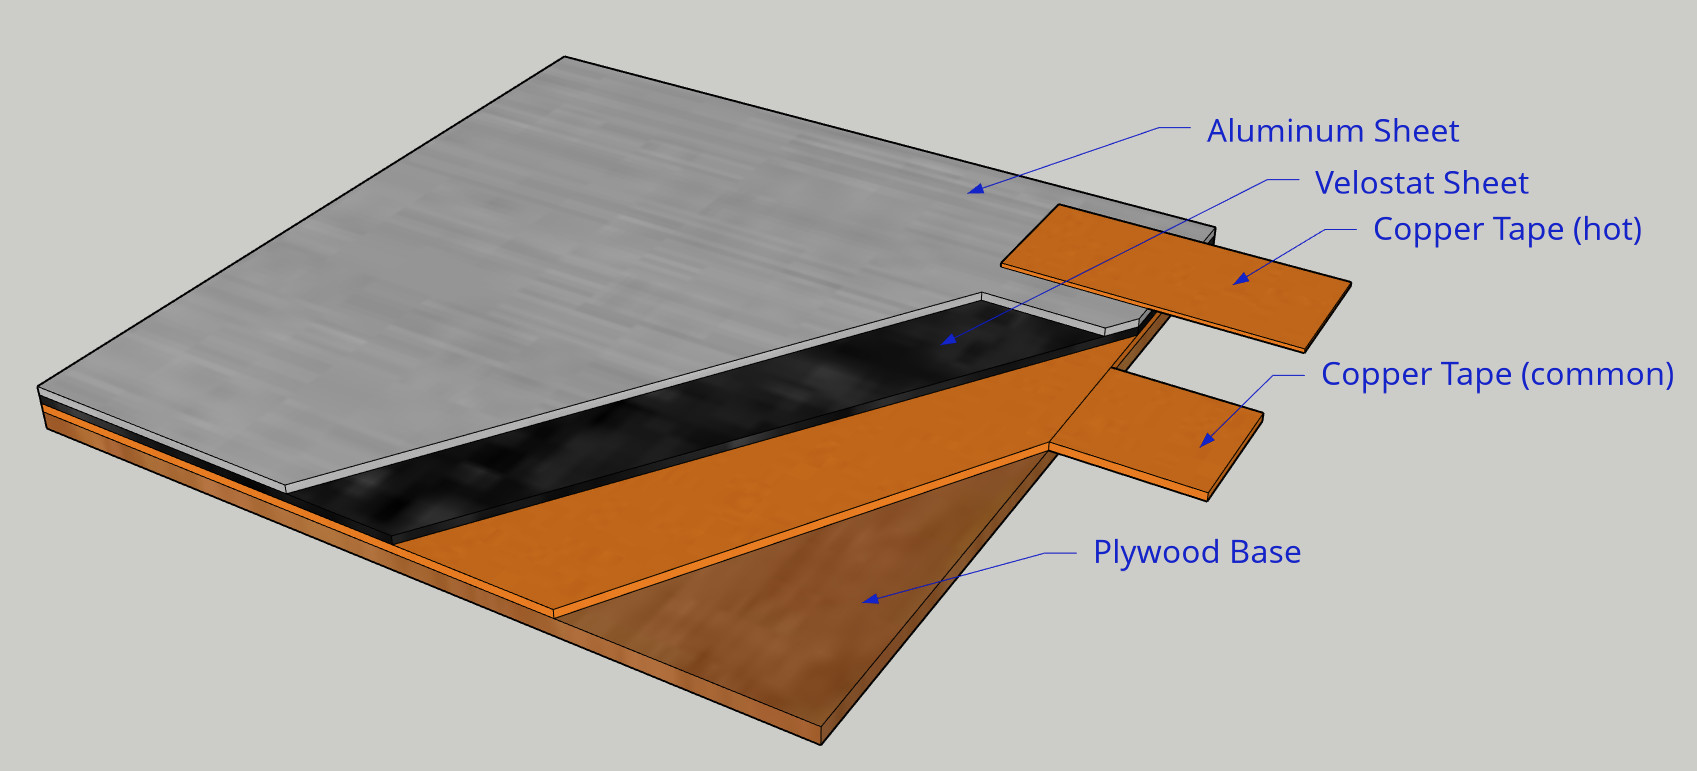 Cutaway diagram of a sensor sandwich. Two electrical contact layers are separated by a Velostat layer. When compressed, the Velostat resistance drops and the button is triggered.
This ddr dance pad design focuses on creating an inexpensive yet near-indestructible and competition-level precise controller, perfect for dedicated DDR and StepMania players.
Materials and Tools You’ll Need
Building this ddr dance pad requires readily available materials and common tools. Here’s a comprehensive list to get you started:
Bill of Materials
- Plywood: 34″ x 33″ for the base.
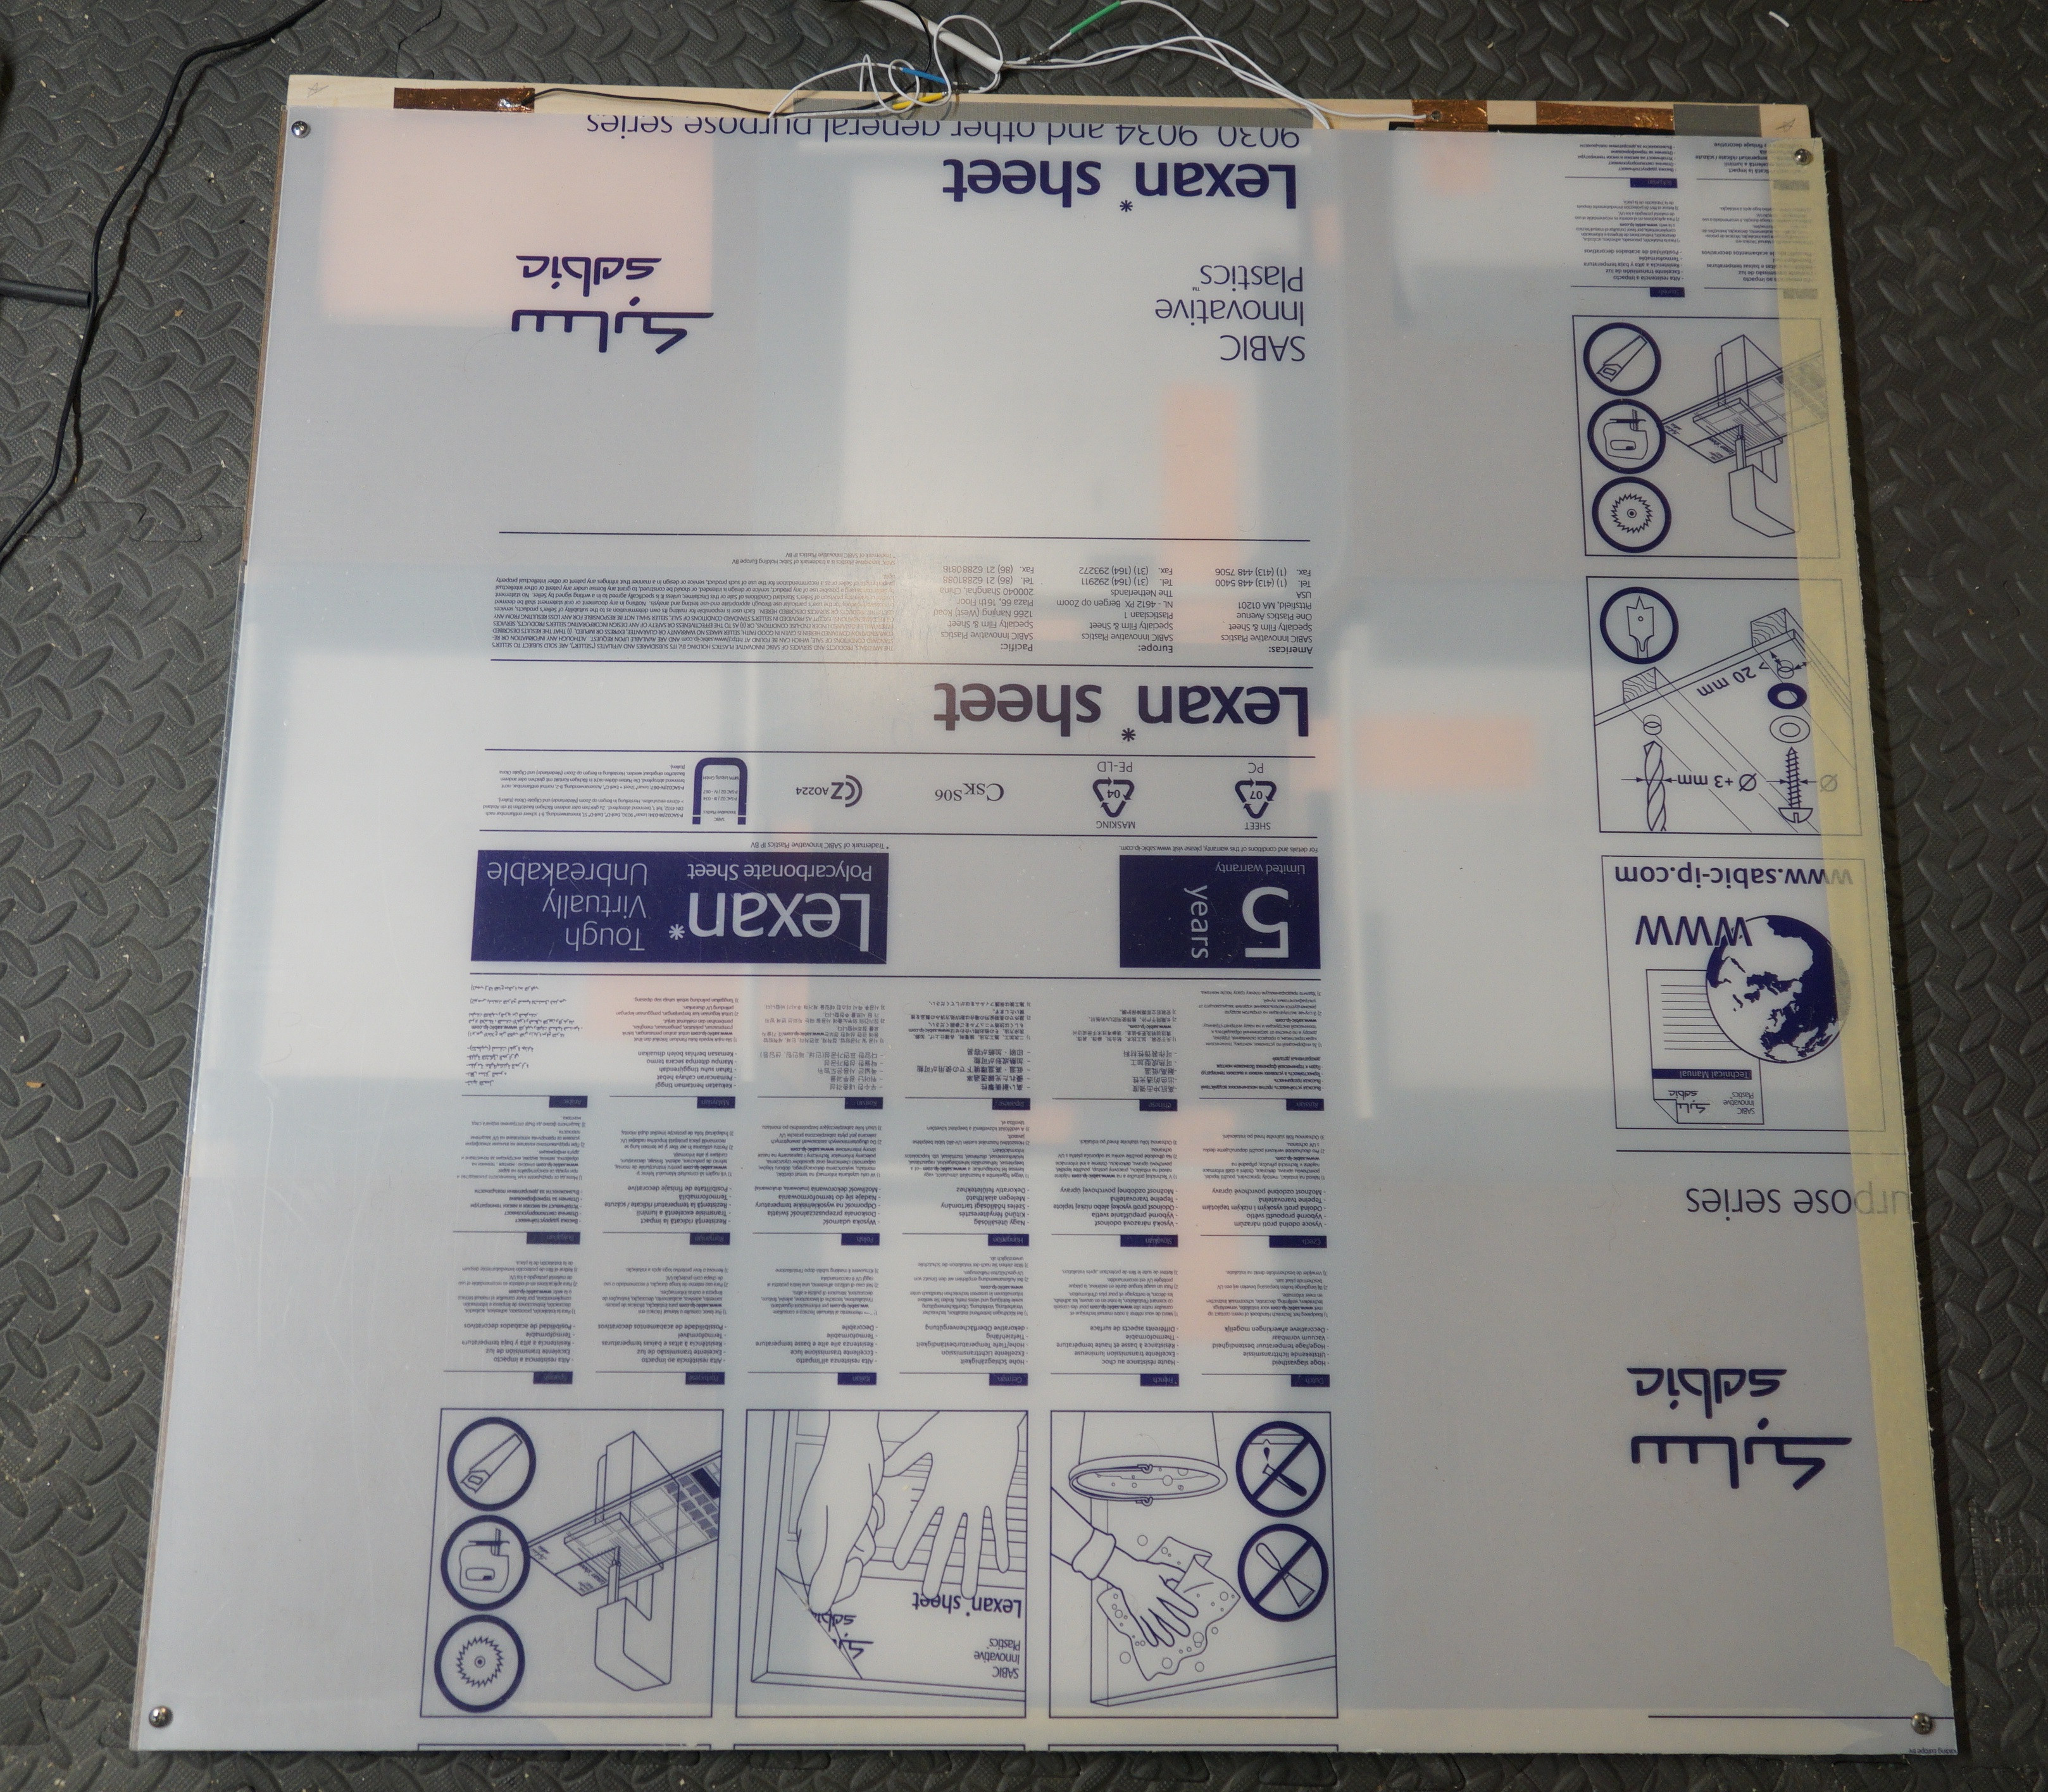
- Lexan Sheets (Polycarbonate): 2 sheets, 33″ x 33″ x 0.040″. Keep the protective sheet on during construction.
- MDF (Medium-Density Fiberboard):
- 2 pieces: 10.25″ x 10.25″
- 2 pieces: 5.25″ x 10.25″
- 1 piece: 9.5″ x 9.5″
- 4 strips: 5″ x 1″
- Sheet Metal:
- 4 pieces: 10.75″ x 10.75″, corners slightly clipped.
- 2 pieces: 4.5″ x 8″, corners slightly clipped.
- Velostat Sheets: 4 pieces, 11.25″ x 11.25″.
- Copper Tape: For electrical contacts.
- Weather Stripping: Foam weather stripping for step cushioning.
- Duct Tape: For securing sensor layers.
- Non-Slip Pad (Optional): For use on hard floors. Can be substituted with Plasti-Dip spray for a rubberized bottom.
- Poster Graphic & Spray Mount Glue (Optional): For cosmetic finishing.
- Wires: For internal wiring and connecting to the controller board.
- Solder & Soldering Iron: For wire connections.
- Heat Shrink Tubing: For insulating solder joints.
- T-Nuts & M5 Screws: For securing the Lexan top.
- Wood Glue: For MDF assembly.
- Glue Gun & Hot Glue: For wire management.
- Teensy LC Board (Microcontroller): https://www.pjrc.com/teensy/ (or compatible alternative)
- USB Cable: For connecting Teensy to your computer.
You can find many of these materials at local hardware stores or online retailers. The provided links in the original article are maintained here for your convenience and are not affiliate links.
Cut List
- Plywood: 34″ x 33″
- Lexan: 2x 33″ x 33″ x 0.040″
- MDF: 2x 10.25″ x 10.25″, 2x 5.25″ x 10.25″, 9.5″ x 9.5″, 4x 5″ x 1″
- Sheet Metal: 4x 10.75″ x 10.75″, 2x 4.5″ x 8″
- Velostat: 4x 11.25″ x 11.25″
These dimensions are for a borderless ddr dance pad. Adjustments will be needed if you prefer a classic style with borders.
Essential Tools
- Circular Saw or Utility Knife with Carbide Blade: For cutting plywood, MDF, and Lexan.
- Yard Stick or Ruler: For measuring and marking.
- Clamps: For securing materials during cutting and gluing.
- Drill & 1/4″ Drill Bit: For creating mounting holes.
- Hammer: For installing T-nuts.
- Screwdriver: For M5 screws.
- File: For smoothing sharp edges of sheet metal.
- Pencil: For marking guidelines.
- Scissors or Utility Knife: For cutting tape, Velostat, and weather stripping.
- Soldering Iron & Solder: For electrical connections.
- Wire Strippers: For preparing wires.
- Glue Gun: For hot glue application.
Step-by-Step Guide to Building Your DDR Dance Pad
Follow these detailed instructions to assemble your own high-performance ddr dance pad.
Preparing the Base and Sensor Locations
-
Mark Guidelines: On the plywood base, mark a margin at the front edge. Divide the remaining area into a 3×3 grid of 11″ squares. These lines will serve as guides for sensor placement and component alignment for your ddr dance pad.
-
Apply Copper Tape (Bottom Layer): Cut 11″ strips of copper tape and apply them to cover each sensor location within the marked grid. Overlap the strips by 1″ to ensure consistent electrical conductivity across the sensor areas of your ddr dance pad.
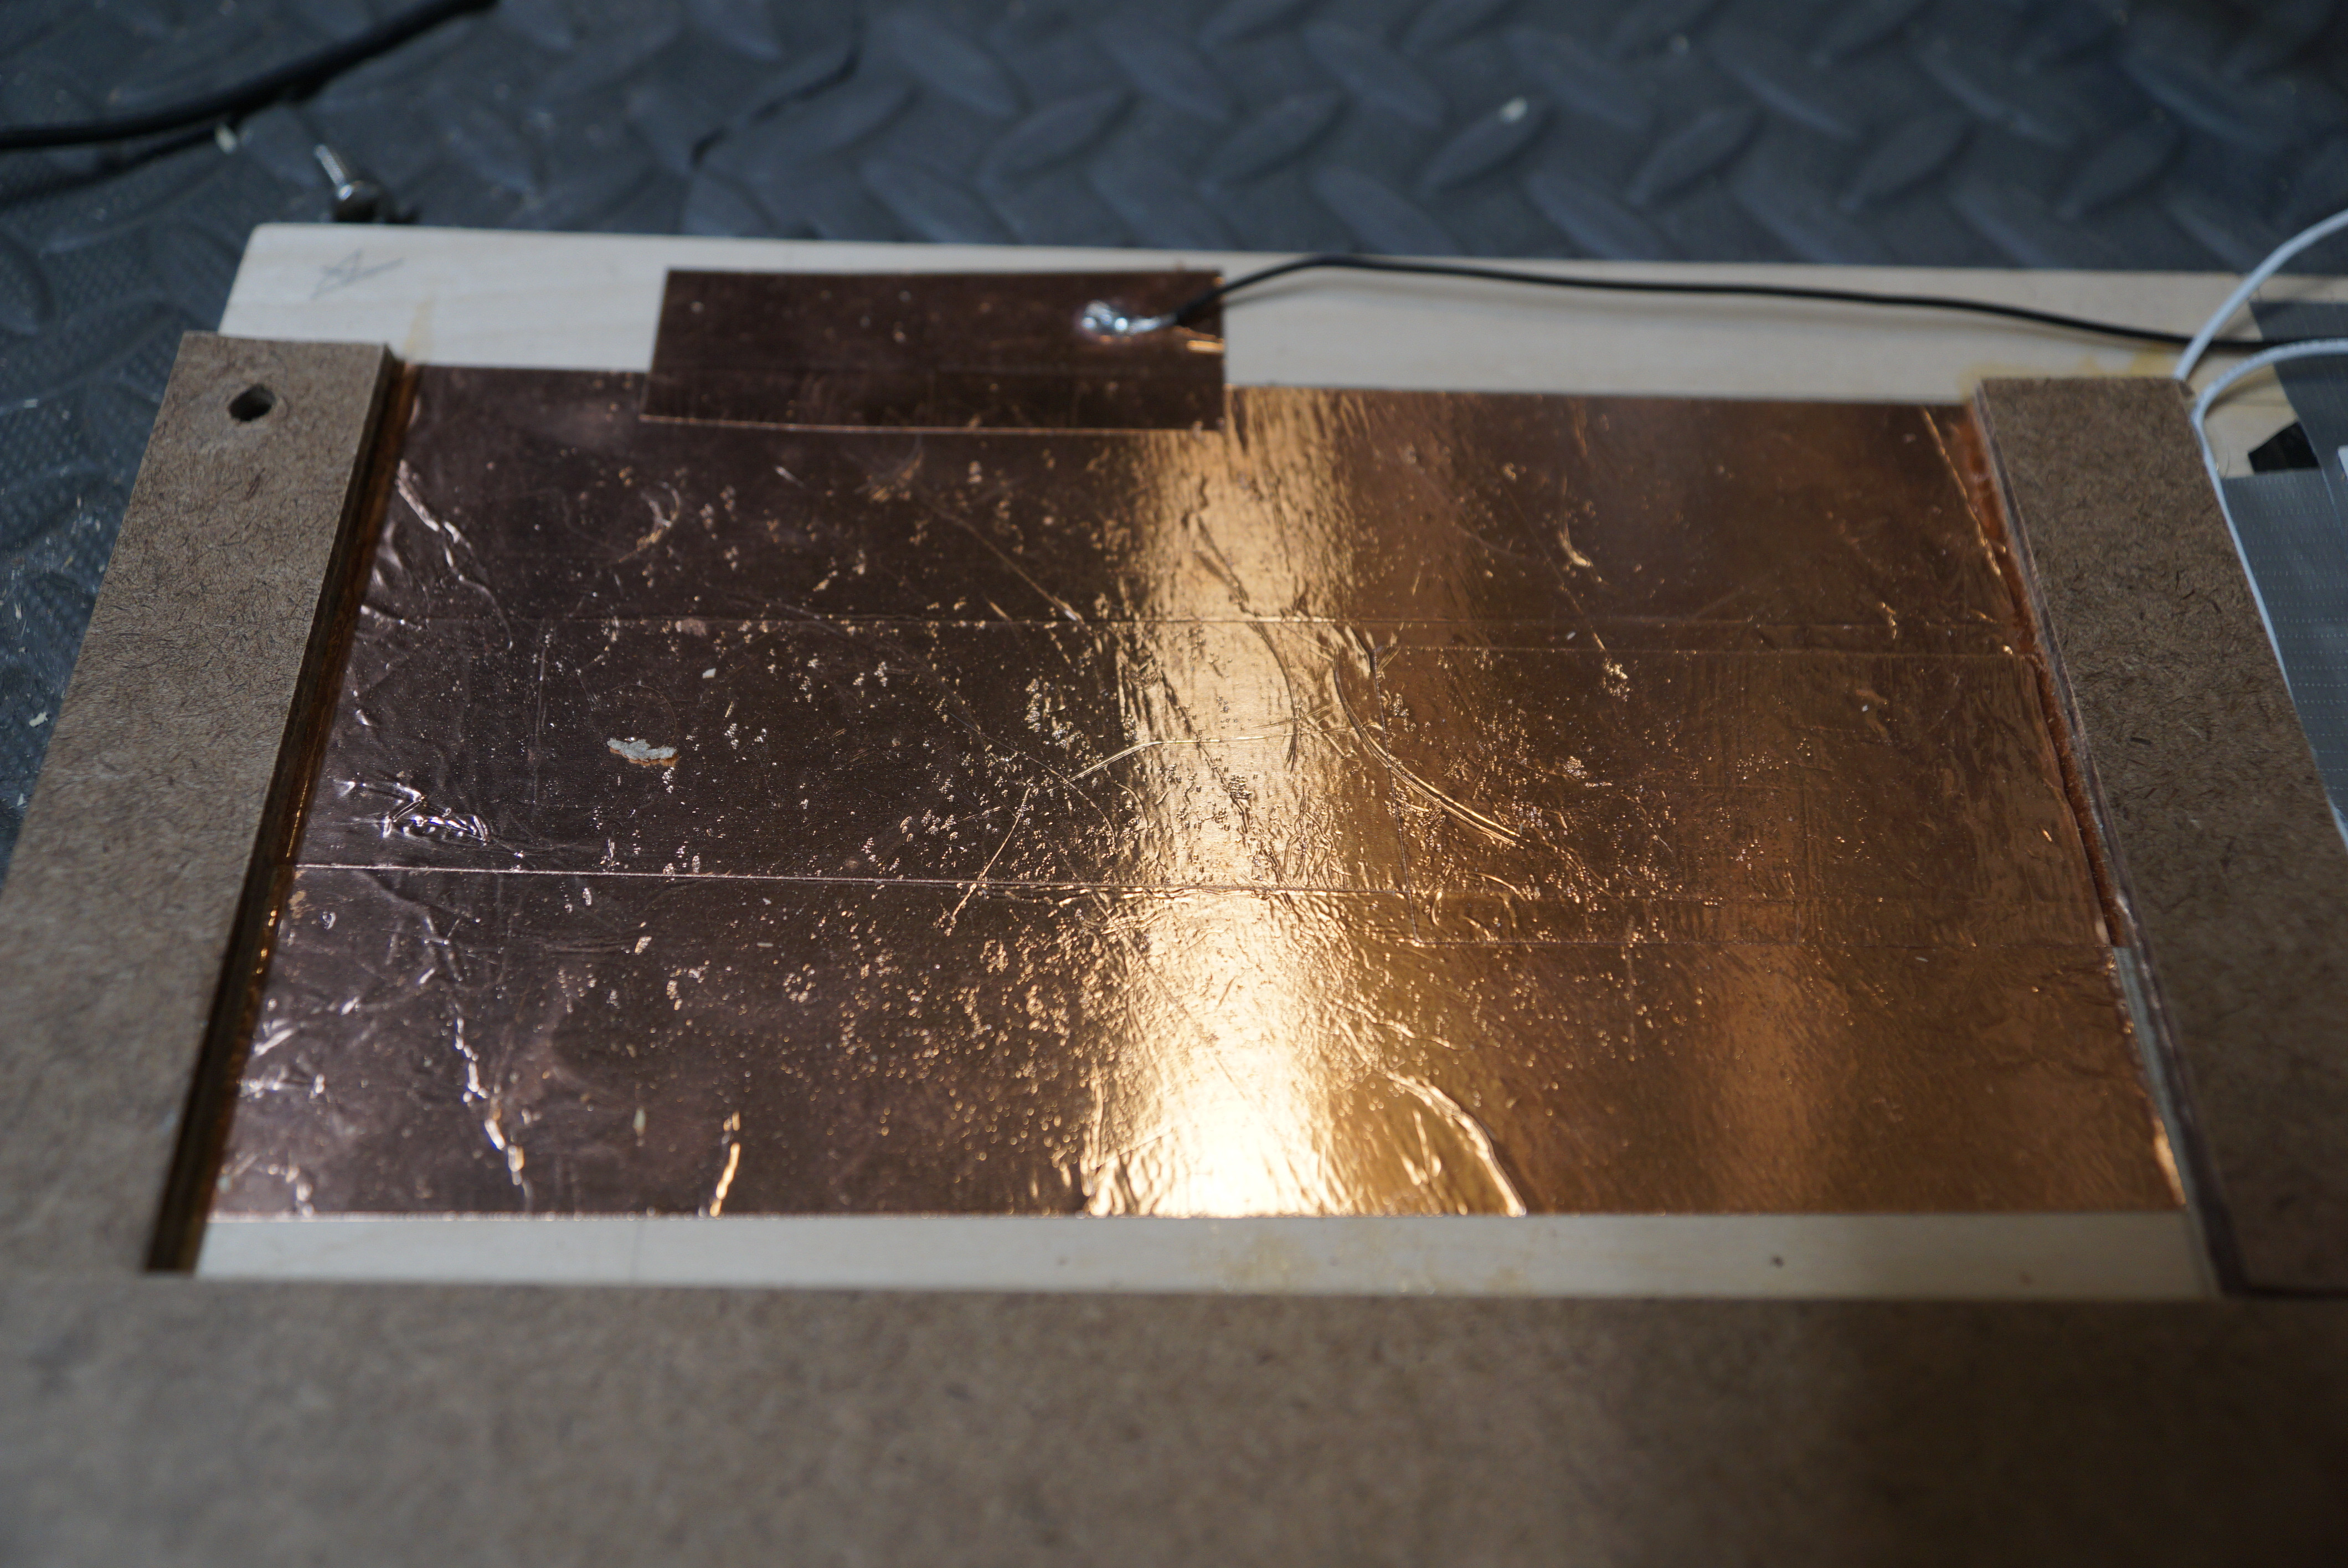 Close-up of the lower contact for the Select button.
 -
Create Common Contact: Run two long strips of copper tape to connect the Left/Right and Up/Down sensor locations. Add two more strips to connect the Start/Select sensor areas. These strips, along with the Start/Select sensor copper, will form the common ground contact for your ddr dance pad.
Assembling the MDF Frame
-
Glue MDF Corner Supports: Using wood glue, attach the MDF pieces to the plywood base in the non-sensor corners. Place the larger squares in the back corners, the smaller square in the center, and the rectangles in the front corners. Position them 0.75″ from the marked guidelines. Clamp or weigh down the MDF with heavy objects (like books) for at least 30 minutes to allow the glue to set properly, forming the structural frame of your ddr dance pad.
-
Add Upper Corner MDF Strips: Glue the MDF strips along the edges of the upper corners. These will frame the Start/Select buttons and create a defined area for these controls on your ddr dance pad.
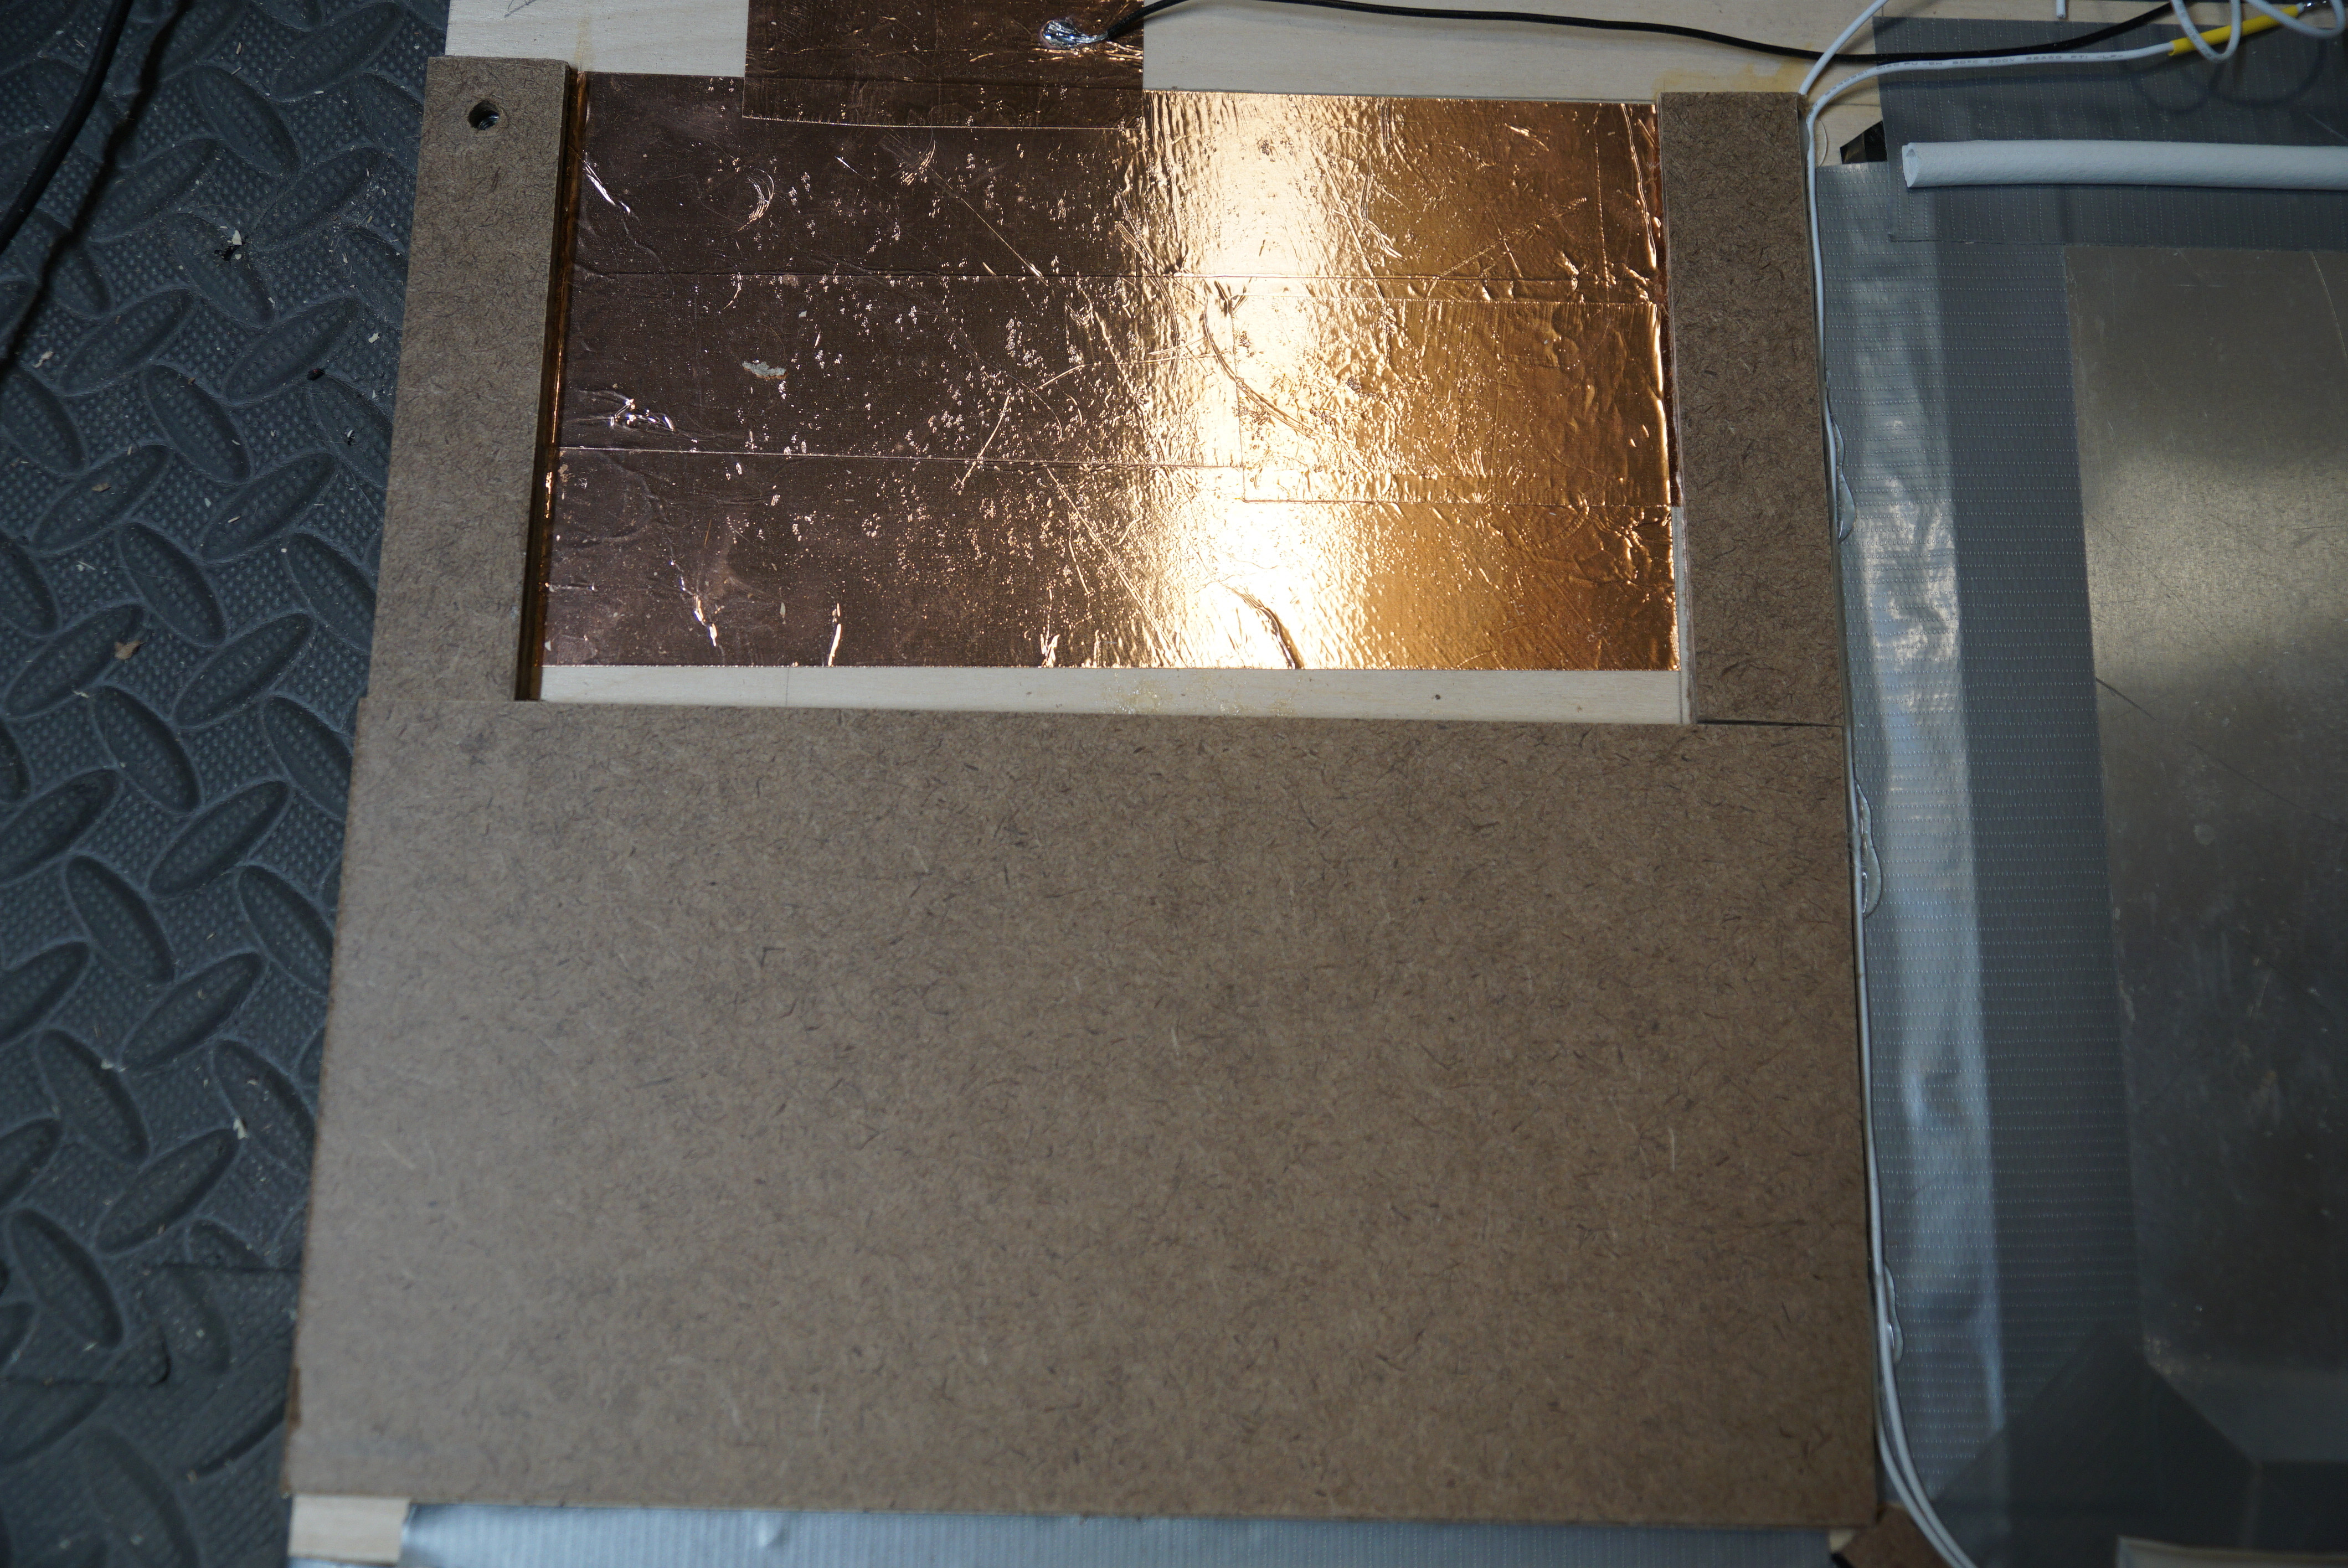 MDF laid out to frame the upper corner buttons.
Installing Velostat Sensors and Metal Contacts
-
Place Velostat Sheets: Position one Velostat sheet over each sensor location, ensuring it covers the entire copper contact below, except for the copper strip leading to other sensors. Gluing the Velostat is optional. Leave a small gap between the Velostat and the MDF frame, exposing a bit of plywood. This margin helps prevent accidental shorts and ensures proper sensor function in your ddr dance pad.
-
Position Sheet Metal Contacts: Carefully place the sheet metal top contacts over each Velostat sheet. Crucially, ensure the sheet metal does not directly touch the copper tape. Verify the Velostat is free of tears and bunching to prevent shorts. The cut dimensions are designed to provide a margin of safety for your ddr dance pad sensors.
-
Connect Top Contacts with Copper Tape: Attach copper tape from each sheet metal top contact to the inner cable channel area of the ddr dance pad. This will be the ‘hot’ connector for each sensor. Absolutely prevent this copper tape from contacting the common ground copper layer underneath the Velostat. If any copper is exposed where it shouldn’t be, use electrical tape to insulate it. It’s acceptable for the top copper layer to touch the Velostat.
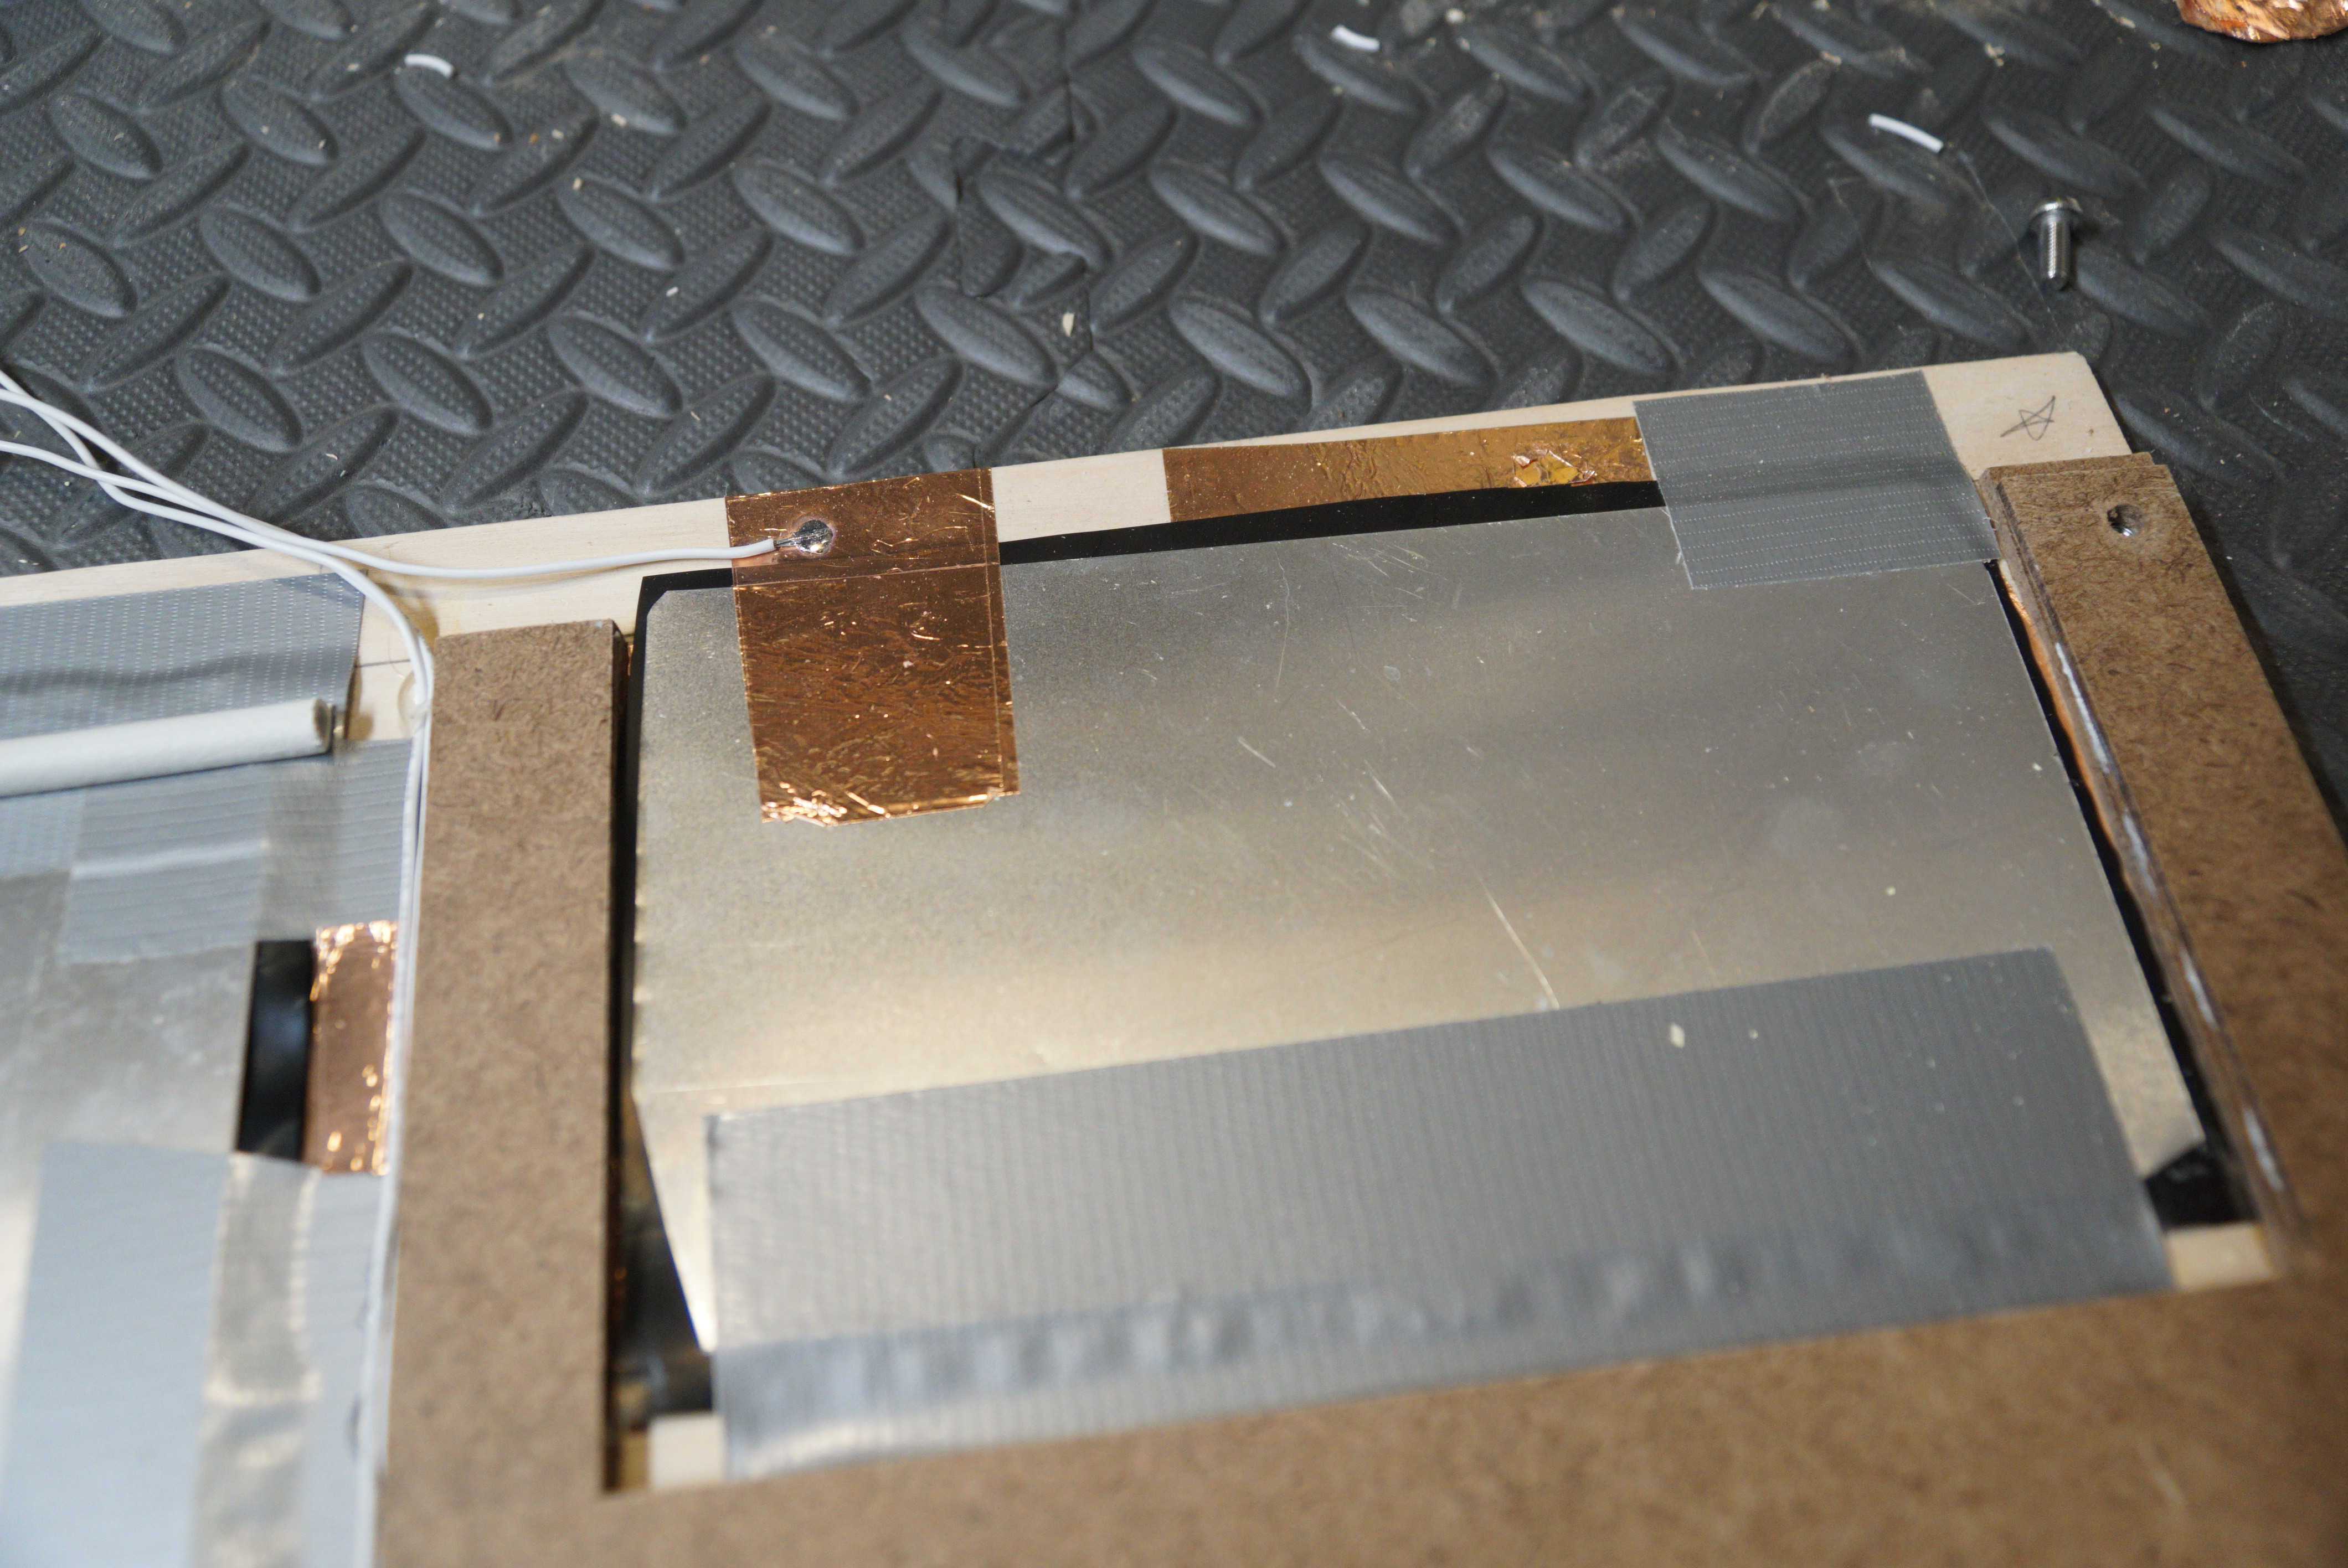 Less duct tape on the corner buttons, which makes it easier to see the layering here.
Securing Sensors and Weather Stripping
-
Duct Tape Sensor Sandwich: Use duct tape to firmly secure the sheet metal, Velostat, and copper tape layers together as a single sensor ‘sandwich’. Tape down all four edges of each sensor thoroughly, but avoid placing duct tape directly over the copper tape contact points. This creates a robust and sealed sensor unit for your ddr dance pad.
-
Glue MDF Corner Mini-Strips: Glue the MDF mini-strips into the corners, leaving a small channel for wire routing. These strips ensure clean separation between the main step panels and contribute to the tactile feel of your ddr dance pad.
Wiring and Electronics
-
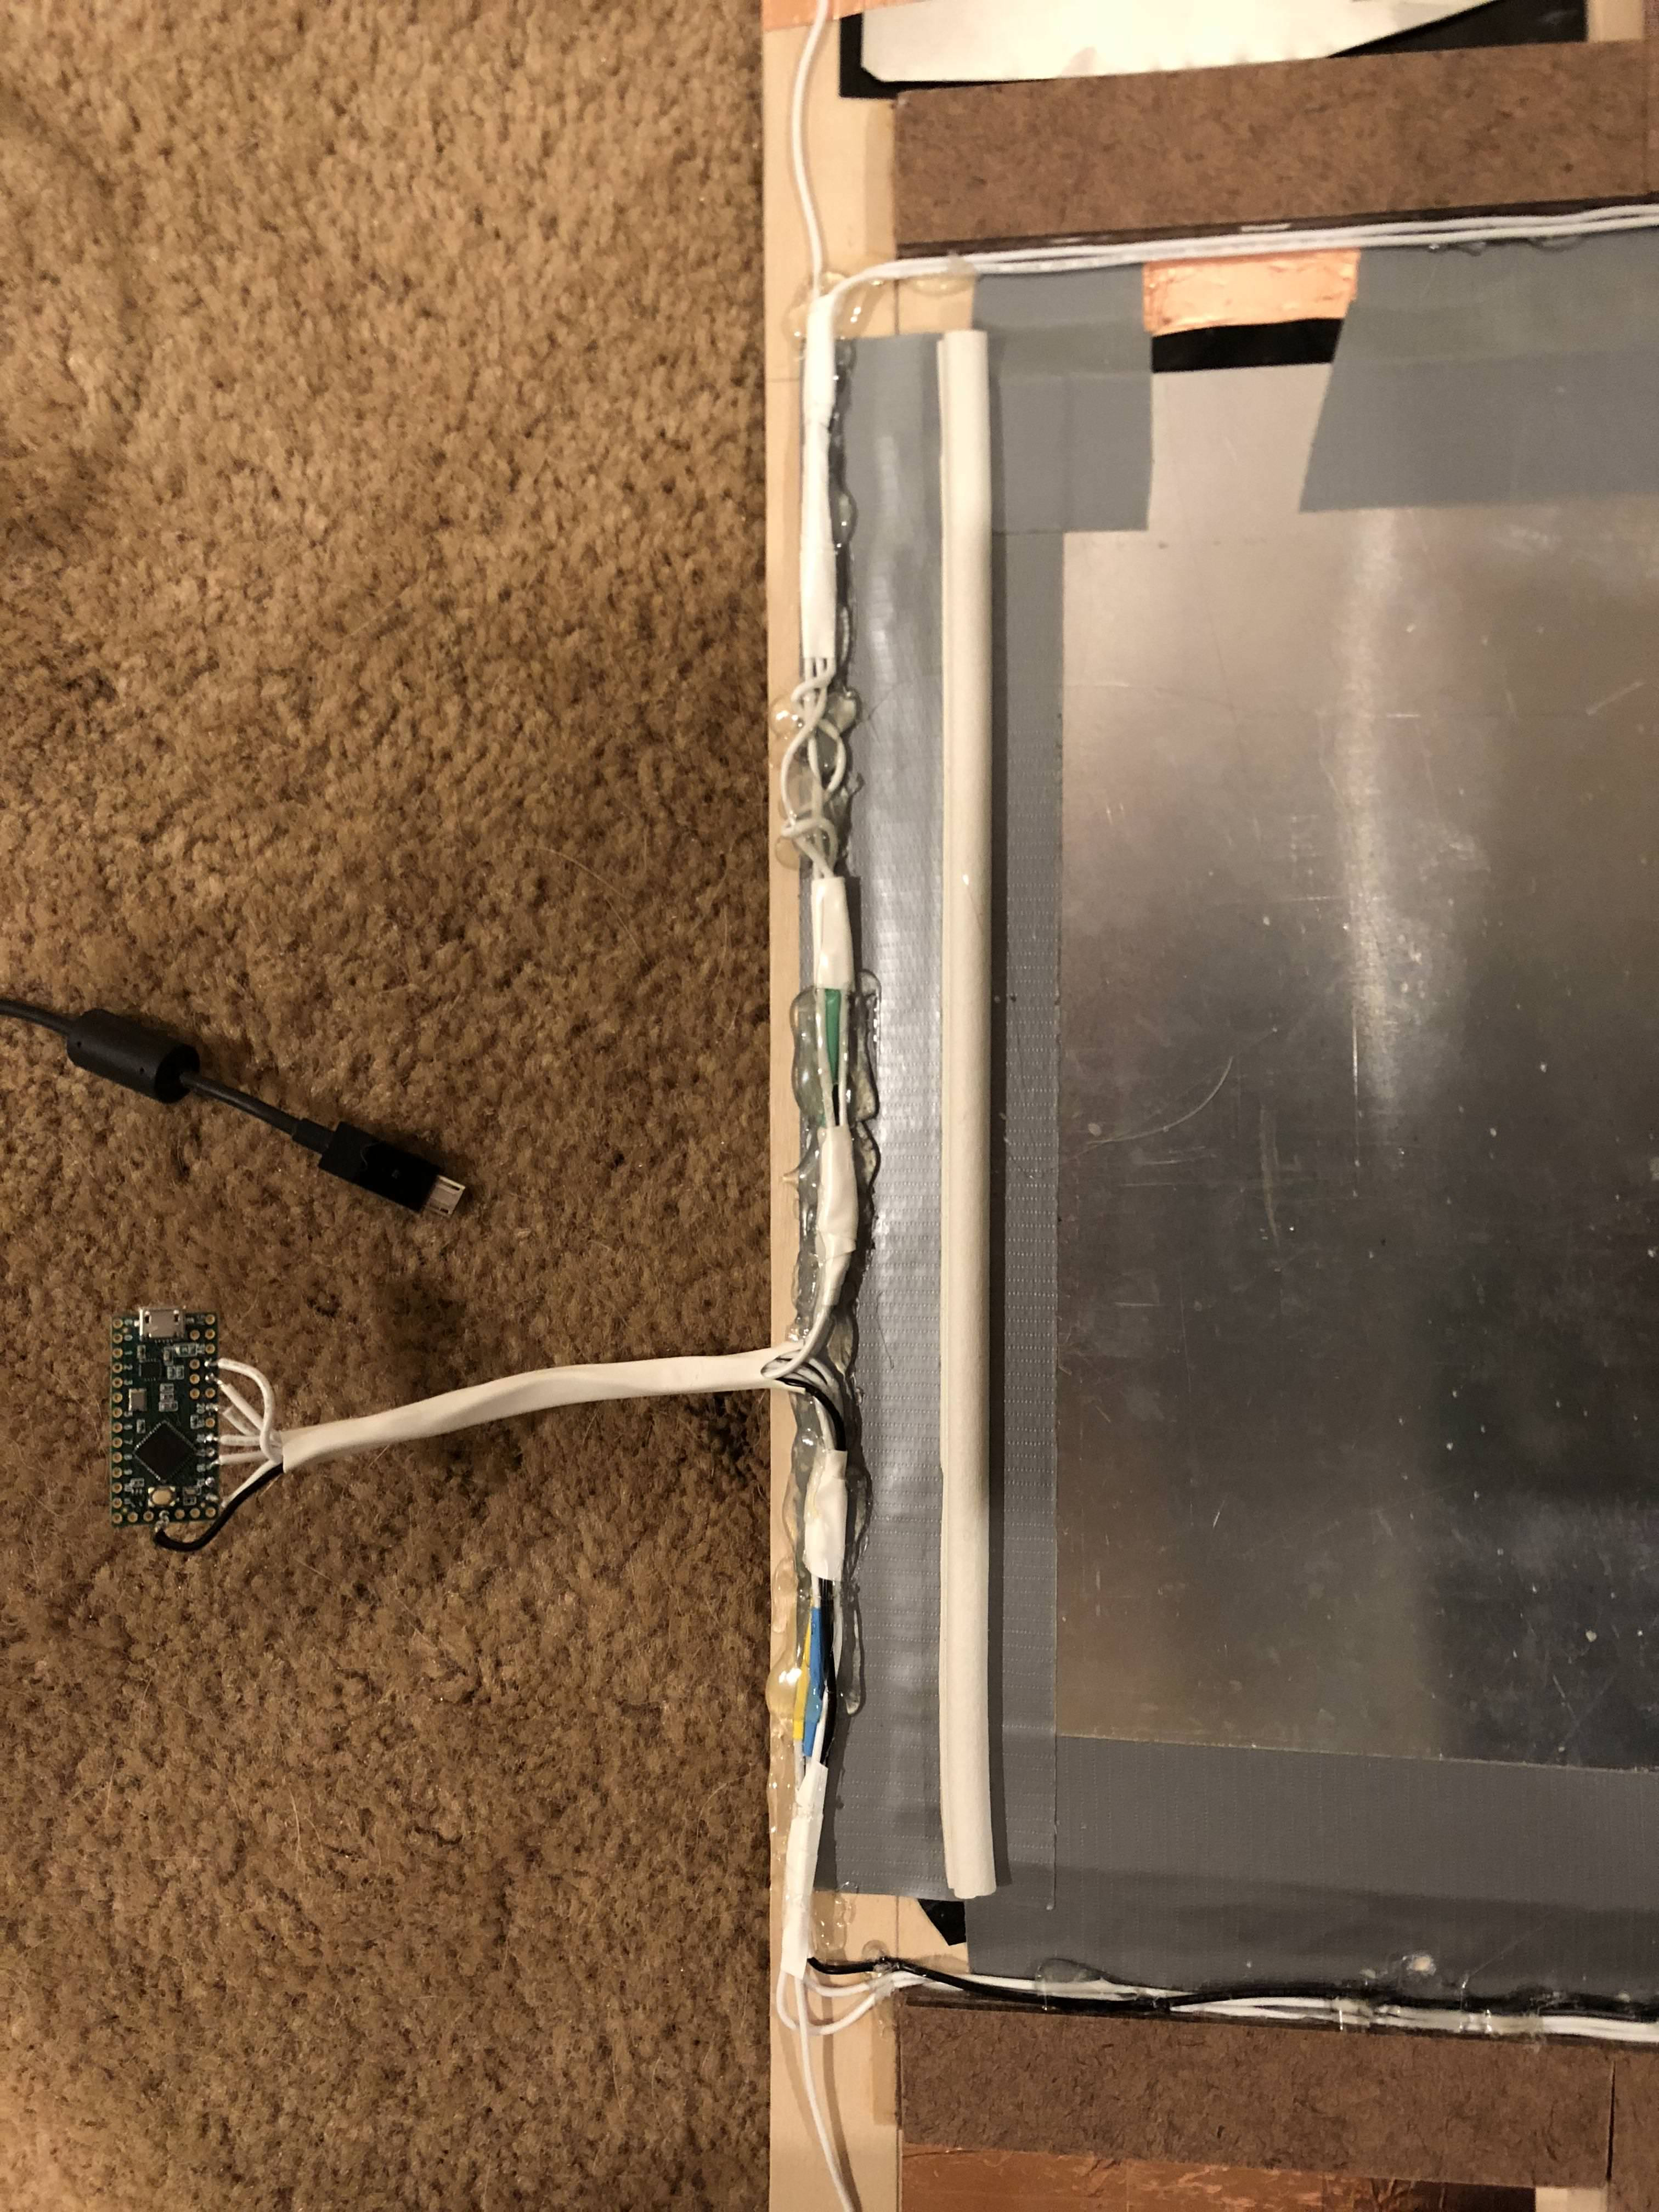
Route Internal Wiring: Solder one end of a white wire to each ‘hot’ copper tape contact on the sensors. Route these wires through the internal channels of the ddr dance pad and out to the top side. Choose one side (left or right) for wire exits for cleaner organization. Leave ample wire length (8-12″ recommended) for connecting to the Teensy board.
-
Connect Ground Wire: Choose a convenient point to connect a ground wire to the common ground copper tape layer and route it out to the top alongside the sensor wires.
-
Secure Wires with Hot Glue: Use a glue gun to strategically place blobs of hot glue along the internal wires to secure them in place and prevent movement. Keep the glue away from the sensor areas to avoid interfering with step registration on your ddr dance pad.
Final Assembly and Testing
-
Apply Weather Stripping: Split the weather stripping, cut it into 11″ pieces, and apply it to the top and bottom edges of each main sensor (excluding Start/Select buttons). Position the weather stripping on top of the sheet metal and duct tape, right at the sensor edges. This provides cushioning and defines the step areas of your ddr dance pad.
-
Align Lexan and Drill Mounting Holes: Place the Lexan sheet down, ideally elevated slightly. Carefully position the pad (MDF-down) on top of the Lexan, ensuring proper alignment. Clamp all layers firmly together. Using a 1/4″ drill bit, drill holes through all layers in the four corners of the ddr dance pad. Marking the Lexan’s orientation at this stage is advisable for consistent reassembly.
-
Install T-Nuts: Hammer T-nuts into the drilled holes on the plywood side of the ddr dance pad.
-
Secure Lexan Top: Flip the assembly face up. Thread M5 screws through the Lexan and into the T-nuts to securely fasten the Lexan top to the pad base.
-
Initial Testing: Your ddr dance pad is now mechanically complete! Test the step feel by pressing on each sensor. They should have a distinct, clicky feedback. If the steps feel too deep, adjustments can be made later.
 She’s not pretty yet, but she is fully functional.
Connecting the Brains: Teensy Board Setup
-
Wire to Teensy Board: Cut new white wires and solder one end of each to the Teensy board’s analog input pins (pins 14, 16, 18, 20, 22, and 23, corresponding to A0, A2, A4, A6, A8, and A9). This pin configuration provides spacing for easier soldering. Solder the other ends of these wires to the internal wires coming from the ddr dance pad sensors. Use heat shrink tubing to insulate the solder joints.
-
Install Arduino and Teensyduino: Install the Arduino IDE and Teensyduino add-on, following the instructions at https://www.pjrc.com/teensy/td_download.html. These are necessary for programming the Teensy board to function as the controller for your ddr dance pad.
-
Upload Code to Teensy: Create a new Arduino sketch and copy-paste the provided code (link in original article – https://pastebin.com/Y1vNZ56K) into it. In the Arduino IDE, go to Tools -> USB Type and select “Serial + Mouse + Keyboard + Joystick.” Run the code to upload it to the Teensy board.
-
Functionality Check: After uploading, test the ddr dance pad by stepping on each sensor. The on-board LED on the Teensy should light up when a sensor is pressed and turn off when released. If the LED stays lit when no sensor is pressed, check for shorts in your wiring.
-
StepMania Testing: Connect the Teensy-equipped ddr dance pad to your computer via USB and launch StepMania. Test the pad thoroughly in-game to ensure all sensors are registering correctly and the pad is functioning as expected.
 Hot glued the hell out of the wires to secure them. Be neater than this.
Finishing Touches and Graphics
- Apply Non-Slip Layer (Optional): If using a non-slip layer, cut it to size. Apply spray glue to both the non-slip layer and the plywood back of the ddr dance pad, then adhere them together.
- Install Graphic (Optional): Unscrew the Lexan top and remove the protective film from the inside face. Place your printed graphic face down on the Lexan, ensuring correct orientation. Apply spray mount adhesive evenly and glue the poster to the Lexan.
- Final Assembly: Use a utility knife to carefully cut notches in the poster for the screw holes. Reattach the Lexan sheet to the top of the ddr dance pad with the screws.
Your DIY ddr dance pad is now complete and ready for countless hours of DDR and StepMania enjoyment!
Tips for a Perfect Build
Here are some helpful tips to ensure a smooth and successful ddr dance pad build:
Cutting Sheet Metal and Materials
- Sheet Metal Cutting: The easiest method for cutting sheet metal is to use a carbide blade utility knife. Clamp the sheet metal between a plywood backing and a yardstick. Score along the cut line repeatedly until the metal bends and breaks cleanly. File down any sharp edges, directing any burr upwards away from the Velostat layer to prevent damage.
- Circular Saw Tracks: Consider using DIY or commercial circular saw tracks for precise and straight cuts on plywood, MDF, and Lexan. Ensure materials are securely clamped during cutting.
Accurate Cutting Techniques
- Blade Selection: When using a circular saw for Lexan and plywood/MDF, use a blade with a high tooth count (at least 40T, ideally 60+ teeth) for cleaner cuts and reduced chipping, especially on Lexan.
- Sacrificial Plywood for Lexan: For the cleanest cuts on Lexan, sandwich it between sacrificial plywood sheets. This minimizes chipping and cracking.
Customizing Your Dance Pad
This ddr dance pad design is easily customizable to suit your preferences.
Adjusting Sensitivity
- Cardboard Shims: To increase sensitivity and soften the step feel, cut cardboard sheets (approximately 10″ x 11″) and place them on top of the Velostat sensors, underneath the weather stripping. Experiment with different thicknesses and layers of cardboard to achieve your desired sensitivity level. Double-sided tape can help secure the cardboard shims in place.
Fine-Tuning Step Feel
- Weather Stripping Adjustment: Adding more weather stripping around the sensor edges can alter the step feel, making it potentially softer or more defined. Experiment to see if this suits your play style, though the original design found this less desirable for precise play.
- Internal Foam or Rubber: Inserting thin rubber or foam sheets inside the sensor sandwich can dramatically increase sensitivity, creating a very soft, “ignition-style” feel. However, this can make precise play more challenging. Proceed with caution if considering this modification for your ddr dance pad.
Future Improvements and Wireless Dreams
- Copper Tape Top Layer: For enhanced sensitivity, consider using copper tape on Lexan squares for the top contact layer instead of sheet aluminum. This “V4” sensor design improves responsiveness. You’ll need to adjust the trigger threshold in the code accordingly.
- Lower Cost Lexan Alternatives: Explore options for reducing Lexan costs by using it only in the step areas. Developing a design that maintains proper step movement and edge-to-edge sensitivity with less Lexan is a future design goal.
- Wireless Connectivity: Future iterations aim to incorporate Bluetooth wireless connectivity using boards like the Adafruit Feather HUZZAH32, creating a truly wireless ddr dance pad.
Conclusion: Step Up Your Game with a DIY DDR Dance Pad
By building this DIY ddr dance pad, you’re not just saving money; you’re crafting a high-performance, durable, and customizable controller that rivals and even surpasses commercial options. This guide provides all the information you need to create a ddr dance pad that will enhance your DDR and StepMania experience for years to come. Step up to the challenge and build your ultimate dance pad today!
 It
It
[