
Navigating life after laparoscopic surgery can bring up many questions, especially for dancers eager to return to their passion. At ten-dance.com, we understand your desire to get back on the dance floor and are here to guide you through a safe and effective recovery. This article will explore when and how you can resume dancing, focusing on minimizing risks and maximizing your recovery, incorporating insights from top medical and dance professionals. Embrace a smooth return to your dance journey with advice that blends medical knowledge with dance-specific considerations, ensuring you’re well-prepared to leap back into action. Discover recovery tips, alternative dance workouts, and resources for a confident comeback.
1. What is Laparoscopic Surgery and How Does it Affect My Body?
Laparoscopic surgery is a minimally invasive surgical technique where operations are performed through small incisions using a camera and specialized instruments. Instead of a large incision, surgeons make several small cuts—typically less than half an inch each. This approach generally results in less pain, shorter hospital stays, and quicker recovery times compared to traditional open surgery. According to research from the Society of American Gastrointestinal and Endoscopic Surgeons (SAGES), patients undergoing laparoscopic procedures often experience reduced postoperative discomfort and faster return to normal activities.
1.1. Understanding the Procedure
During laparoscopic surgery, the abdomen is inflated with carbon dioxide gas to create space for the surgeon to view and operate. A laparoscope, a thin tube with a camera attached, is inserted through one of the incisions, providing a magnified view of the internal organs on a monitor. Surgical instruments are then inserted through other small incisions to perform the necessary procedures. The benefits of this technique include smaller scars, reduced risk of infection, and less internal trauma.
1.2. How Laparoscopic Surgery Differs from Open Surgery
Open surgery involves making a large incision to access the abdominal cavity directly. While open surgery is necessary for certain complex conditions, it typically leads to more significant tissue damage, increased pain, longer recovery periods, and a higher risk of complications such as hernias. Laparoscopic surgery minimizes these risks by reducing the size and number of incisions, leading to faster healing and less scarring.
1.3. Common Laparoscopic Procedures
Laparoscopic surgery is used for a variety of procedures, including:
- Cholecystectomy: Removal of the gallbladder.
- Appendectomy: Removal of the appendix.
- Hernia Repair: Repair of abdominal hernias.
- Hysterectomy: Removal of the uterus.
- Colon Resection: Removal of part of the colon.
 Laparoscopic surgery
Abdominal Laparoscopic Surgery
1.4. Initial Recovery Phases
-
Phase 1: Immediate Post-Op (Days 1-3): Focus on rest, pain management, and gentle movement like walking to improve circulation and prevent blood clots.
- Rest: Get plenty of sleep and avoid strenuous activities.
- Pain Management: Take prescribed pain medication as directed.
- Hydration: Drink plenty of fluids to stay hydrated.
- Gentle Movement: Walk short distances to promote circulation.
-
Phase 2: Early Recovery (Weeks 1-2): Gradually increase activity levels, but avoid heavy lifting or strenuous exercise.
- Increase Activity: Gradually increase walking distance and light activities.
- Avoid Heavy Lifting: Refrain from lifting anything heavier than 10 pounds.
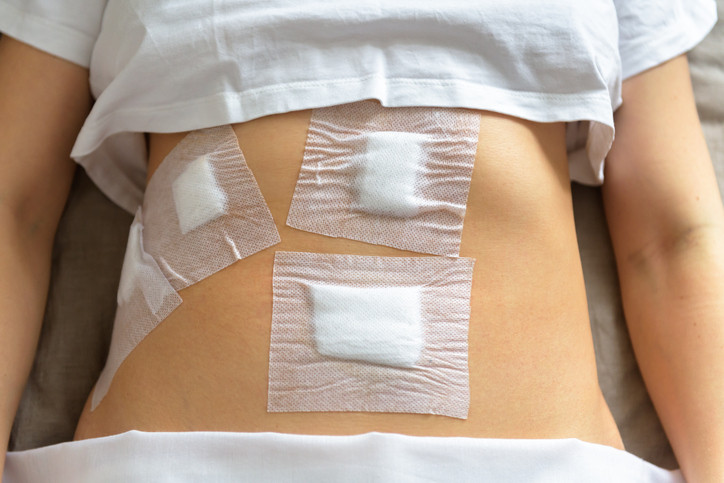
- Monitor Incisions: Keep an eye on incisions for signs of infection.
- Nutrition: Eat a balanced diet to promote healing.
-
Phase 3: Intermediate Recovery (Weeks 3-6): Begin incorporating light exercises and activities as tolerated.
- Light Exercises: Start with gentle stretching and low-impact exercises.
- Listen to Your Body: Pay attention to any pain or discomfort and adjust accordingly.
- Gradual Progression: Slowly increase the intensity and duration of activities.
- Consult Your Doctor: Discuss any concerns with your healthcare provider.
1.5. Potential Complications to Watch For
While laparoscopic surgery is generally safe, potential complications can occur:
- Infection: Redness, swelling, or discharge at the incision sites.
- Bleeding: Excessive bleeding from the incisions.
- Blood Clots: Pain or swelling in the legs, shortness of breath.
- Hernia: Bulging at the incision site.
- Adhesions: Scar tissue that can cause pain or bowel obstruction.
If you experience any of these symptoms, contact your healthcare provider immediately.
2. How Soon Can I Start Dancing After Laparoscopic Surgery?
The timeline for returning to dancing after laparoscopic surgery varies, but generally, it’s safe to start with gentle movements around 3-4 weeks post-surgery, provided your surgeon approves. According to the American College of Surgeons, the recovery period depends on the type of surgery and individual healing rate. The recommendation is to gradually increase activity levels.
2.1. General Recovery Timeline
| Recovery Stage | Timeline | Activities | Considerations |
|---|---|---|---|
| Immediate Post-Op | Days 1-3 | Rest, light walking | Focus on pain management and preventing blood clots. |
| Early Recovery | Weeks 1-2 | Gradual increase in walking, light household activities | Avoid heavy lifting (over 10 lbs) and strenuous activities. |
| Intermediate Recovery | Weeks 3-6 | Light exercises, gentle stretching, modified dance movements | Listen to your body and avoid any movements that cause pain or discomfort. Consult your doctor before starting any new exercise regimen. |
| Full Recovery | 6 weeks+ | Return to normal activities, including full dance routines | Continue to monitor for any signs of complications and gradually increase intensity. |
2.2. Factors Influencing Recovery Time
Several factors can influence your recovery time:
- Type of Surgery: More complex procedures may require a longer recovery period.
- Overall Health: General health, fitness level, and any pre-existing conditions can affect healing.
- Age: Younger individuals may recover faster than older adults.
- Adherence to Post-Op Instructions: Following your surgeon’s recommendations is crucial for a smooth recovery.
2.3. Consulting Your Surgeon
Before resuming any dance activities, it is essential to consult with your surgeon. They can assess your healing progress and provide personalized recommendations based on your specific situation. During the consultation, discuss:
- Your dance routine and the types of movements involved.
- Any pain or discomfort you are experiencing.
- Your goals for returning to dance.
2.4. Red Flags to Watch For
Pay attention to your body and watch for any of the following red flags:
- Increased Pain: Persistent or worsening pain at the incision sites or in the abdomen.
- Swelling: Excessive swelling or redness around the incisions.
- Fever: A temperature of 100.4°F (38°C) or higher.
- Discharge: Pus or fluid leaking from the incisions.
- Nausea or Vomiting: Persistent nausea or vomiting.
- Constipation: Inability to pass stool or gas.
If you experience any of these symptoms, contact your healthcare provider immediately.
3. What Types of Dance Can I Do Initially?
Starting slowly is key. Gentle forms of dance like ballet barre work, basic ballroom steps, or light contemporary movements are good options, as they minimize stress on the abdominal area. According to the Harkness Center for Dance Injuries, gradual re-introduction of dance activities is essential to avoid setbacks.
3.1. Recommended Dance Styles for Early Recovery
- Ballet Barre Work: Focus on posture, alignment, and gentle stretches without strenuous jumps or turns.
- Ballroom Dancing: Start with basic steps and slow tempos, avoiding dips and quick movements.
- Contemporary Dance: Emphasize fluid, controlled movements and floor work.
- Yoga and Pilates: Modified versions of these practices can improve core strength and flexibility.
- Tai Chi: Gentle, flowing movements that promote balance and coordination.
3.2. Dance Styles to Avoid Initially
- High-Impact Dance: Avoid jumping, leaping, and fast turns, which can strain the abdominal muscles.
- Contact Improvisation: This style involves close physical contact and unpredictable movements, increasing the risk of injury.
- Acrobatic Dance: Acrobatic elements can put excessive pressure on the healing tissues.
- Pole Dancing: Requires significant core strength and abdominal engagement.
- Hip-Hop: High-energy movements and isolations can be too intense in the early stages of recovery.
3.3. Modifying Your Dance Routine
Adjusting your dance routine to accommodate your recovery is essential. Consider these modifications:
- Reduce Intensity: Lower the tempo and complexity of the movements.
- Shorten Sessions: Start with shorter dance sessions and gradually increase the duration.
- Focus on Technique: Use this time to refine your technique and alignment.
- Avoid High-Impact Movements: Substitute jumps and leaps with gentler steps.
- Use Support: Wear supportive clothing or use props like a chair or barre for balance.
3.4. Sample Modified Dance Routine
| Warm-Up (10 minutes) | Main Activity (20 minutes) | Cool-Down (10 minutes) |
|---|---|---|
| Gentle stretches | Basic ballet barre exercises | Gentle stretches and deep breathing |
| Arm circles | Slow ballroom steps (e.g., waltz) | Foam rolling (avoiding the abdominal area) |
| Ankle rotations | Fluid contemporary movements (floor work) | Meditation or visualization |
| Deep breathing exercises | Modified yoga poses (e.g., cat-cow, child’s pose) | Light massage (avoiding the incision sites) |
4. Exercises to Support Your Recovery
Specific exercises can aid your recovery and prepare you for dancing again. Core strengthening exercises, like gentle pelvic tilts and diaphragmatic breathing, can help rebuild abdominal strength, according to physical therapy guidelines from the Cleveland Clinic.
4.1. Core Strengthening Exercises
- Pelvic Tilts: Lie on your back with knees bent and feet flat on the floor. Gently tilt your pelvis upward, engaging your abdominal muscles. Hold for a few seconds and repeat.
- Diaphragmatic Breathing: Lie on your back with one hand on your chest and the other on your abdomen. Inhale deeply through your nose, allowing your abdomen to rise. Exhale slowly through your mouth, feeling your abdomen fall.
- Transverse Abdominis Activation: Lie on your back with knees bent and feet flat on the floor. Gently draw your belly button towards your spine, engaging your deep abdominal muscles. Hold for a few seconds and repeat.
4.2. Flexibility and Mobility Exercises
- Gentle Stretching: Stretch your arms, legs, and back gently, avoiding any movements that cause pain or discomfort.
- Shoulder Rolls: Roll your shoulders forward and backward to improve mobility and reduce tension.
- Ankle Pumps and Circles: Pump your ankles up and down and rotate them in circles to improve circulation.
4.3. Postural Exercises
- Wall Slides: Stand with your back against a wall, feet shoulder-width apart. Slide your back down the wall, bending your knees slightly, and then slide back up.
- Chin Tucks: Sit or stand with good posture. Gently tuck your chin towards your chest, lengthening the back of your neck.
- Scapular Squeezes: Sit or stand with good posture. Squeeze your shoulder blades together, holding for a few seconds and repeat.
4.4. Gradual Progression
- Start Slowly: Begin with a few repetitions of each exercise and gradually increase the number as you get stronger.
- Listen to Your Body: Pay attention to any pain or discomfort and stop if needed.
- Consistency is Key: Perform these exercises regularly to support your recovery and improve your dance performance.
5. Alternative Dance Activities During Recovery
While you’re recovering, explore activities like choreography, dance history study, or even teaching beginner classes, which allow you to stay connected to dance without physically straining your body. The International Association for Dance Medicine & Science (IADMS) supports continued engagement in dance-related activities during recovery to maintain mental and emotional well-being.
5.1. Choreography
- Create New Routines: Use this time to develop new dance routines, focusing on creative expression and movement quality rather than physical exertion.
- Collaborate with Others: Work with other dancers or choreographers to brainstorm ideas and refine your choreography.
- Visualize Movements: Practice visualizing the movements in your mind, which can help improve your technique and performance.
5.2. Dance History Study
- Explore Different Genres: Learn about the history and evolution of different dance genres, from ballet to hip-hop.
- Research Influential Dancers: Study the lives and works of influential dancers and choreographers.
- Watch Performances: Watch recordings of famous dance performances to gain inspiration and learn new techniques.
5.3. Teaching Beginner Classes
- Share Your Knowledge: Teach beginner dance classes to share your knowledge and passion for dance with others.
- Focus on Fundamentals: Emphasize the fundamentals of dance, such as posture, alignment, and basic steps.
- Adapt to Different Levels: Adjust your teaching style to accommodate different skill levels and learning styles.
5.4. Online Dance Resources
- Virtual Dance Classes: Participate in virtual dance classes to stay active and learn new skills.
- Dance Tutorials: Watch online dance tutorials to improve your technique and learn new routines.
- Dance Communities: Join online dance communities to connect with other dancers and share your experiences.
6. Optimizing Your Diet for Recovery
Nutrition plays a vital role in recovery. Focus on a balanced diet rich in protein, vitamins, and minerals to support tissue repair and energy levels. According to the Academy of Nutrition and Dietetics, adequate protein intake is essential for wound healing and muscle recovery.
6.1. Key Nutrients for Recovery
- Protein: Essential for tissue repair and muscle recovery. Good sources include lean meats, poultry, fish, eggs, beans, and lentils.
- Vitamin C: Supports collagen production and wound healing. Found in citrus fruits, berries, and leafy green vegetables.
- Vitamin D: Important for bone health and immune function. Sources include fatty fish, eggs, and fortified foods.
- Zinc: Supports immune function and wound healing. Found in meat, poultry, seafood, and nuts.
- Iron: Helps carry oxygen to tissues and supports energy production. Sources include lean meats, beans, and leafy green vegetables.
6.2. Foods to Promote Healing
| Food Group | Examples | Benefits |
|---|---|---|
| Protein Sources | Chicken, fish, beans, lentils, tofu | Supports tissue repair and muscle recovery |
| Fruits and Vegetables | Citrus fruits, berries, leafy greens, bell peppers | Provides vitamins, minerals, and antioxidants for wound healing and immune function |
| Whole Grains | Brown rice, quinoa, oats | Provides energy and fiber for digestive health |
| Healthy Fats | Avocados, nuts, seeds, olive oil | Supports hormone production and reduces inflammation |
6.3. Hydration
- Drink Plenty of Water: Stay hydrated by drinking plenty of water throughout the day.
- Avoid Sugary Drinks: Limit sugary drinks, which can hinder the healing process.
- Electrolyte Balance: Replenish electrolytes with sports drinks or coconut water, especially after exercise.
6.4. Sample Recovery Meal Plan
| Meal | Example | Benefits |
|---|---|---|
| Breakfast | Oatmeal with berries and nuts | Provides energy, fiber, and antioxidants |
| Lunch | Grilled chicken salad with mixed greens and avocado | Provides protein, vitamins, and healthy fats |
| Dinner | Baked salmon with roasted vegetables (broccoli, carrots, sweet potatoes) | Provides protein, vitamins, and minerals |
| Snacks | Greek yogurt with fruit, a handful of almonds, or a protein smoothie | Provides protein, vitamins, and healthy fats to keep you feeling full and satisfied |
7. Mental and Emotional Well-being During Recovery
Recovery isn’t just physical; it’s also mental. Maintaining a positive mindset, setting realistic goals, and seeking support are crucial. According to the National Center for Mental Health, managing stress and anxiety can significantly improve recovery outcomes.
7.1. Strategies for Maintaining a Positive Mindset
- Set Realistic Goals: Set achievable goals for your recovery and celebrate your progress along the way.
- Practice Gratitude: Focus on the things you are grateful for in your life.
- Stay Connected: Maintain social connections with friends and family.
- Engage in Enjoyable Activities: Participate in activities that bring you joy and relaxation.
- Seek Professional Help: If you are struggling with anxiety or depression, seek professional help from a therapist or counselor.
7.2. Setting Realistic Goals
- Start Small: Begin with small, achievable goals, such as walking for 10 minutes each day.
- Gradually Increase Activity: Gradually increase your activity level as you get stronger.
- Be Patient: Understand that recovery takes time and be patient with yourself.
- Celebrate Progress: Celebrate your progress along the way, no matter how small.
7.3. Seeking Support
- Talk to Friends and Family: Share your experiences and feelings with friends and family.
- Join a Support Group: Connect with others who are going through similar experiences.
- Consult with a Therapist: Work with a therapist or counselor to address any emotional challenges.
7.4. Mindfulness and Meditation
- Practice Mindfulness: Pay attention to the present moment without judgment.
- Meditation: Practice meditation to reduce stress and improve focus.
- Deep Breathing Exercises: Use deep breathing exercises to calm your mind and body.
8. Returning to Full Dance Activity
A gradual return to your pre-surgery dance level is crucial, typically over several months. Monitor your body closely for any signs of strain or discomfort. The American Academy of Orthopaedic Surgeons recommends a phased approach, increasing intensity and duration gradually.
8.1. Phased Approach to Returning to Dance
- Phase 1: Reintroduction (Weeks 6-8): Begin with light dance movements and exercises, focusing on technique and alignment.
- Phase 2: Gradual Increase (Weeks 8-12): Gradually increase the intensity and duration of your dance sessions, adding more complex movements.
- Phase 3: Full Return (12+ Weeks): Return to your pre-surgery dance level, monitoring your body for any signs of strain or discomfort.
8.2. Monitoring Your Body
- Pay Attention to Pain: Stop dancing if you experience any pain or discomfort.
- Monitor for Swelling: Watch for any swelling or redness around the incision sites.
- Listen to Your Body: Pay attention to your body’s signals and adjust your activity level accordingly.
8.3. Preventing Re-Injury
- Warm-Up Properly: Always warm up before dancing to prepare your muscles for activity.
- Cool-Down After Dancing: Cool down after dancing to help your muscles recover.
- Maintain Good Technique: Use proper technique to reduce the risk of injury.
- Stay Hydrated: Drink plenty of water to stay hydrated and prevent muscle cramps.
- Get Enough Rest: Get enough rest to allow your body to recover.
8.4. Seeking Professional Guidance
- Consult with a Physical Therapist: Work with a physical therapist to develop a personalized rehabilitation program.
- Work with a Dance Teacher: Collaborate with a dance teacher to modify your routines and improve your technique.
- See a Sports Medicine Doctor: Consult with a sports medicine doctor for any concerns about your recovery.
9. What are the Risks of Returning Too Soon?
Returning to dance too soon can lead to complications like incisional hernias, increased pain, and delayed healing. The Mayo Clinic emphasizes the importance of allowing adequate time for tissues to heal to avoid long-term problems.
9.1. Potential Complications
- Incisional Hernia: A bulge at the incision site caused by weakened abdominal muscles.
- Increased Pain: Persistent or worsening pain in the abdomen.
- Delayed Healing: Slow or incomplete healing of the incision sites.
- Infection: Redness, swelling, or discharge at the incision sites.
- Adhesions: Scar tissue that can cause pain or bowel obstruction.
9.2. Signs of Overexertion
- Increased Pain: Persistent or worsening pain in the abdomen.
- Swelling: Excessive swelling or redness around the incision sites.
- Fatigue: Feeling overly tired or exhausted.
- Nausea or Vomiting: Persistent nausea or vomiting.
- Dizziness: Feeling lightheaded or dizzy.
9.3. Long-Term Effects
- Chronic Pain: Persistent pain that can interfere with daily activities.
- Reduced Mobility: Limited range of motion due to scar tissue or adhesions.
- Weakened Abdominal Muscles: Decreased core strength and stability.
9.4. Prevention Strategies
- Follow Your Doctor’s Instructions: Adhere to your doctor’s recommendations for activity restrictions and follow-up appointments.
- Gradual Progression: Gradually increase your activity level as you get stronger.
- Listen to Your Body: Pay attention to your body’s signals and stop if needed.
- Proper Nutrition: Eat a balanced diet to support healing and recovery.
- Adequate Rest: Get enough rest to allow your body to recover.
10. Frequently Asked Questions (FAQs) About Dancing After Laparoscopic Surgery
Have more questions? Here are some common questions to help guide you.
10.1. Can I drive after laparoscopic surgery?
Generally, you can drive once you are no longer taking prescription pain medication and can comfortably make sudden movements. Usually, this is about a week after surgery.
10.2. How long will I be on pain medication?
Most patients require pain medication for the first few days after surgery. Over-the-counter pain relievers can often manage discomfort after that.
10.3. When can I lift heavy objects?
Avoid lifting anything heavier than 10 pounds for the first few weeks after surgery. Your surgeon will provide specific guidelines based on your procedure.
10.4. Can I take a bath or swim after surgery?
Avoid soaking in a tub or swimming until your incisions have healed completely, typically about two weeks after surgery. Showering is usually permitted shortly after surgery.
10.5. What if I experience complications?
Contact your surgeon immediately if you experience signs of infection, increased pain, or other concerning symptoms.
10.6. How long will the gas pain last?
Gas pain from the carbon dioxide used during surgery can last for a few days. Walking and gentle movement can help relieve the discomfort.
10.7. When can I return to work?
The return-to-work timeline depends on the nature of your job and the type of surgery you had. Discuss this with your surgeon, but many can return after 1-2 weeks.
10.8. Can I fly after laparoscopic surgery?
It’s generally safe to fly after a week, but consult your surgeon, especially if you have a history of blood clots.
10.9. What should I wear to dance class after surgery?
Wear comfortable, supportive clothing that doesn’t restrict movement or put pressure on the incisions.
10.10. Is it normal to feel fatigued after surgery?
Yes, fatigue is normal as your body heals. Ensure you get enough rest and nutrition to support your recovery.
Navigating recovery after laparoscopic surgery requires patience, diligence, and a balanced approach to physical and mental well-being. At ten-dance.com, we’re committed to supporting you every step of the way. Remember, consulting with your healthcare provider is crucial for personalized advice tailored to your specific condition.
Ready to take the next step in your dance journey? Visit ten-dance.com today to explore our wide range of dance classes, connect with a vibrant community of dancers, and discover upcoming dance events near you. Whether you’re looking to refine your technique, explore new styles, or simply reconnect with your passion for dance, ten-dance.com is your ultimate resource.
Address: 60 Lincoln Center Plaza, New York, NY 10023, United States.
Phone: +1 (212) 769-7000.
Website: ten-dance.com.