
Last year, I received a thoughtful birthday gift from a friend – a collection of decorative keys. This year, Christmas brought even more! Inspired, I decided to repurpose these keys into a unique piece of home decor. Using these keys and some pearl garland, I crafted a shabby chic chandelier, which also doubles as a whimsical wind chime. The project is still evolving; I envision adding more beads, tiers, and perhaps some delicate lace as I discover them in my thrift store adventures. Below is a glimpse of the initial stage of this charming DIY project.
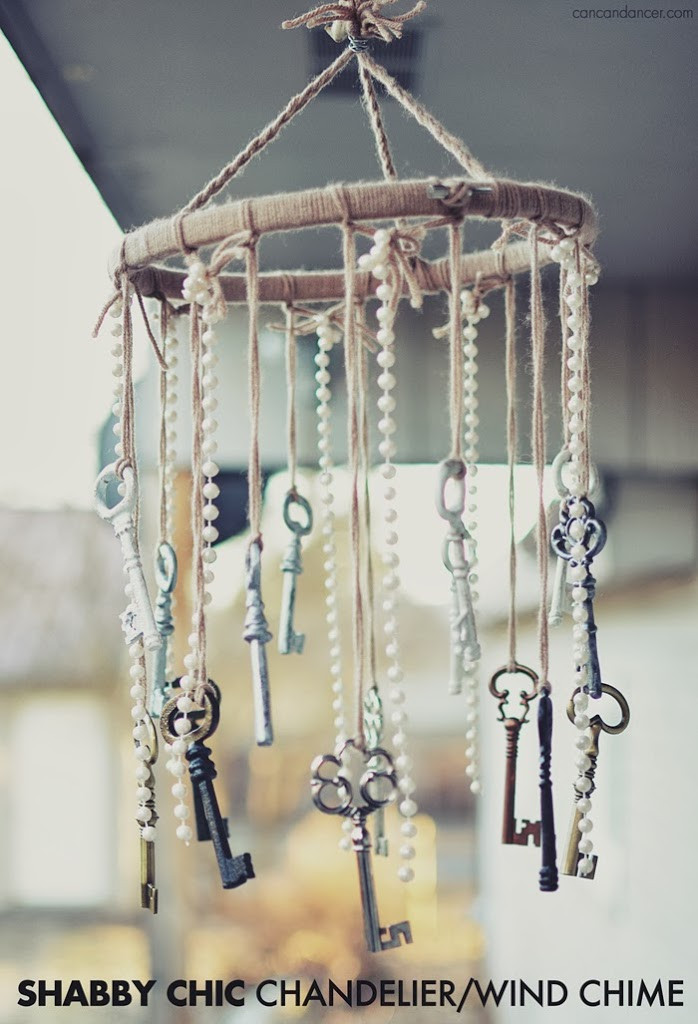
Learn how you can create your own key chandelier with this easy-to-follow tutorial. Perfect for adding a touch of handmade charm to any space, this craft project from Can Dancer is both fun and rewarding.
Materials You’ll Need for Your DIY Key Chandelier
Before you begin, gather these supplies to ensure a smooth crafting experience:
- Decorative Keys: A selection of large keys. These can be new craft keys or upcycled vintage keys for a more authentic shabby chic look.
- Beads or Pearl Garland: Adds elegance and visual appeal. Pearl garland enhances the shabby chic aesthetic beautifully.
- Scissors: For cutting yarn and garland.
- Yarn: Choose a color that complements your keys and beads. Neutral tones like cream or white work well for shabby chic.
- Embroidery Hoop: This will serve as the base of your chandelier. Select a size that suits your desired chandelier dimensions.
- Pliers: Helpful for manipulating wire and ensuring secure attachments.
- Wire (Optional): For a more robust hanging mechanism or for adding extra security to bead attachments.
Step-by-Step Guide to Creating Your Key Chandelier
Follow these detailed instructions to assemble your unique key chandelier:
-
Prepare the Embroidery Hoop: Start by knotting the end of your yarn securely to the embroidery hoop. This knot will be hidden as you wrap.
-
Wrap the Hoop with Yarn: Begin wrapping the yarn tightly and evenly around the embroidery hoop, ensuring you completely cover the initial tail end of the yarn.
-
Continue Wrapping: Keep wrapping the yarn around the entire hoop until the metal is fully concealed by the yarn. This creates a soft and aesthetically pleasing base for your chandelier.
-
Attach the Keys: Take a length of yarn and loop it through the hole in your first key. Bring the tail ends of the yarn through the loop you just made around the key, effectively creating a secure knot around the key.
-
Tie Keys to the Hoop: Tie the two tail ends of the yarn attached to the key firmly onto the yarn-covered embroidery hoop.
-
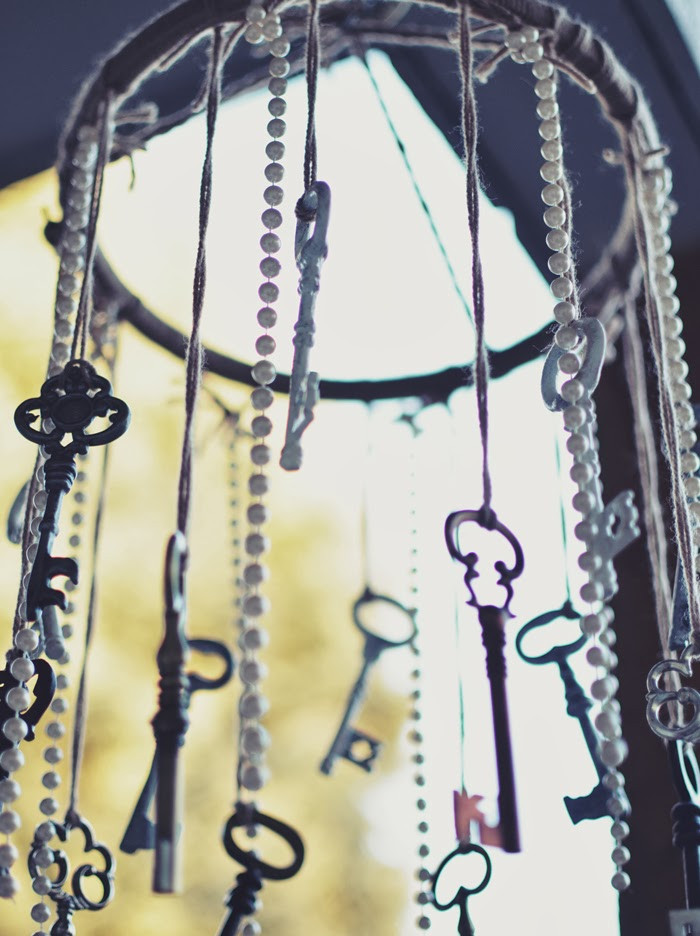
Space the Keys Evenly: Continue attaching more keys around the hoop, spacing them out evenly to maintain a balanced design. For variation, consider using different types or finishes of keys. For the inner tier in the example, silver or white keys were used.
-
Vary Key Lengths: Add more keys, playing with alternating lengths to create a tiered effect. This adds visual interest and dimension to your chandelier.
-
Connect Key Strands and Add Garland: Take the tail ends of the yarn from each key strand and tie them to the nearest neighboring strand. These yarn loops will now serve as attachment points for your pearl garland. Secure your pearl strands to these loops.
-
Trim Yarn Ends (Optional): You can trim the excess yarn tails for a cleaner look, or leave them longer if you plan to add more beads or embellishments in the future, allowing for easy adjustments.
-
Create Hanging Braids: Cut nine equal lengths of yarn. Divide them into three groups of three strands each. Fold each group in half and loop them around the embroidery hoop at evenly spaced points.
-
Braid the Yarn Groups: Braid each of the three yarn groups to create sturdy hanging braids. Knot the ends of each braid to secure them. For a more heavy-duty option, wire can be used instead of yarn for hanging.
-
Assemble and Hang: Gather the ends of the three braids together. Secure them tightly by wrapping wire around them. Create a small loop with the wire at the top for easy hanging.
-
Final Touches: At this stage, you can enhance your chandelier further by adding more beads, lace, or other decorative elements to personalize it. Once you are satisfied with your design, hang your unique shabby chic key chandelier and enjoy the handcrafted charm it brings to your space!
Happy crafting from Can Dancer!