
Building a temporary dance floor can be an achievable DIY project that is both cost-effective and customizable. At ten-dance.com, we guide you through each step, ensuring you can create the perfect dance surface for any event, from weddings to backyard parties. Follow our guide for tips on design, construction, and safety, empowering you to craft an unforgettable dance experience with ease.
1. What Are The Benefits Of Building A Temporary Dance Floor?
Building a temporary dance floor offers numerous benefits, including cost savings, customization, and portability. It is perfect for events where a permanent dance floor is not available or feasible.
Here’s why building a temporary dance floor is a fantastic idea:
- Cost-Effective: Renting a dance floor can be expensive. Building your own can save you hundreds of dollars.
- Customizable: You can tailor the size, shape, and design to fit your specific needs and preferences.
- Portable: A temporary dance floor can be disassembled and transported, making it ideal for various locations.
- Personalized: Create a unique look that complements your event’s theme and style.
- Durable: Constructed properly, it can withstand hours of dancing and fun.
2. What Materials Do I Need To Build A Temporary Dance Floor?
Gathering the right materials is crucial for constructing a sturdy and appealing temporary dance floor. Plywood, 2×4 lumber, nails, and paint are essential.
Here’s a detailed list of materials you’ll need:
- Plywood Sheets: ½” or ¾” thick, depending on your desired sturdiness.
- 2×4 Lumber: For framing and support.
- Nails/Screws: For assembling the frame and attaching the plywood.
- Wood Glue: To reinforce joints.
- Paint or Stain: To finish the surface and match your event’s decor.
- Primer: To prepare the wood for painting.
- Polyurethane: To seal and protect the painted surface.
- Painter’s Tape: For creating designs or patterns.
- Mending Plates: To join sections together securely.
- Sandpaper: For smoothing rough edges.
- Measuring Tape: For accurate cuts.
- Saw: For cutting lumber and plywood.
- Drill: For screwing pieces together.
- Hammer: For nailing.
- Safety Glasses: To protect your eyes.
- Work Gloves: To protect your hands.
3. How Do I Determine The Right Size For My Temporary Dance Floor?
The size of your dance floor depends on the number of guests and available space. A general rule is 4 square feet per dancer.
Follow these steps to determine the appropriate size:
- Estimate Dancers: Calculate how many guests are likely to dance at the same time.
- Space Calculation: Allocate 4 square feet per dancer. For example, 50 dancers would need 200 square feet.
- Measure Available Space: Ensure the area can accommodate the calculated size.
- Consider Shape: Decide if you want a square, rectangle, or custom shape.
- Plan in Sections: Design the floor in manageable sections (e.g., 4×8 feet) for easier assembly and transport.
4. What Is The Step-by-Step Guide To Constructing A Temporary Dance Floor?
Constructing a temporary dance floor involves building a sturdy frame, attaching the plywood surface, and finishing it with paint or stain. Careful measurements and secure assembly are key.
Here’s a detailed step-by-step guide:
- Build the Frame:
- Cut the 2×4 lumber to create a rectangular frame. For example, for a 4×8 foot section, you’ll need two 4-foot pieces and two 8-foot pieces.
- Assemble the frame using wood glue and screws, ensuring the corners are square.
- Add support beams every 2 feet within the frame for added stability.
- Attach the Plywood:
- Place the plywood sheet on top of the frame.
- Secure the plywood to the frame using nails or screws, spacing them every 6 inches along the edges and support beams.
- Ensure the plywood is flush with the frame and there are no sharp edges.
- Sand and Prime:
- Sand the surface of the plywood to smooth any rough spots or splinters.
- Apply a coat of primer to prepare the wood for painting or staining.
- Let the primer dry completely before proceeding.
- Paint or Stain:
- Apply your chosen paint or stain to the surface, using multiple thin coats for best results.
- If creating a pattern, use painter’s tape to mask off areas and achieve clean lines.
- Allow the paint or stain to dry completely between coats.
- Seal the Surface:
- Apply a coat of polyurethane to seal and protect the painted or stained surface.
- This will help prevent scratches and wear during use.
- Let the polyurethane dry completely before assembling the dance floor.
- Assemble the Sections:
- If building a larger dance floor, create multiple sections following the steps above.
- Use mending plates to join the sections together securely.
- Position the mending plates along the seams between the sections and screw them into place.
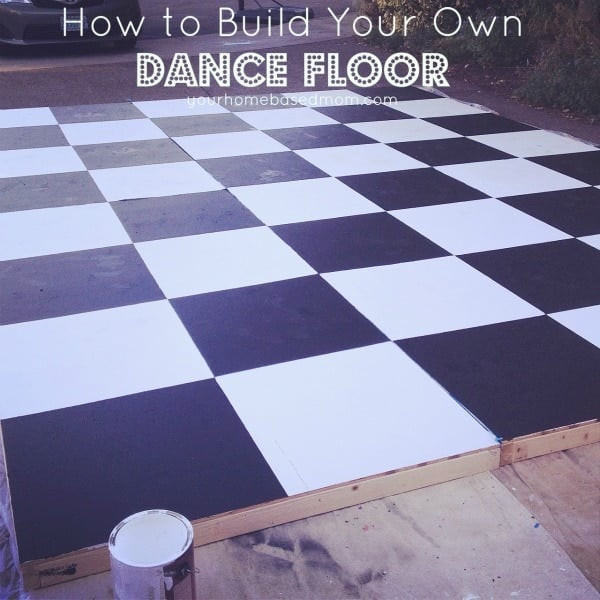 Wooden Dance Floor Under Construction
5. What Are Some Creative Design Ideas For A Temporary Dance Floor?
Unleash your creativity with checkerboard patterns, geometric designs, or custom stencils to make your dance floor a visual centerpiece. Consider adding lighting for an extra touch.
Here are some design ideas to inspire you:
- Checkerboard: A classic black and white checkerboard pattern adds a timeless, fun element.
- Geometric Patterns: Use painter’s tape to create modern geometric designs with bold colors.
- Stencils: Apply custom stencils for themed events, such as floral patterns for weddings.
- Ombre Effect: Create a gradient effect by blending different shades of the same color.
- Wood Stain: Use different wood stains to create a rustic or elegant look.
- Lighting: Incorporate LED strip lights around the perimeter for a visually stunning effect.
- Monogram: Add a personal touch with a monogram or custom logo in the center of the dance floor.
- Glow-in-the-Dark: Use glow-in-the-dark paint for a fun, nighttime effect.
6. How Can I Ensure The Temporary Dance Floor Is Safe For Dancers?
Safety is paramount. Ensure the surface is level, non-slip, and free of hazards. Secure the sections together to prevent tripping and consider adding a ramp for accessibility.
Follow these safety tips:
- Level Surface: Ensure the ground is level before setting up the dance floor. Use shims if necessary.
- Non-Slip Surface: Apply a non-slip coating or use textured paint to prevent slips and falls.
- Secure Connections: Ensure all sections are securely connected with mending plates.
- Smooth Edges: Sand down any sharp edges or corners to prevent injuries.
- Ramps: Add ramps to the edges for easy access, especially for guests with mobility issues.
- Adequate Lighting: Ensure the dance floor is well-lit to prevent accidents.
- Clear Surroundings: Keep the area around the dance floor clear of obstacles.
- Regular Inspections: Periodically inspect the dance floor during the event to ensure it remains safe.
7. What Are The Best Flooring Options For A Temporary Dance Floor?
Plywood is a popular choice for its durability and smooth surface, but consider alternatives like laminate or interlocking dance tiles for specific needs.
Here’s a comparison of flooring options:
| Flooring Option | Pros | Cons | Best For |
|---|---|---|---|
| Plywood | Durable, smooth surface, cost-effective, customizable | Can be heavy, requires sanding and finishing, susceptible to moisture | DIY projects, weddings, backyard parties |
| Laminate | Attractive, easy to clean, scratch-resistant | Can be slippery, less durable than plywood, may require underlayment | Indoor events, formal occasions |
| Interlocking Tiles | Easy to install and disassemble, portable, comfortable underfoot | Can be expensive, may not be as stable as plywood, limited design options | Events requiring quick setup and takedown, rentals |
| Vinyl | Water-resistant, easy to clean, versatile designs | Can be slippery, may require adhesive, less durable than plywood | Events where spills are likely, quick setups |
| Dance Floor Tarps | Lightweight, inexpensive, provides a smooth surface | Not as durable, requires a smooth subfloor, can be slippery if not properly secured | Practice sessions, quick setups, events with a tight budget |
8. How Do I Transport And Store A Temporary Dance Floor?
Design your dance floor in modular sections for easy transport and storage. Protect the surfaces with padding during transport and store in a dry place to prevent damage.
Follow these tips for transport and storage:
- Modular Design: Divide the dance floor into manageable sections (e.g., 4×8 feet).
- Protective Padding: Use blankets, bubble wrap, or moving pads to protect the surfaces during transport.
- Secure Straps: Use straps or rope to secure the sections together to prevent shifting.
- Transport Vehicle: Use a truck, trailer, or van to transport the sections safely.
- Dry Storage: Store the sections in a dry, well-ventilated area to prevent moisture damage.
- Stacking: If stacking, place protective material between the sections to prevent scratches.
- Labeling: Label each section for easy reassembly.
9. What Are The Cost Considerations When Building A Temporary Dance Floor?
Material costs, paint, and finishing supplies are the main expenses. Consider renting tools to save money and explore budget-friendly material options.
Here’s a breakdown of cost considerations:
- Materials: Plywood, lumber, nails, screws, wood glue.
- Finishing Supplies: Primer, paint, stain, polyurethane.
- Tools: Saw, drill, hammer, measuring tape, sandpaper. Consider renting if you don’t own them.
- Design Elements: Stencils, tape, lighting.
- Labor: Factor in the cost of your time or hiring help.
- Contingency: Add a buffer for unexpected expenses.
10. How Do I Maintain A Temporary Dance Floor During An Event?
Regular sweeping and spot cleaning will keep your dance floor looking great. Address spills immediately to prevent damage and inspect the surface for any hazards.
Follow these maintenance tips:
- Regular Sweeping: Sweep the dance floor regularly to remove dirt, dust, and debris.
- Spot Cleaning: Clean up spills immediately with a damp cloth and mild detergent.
- Avoid Harsh Chemicals: Do not use harsh chemicals or abrasive cleaners that can damage the surface.
- Inspect Regularly: Check the dance floor periodically for any loose connections, sharp edges, or other hazards.
- Restrict Food and Drinks: Designate a separate area for food and drinks to minimize spills on the dance floor.
- Use Protective Mats: Place mats at entrances to prevent dirt and debris from being tracked onto the dance floor.
11. What Are Some Common Mistakes To Avoid When Building A Temporary Dance Floor?
Avoid using warped lumber, skipping the sanding process, and neglecting to seal the surface properly. These oversights can compromise the floor’s stability and appearance.
Here are some common mistakes to avoid:
- Using Warped Lumber: Always use straight, unwarped lumber for the frame.
- Skipping Sanding: Sanding is essential for a smooth, splinter-free surface.
- Neglecting to Prime: Priming ensures the paint or stain adheres properly.
- Inadequate Sealing: Sealing protects the surface from scratches and moisture.
- Rushing Assembly: Take your time and ensure all connections are secure.
- Ignoring Safety: Always prioritize safety by ensuring a level surface and secure connections.
- Poor Planning: Plan the project thoroughly before starting to avoid costly mistakes.
12. How Does Building A Temporary Dance Floor Compare To Renting One?
Building a dance floor is more cost-effective long-term and offers customization, while renting is convenient for one-time events.
Here’s a comparison:
| Feature | Building | Renting |
|---|---|---|
| Cost | Lower long-term cost, especially for multiple events. One-time investment in materials and tools. | Higher cost per event. Rental fees can add up quickly. |
| Customization | Fully customizable to your specific needs and preferences. You can choose the size, shape, design, and materials. | Limited customization options. You are restricted to the available sizes and styles. |
| Convenience | Requires time and effort to build. You need to plan, purchase materials, and assemble the dance floor. | Convenient for one-time events. The rental company delivers, sets up, and takes down the dance floor. |
| Storage | Requires storage space when not in use. You need to find a dry, secure place to store the dance floor sections. | No storage required. The rental company takes care of storage. |
| Portability | Can be disassembled and transported, but requires effort. The modular design makes it easier to move the sections. | Typically not portable. Rental dance floors are designed for temporary use at a single location. |
| Maintenance | Requires maintenance and upkeep. You need to clean and repair the dance floor as needed. | Minimal maintenance required during the event. The rental company is responsible for major repairs. |
13. Can I Build A Temporary Dance Floor Outdoors?
Yes, but ensure the surface is weather-resistant and properly supported to handle outdoor conditions. Consider using pressure-treated lumber and a waterproof sealant.
Here are some tips for building an outdoor dance floor:
- Pressure-Treated Lumber: Use pressure-treated lumber for the frame to resist rot and insect damage.
- Waterproof Sealant: Apply a waterproof sealant to the surface to protect it from rain and moisture.
- Proper Drainage: Ensure the area has good drainage to prevent water from pooling under the dance floor.
- Level Ground: Use shims to create a level surface on uneven ground.
- Secure Anchoring: Anchor the dance floor to the ground to prevent it from shifting in windy conditions.
- Covering: Consider using a tent or canopy to protect the dance floor from direct sunlight and rain.
14. What Types Of Dances Are Best Suited For A Temporary Dance Floor?
Most dance styles work well on a temporary dance floor, but consider the surface when choosing footwear. Ballroom, swing, and freestyle dance are excellent choices.
Here’s a guide to suitable dance types:
| Dance Type | Footwear Considerations | Surface Suitability |
|---|---|---|
| Ballroom | Smooth-soled shoes are ideal for gliding and turning. | Excellent. Provides a smooth surface for elegant movements. |
| Swing | Leather-soled shoes or dance sneakers offer the right balance of grip and slide. | Very Good. Suitable for energetic steps and turns. |
| Freestyle | Versatile; choose shoes appropriate for the specific style, such as sneakers for hip-hop or bare feet for contemporary. | Good. Adaptable to various styles and movements. |
| Latin | High heels for women and dress shoes for men are common. | Good. Requires a stable surface for quick steps and turns. |
| Hip-Hop | Sneakers with good cushioning and support are essential. | Very Good. Provides the necessary grip and stability for dynamic movements. |
15. Where Can I Find Inspiration For Temporary Dance Floor Designs?
Websites like Pinterest and Instagram are treasure troves of design ideas. Home improvement blogs and DIY forums can also offer valuable inspiration and tips.
Here are some resources for design inspiration:
- Pinterest: Search for “DIY dance floor” or “temporary dance floor” to find a wealth of visual ideas.
- Instagram: Follow hashtags like #DIYdancefloor and #temporarydancefloor to see real-life examples.
- Home Improvement Blogs: Websites like “This Old House” and “DIY Network” offer detailed tutorials and design ideas.
- DIY Forums: Websites like “Reddit” and “Instructables” have active communities where you can ask questions and share ideas.
- Event Planning Websites: Websites like “The Knot” and “WeddingWire” showcase dance floor designs from real weddings and events.
16. How To Add A Professional Touch To Your Temporary Dance Floor?
Enhance your temporary dance floor with a professional touch by adding trim, custom lighting, and a high-quality finish. These details elevate the overall look and feel.
Here are some ways to add a professional touch:
- Trim: Add decorative trim around the perimeter to give the dance floor a polished look.
- Custom Lighting: Incorporate LED strip lights or spotlights to create a dramatic effect.
- High-Quality Finish: Use a high-gloss polyurethane finish for a durable and professional-looking surface.
- Stenciled Design: Use a custom stencil to add a unique design or logo to the center of the dance floor.
- Professional Installation: Hire a professional carpenter or handyman to ensure the dance floor is built to a high standard.
17. What Are The Best Types Of Paint To Use On A Temporary Dance Floor?
Choose paints specifically designed for floors, such as porch and floor enamel or epoxy paint, for durability and resistance to wear and tear.
Here’s a comparison of paint options:
| Paint Type | Pros | Cons | Best For |
|---|---|---|---|
| Porch and Floor Enamel | Durable, water-resistant, easy to apply | Limited color options, may require multiple coats | General-purpose use, outdoor dance floors |
| Epoxy Paint | Extremely durable, chemical-resistant, high-gloss finish | More expensive, requires careful preparation, can be slippery | High-traffic areas, commercial events |
| Acrylic Latex Paint | Easy to apply, low odor, quick-drying | Less durable than enamel or epoxy, may not be suitable for heavy use | Indoor events, DIY projects |
| Chalk Paint | Matte finish, easy to distress for a vintage look | Requires sealing with wax or polyurethane, less durable than other options | Themed events, rustic decor |
18. How Do I Create A Non-Slip Surface On My Temporary Dance Floor?
To create a non-slip surface on your temporary dance floor, consider applying non-slip coatings, textured paints, or dance floor mats. These additions will improve safety and stability for dancers.
Here are several methods to create a non-slip surface:
- Non-Slip Coating: Apply a non-slip coating specifically designed for floors.
- Textured Paint: Use paint with a textured additive to create a rougher surface.
- Dance Floor Mats: Place rubber or vinyl dance floor mats over the surface.
- Grip Tape: Apply grip tape to the edges or high-traffic areas.
- Etching: Lightly etch the surface with a chemical solution to create a textured finish.
- Rubber Underlayment: Place a rubber underlayment beneath the dance floor to provide cushioning and grip.
19. How Can I Incorporate Lighting Into My Temporary Dance Floor Design?
Integrate lighting into your temporary dance floor design by using LED strip lights, spotlights, and uplighting to create ambiance and highlight patterns. Proper lighting enhances the visual appeal and safety.
Here are some lighting ideas:
- LED Strip Lights: Attach LED strip lights around the perimeter of the dance floor to create a colorful glow.
- Spotlights: Use spotlights to highlight specific areas or features, such as a monogram or design.
- Uplighting: Place uplights around the base of the dance floor to create a dramatic effect.
- String Lights: Hang string lights overhead to create a festive atmosphere.
- Gobo Projectors: Use gobo projectors to project patterns or images onto the dance floor.
- Dimmable Lights: Use dimmable lights to adjust the brightness and create the desired ambiance.
20. What Tools Are Essential For Building A Temporary Dance Floor?
Essential tools for building a temporary dance floor include a saw, drill, hammer, measuring tape, and sandpaper. Having these tools on hand ensures precision and efficiency throughout the construction process.
Here is a list of essential tools:
- Saw: For cutting lumber and plywood.
- Drill: For screwing pieces together.
- Hammer: For nailing.
- Measuring Tape: For accurate measurements.
- Sandpaper: For smoothing rough edges.
- Safety Glasses: To protect your eyes.
- Work Gloves: To protect your hands.
- Level: To ensure a level surface.
- Square: To ensure corners are square.
- Clamps: To hold pieces together while gluing or screwing.
21. How To Repair Damage To A Temporary Dance Floor?
Repair damage to your temporary dance floor by patching holes with wood filler, sanding rough spots, and repainting or resealing the surface as needed. Regular maintenance extends the life of the floor.
Here are some repair tips:
- Patch Holes: Fill any holes or dents with wood filler.
- Sand Rough Spots: Sand down any rough spots or splinters.
- Repaint or Restain: Repaint or restain the damaged area to match the rest of the dance floor.
- Reseal: Apply a new coat of polyurethane to reseal the surface.
- Replace Sections: If a section is severely damaged, replace it entirely.
- Tighten Connections: Check and tighten any loose connections between sections.
22. Where Can I Buy Materials For Building A Temporary Dance Floor?
Purchase materials for building a temporary dance floor from home improvement stores like Home Depot and Lowe’s, or lumber yards for a wider selection of wood. These suppliers offer the necessary resources for your project.
Here are some places to buy materials:
- Home Depot: Offers a wide range of lumber, plywood, paint, and tools. Address: 60 Lincoln Center Plaza, New York, NY 10023, United States. Phone: +1 (212) 769-7000.
- Lowe’s: Another major home improvement store with similar offerings.
- Local Lumber Yards: Often have a better selection of wood and can provide expert advice.
- Online Retailers: Websites like Amazon and eBay offer a convenient way to purchase materials online.
- Hardware Stores: Smaller hardware stores can be a good source for tools and fasteners.
23. What Are The Environmental Considerations When Building A Temporary Dance Floor?
Consider using sustainable materials, such as reclaimed wood or eco-friendly paints, to minimize your environmental impact. Proper disposal of waste materials is also important.
Here are some environmental considerations:
- Sustainable Materials: Use reclaimed wood, bamboo, or other sustainable materials.
- Eco-Friendly Paints: Choose paints and sealants with low VOC (volatile organic compounds) content.
- Proper Disposal: Dispose of waste materials properly, recycling whenever possible.
- Reduce Waste: Plan your project carefully to minimize waste.
- Reusable Materials: Design the dance floor so that it can be reused for multiple events.
24. What Are Some Alternatives To Plywood For A Temporary Dance Floor?
Consider using laminate flooring, dance floor tiles, or even a sturdy tarp as alternatives to plywood, depending on your budget and desired aesthetic.
Here are some alternatives to plywood:
- Laminate Flooring: Attractive, easy to clean, and relatively durable.
- Dance Floor Tiles: Interlocking tiles that are easy to install and disassemble.
- Sturdy Tarp: A temporary solution for a smooth dance surface.
- Oriented Strand Board (OSB): A cheaper alternative to plywood, but less durable.
- Reclaimed Wood: Adds a rustic and unique look.
25. How Can I Get Help Or Advice On Building My Temporary Dance Floor?
Seek advice from experienced DIYers, online forums, or local hardware stores for guidance and tips on building your temporary dance floor.
Here are some resources for help and advice:
- Online Forums: Websites like Reddit and DIY forums have active communities where you can ask questions and share ideas.
- Local Hardware Stores: Employees at hardware stores can provide expert advice on materials and techniques.
- DIY Blogs: Many blogs offer detailed tutorials and tips for building a temporary dance floor.
- Experienced DIYers: Ask friends or family members with experience in woodworking for help and advice.
- Professional Carpenters: Hire a professional carpenter for assistance with design or construction.
26. How Do I Prevent My Temporary Dance Floor From Shifting During An Event?
Prevent your temporary dance floor from shifting during an event by securing it with ground stakes, non-slip underlayment, or by placing heavy objects around the perimeter.
Here are some methods to prevent shifting:
- Ground Stakes: Use ground stakes to anchor the dance floor to the ground, especially for outdoor events.
- Non-Slip Underlayment: Place a non-slip underlayment beneath the dance floor to provide additional grip.
- Heavy Objects: Place heavy objects, such as sandbags or weights, around the perimeter of the dance floor.
- Interlocking Sections: Use interlocking sections that fit together tightly to prevent movement.
- Secure Connections: Ensure all sections are securely connected with mending plates.
27. Can I Add Sound Dampening To My Temporary Dance Floor?
Add sound dampening to your temporary dance floor by using rubber underlayment, thick carpeting, or soundproofing mats to minimize noise and vibrations.
Here are some ways to add sound dampening:
- Rubber Underlayment: Place a rubber underlayment beneath the dance floor to absorb sound and vibrations.
- Thick Carpeting: Cover the dance floor with thick carpeting to dampen sound.
- Soundproofing Mats: Use soundproofing mats specifically designed for reducing noise.
- Acoustic Panels: Place acoustic panels around the perimeter of the dance floor to absorb sound.
- Closed-Cell Foam: Use closed-cell foam insulation to fill the gaps between the dance floor and the ground.
28. How Do I Choose The Right Type Of Wood For My Temporary Dance Floor?
Choose the right type of wood for your temporary dance floor by considering factors like durability, cost, and resistance to moisture. Plywood is a common choice, but other options include hardwood and softwood.
Here’s a comparison of wood types:
| Wood Type | Pros | Cons | Best For |
|---|---|---|---|
| Plywood | Durable, smooth surface, cost-effective, easy to work with | Susceptible to moisture, can splinter | General-purpose use, indoor events |
| Hardwood | Very durable, attractive, long-lasting | More expensive, harder to work with | High-end events, permanent installations |
| Softwood | Less expensive, easier to work with | Less durable, more susceptible to damage | DIY projects, temporary installations |
| Reclaimed Wood | Environmentally friendly, unique look | Can be more expensive, requires careful selection and preparation | Themed events, rustic decor |
29. What Safety Precautions Should I Take When Building A Temporary Dance Floor?
Take safety precautions such as wearing safety glasses and gloves, using power tools carefully, and ensuring the work area is well-ventilated to prevent accidents and injuries.
Here are some safety precautions to follow:
- Wear Safety Glasses: Protect your eyes from flying debris.
- Wear Work Gloves: Protect your hands from splinters and cuts.
- Use Power Tools Carefully: Follow the manufacturer’s instructions and use safety guards.
- Ensure Good Ventilation: Work in a well-ventilated area to avoid inhaling dust and fumes.
- Keep Work Area Clean: Keep the work area free of clutter to prevent accidents.
- Use Proper Lifting Techniques: Lift heavy objects with your legs, not your back.
- Get Help When Needed: Ask for help when lifting or moving heavy objects.
30. How Can ten-dance.com Help Me Build The Perfect Temporary Dance Floor?
At ten-dance.com, we provide a wealth of resources to help you build the perfect temporary dance floor, including detailed guides, design inspiration, and expert advice. Explore our site for all the information and support you need to create a stunning and safe dance space.
Ready to start building your dream dance floor? Visit ten-dance.com today for:
- Step-by-step tutorials: Easy-to-follow guides for every skill level.
- Design inspiration: A gallery of creative dance floor designs to spark your imagination.
- Material recommendations: Expert advice on choosing the right materials for your project.
- Safety tips: Essential safety guidelines to ensure a safe and enjoyable building experience.
- Community forum: Connect with other dance enthusiasts, ask questions, and share your progress.
At ten-dance.com, we are committed to helping you create unforgettable dance experiences. Whether you’re planning a wedding, a backyard party, or any other special event, we have the resources and expertise to help you build the perfect temporary dance floor. Visit us today and let’s get started!