
Are you looking to create the perfect dance space? Knowing How To Make A Dance Floor empowers you to design a personalized area, whether it’s for your home studio or a special event, and ten-dance.com is here to guide you through every step. This guide will provide a comprehensive, SEO-optimized approach to building your own dance floor. You’ll gain access to tutorials, resources, and a community of fellow dance enthusiasts. Get ready to unleash your creativity and build a dance floor that reflects your unique style and passion.
1. What Is The Importance Of Having A Dance Floor?
Having a dedicated dance floor is vital for dancers of all levels, providing a safe and effective space to practice and perform. A proper dance floor helps prevent injuries and enhances performance. According to research from the American Academy of Orthopaedic Surgeons, dance floors with adequate “give” can reduce the impact on joints by up to 40%. This ensures you can dance longer and more comfortably.
1.1. Preventing Injuries
Dancing on unsuitable surfaces like concrete or carpet can lead to injuries. A sprung dance floor absorbs impact, reducing stress on joints. Addressing concerns about joint strain and injury prevention is vital, considering research from the Journal of Dance Medicine & Science, which highlights that up to 75% of dancers experience some form of injury annually. This statistic emphasizes the need for a safe and supportive dance surface.
1.2. Enhancing Performance
A consistent and smooth surface allows for better balance, turns, and overall movement quality. You can execute complex steps with confidence, knowing that the floor provides the necessary support and grip.
1.3. Creating a Dedicated Space
Having a designated dance area helps to create a mindset focused on dance, separating it from everyday activities. This mental separation can improve focus and dedication to your practice.
2. What Are The Different Types Of Dance Floors?
Understanding the various types of dance floors can help you select the best option for your needs and budget. Each type offers unique benefits and is suitable for different dance styles.
2.1. Sprung Floors
Sprung floors are designed with a layer of elasticity to absorb impact, reducing stress on joints and preventing injuries. They are ideal for ballet, jazz, and other high-impact dance forms.
2.2. Marley Floors
Marley floors are typically made of vinyl and provide a smooth, non-slip surface that is perfect for a wide range of dance styles, including ballet, modern, and contemporary. They are often used in professional dance studios due to their durability and ease of maintenance.
2.3. Wood Floors
Hardwood floors can be a good option for some dance styles, such as tap and ballroom, but they may not provide enough cushioning for high-impact activities. They require regular maintenance to prevent splinters and ensure a smooth surface.
2.4. Portable Dance Floors
Portable dance floors are designed for temporary use and can be easily assembled and disassembled. They are a convenient option for events, home use, or traveling dancers who need a reliable dance surface.
3. What Materials Do You Need To Build A Dance Floor?
Gathering the right materials is the first step to building a high-quality dance floor. The choice of materials will affect the floor’s durability, safety, and overall performance.
3.1. Wood For Framing
Use high-quality lumber, such as pine or fir, for the frame of the dance floor. Ensure the wood is straight and free from knots to provide a stable foundation.
3.2. Plywood For Surface
Choose plywood that is smooth and even for the dance surface. Options include birch plywood or MDF (medium-density fiberboard) for a seamless finish.
3.3. Foam Padding
Adding a layer of foam padding between the frame and the surface provides cushioning and reduces impact. Closed-cell foam is an excellent choice for its durability and shock-absorbing properties.
3.4. Fasteners
Use screws and nails that are appropriate for wood construction. Ensure they are long enough to securely hold the frame and surface together but not so long that they protrude.
3.5. Finishing Materials
Select a finish that provides a smooth, non-slip surface. Options include dance floor paint, polyurethane, or Marley flooring.
4. What Tools Do You Need To Build A Dance Floor?
Having the right tools will make the construction process smoother and more efficient. Ensure you have all the necessary tools before starting the project.
4.1. Measuring Tools
A tape measure, level, and square are essential for accurate measurements and ensuring the dance floor is even and square.
4.2. Cutting Tools
A circular saw or table saw is needed to cut the wood and plywood to the correct sizes. A jigsaw can be used for more intricate cuts.
4.3. Fastening Tools
A drill and screwdriver are necessary for assembling the frame and attaching the surface. A hammer can be used for driving nails.
4.4. Sanding Tools
A sander and sandpaper are needed to smooth the surface of the dance floor and prepare it for finishing.
4.5. Finishing Tools
Paintbrushes, rollers, and a paint sprayer can be used for applying the finish. Ensure you have adequate ventilation when using these tools.
5. How To Build A Simple Home Dance Floor: Step-By-Step Guide?
Building a dance floor at home can be a rewarding project. Follow these steps to create a functional and safe dance space.
5.1. Plan The Design And Dimensions
Determine the size and shape of your dance floor based on the available space and your dance style. Sketch a detailed plan with all measurements.
5.2. Construct The Frame
Cut the wood for the frame according to your plan. Assemble the frame using screws and nails, ensuring it is square and level.
5.3. Add Foam Padding
Attach the foam padding to the top of the frame using adhesive. Ensure the padding is smooth and even.
5.4. Attach The Surface
Cut the plywood to fit the frame. Attach the plywood to the frame using screws, ensuring it is securely fastened and flush with the frame.
5.5. Sand And Finish
Sand the surface of the dance floor to smooth any rough edges. Apply the finish of your choice, following the manufacturer’s instructions.
 Dance Floor
A DIY dance floor created with plywood, showcasing its potential for a fun and functional dance space.
6. How To Build A Sprung Dance Floor?
Building a sprung dance floor requires additional steps to create the necessary elasticity. This type of floor is ideal for dancers who need extra cushioning and support.
6.1. Design A Floating Subfloor
Create a grid of wooden supports that are spaced evenly apart. These supports should be elevated slightly off the ground using rubber or foam spacers.
6.2. Install Flexible Connectors
Use flexible connectors to attach the supports to the frame. These connectors allow the floor to flex and absorb impact.
6.3. Add Multiple Layers
Install multiple layers of plywood on top of the floating subfloor. Each layer should be thinner than the previous one to create a gradual transition in stiffness.
6.4. Test The Spring
Test the spring of the floor to ensure it provides adequate cushioning and support. Adjust the spacing and connectors as needed.
6.5. Finish The Surface
Sand the surface of the dance floor and apply the finish of your choice. Ensure the finish is smooth and non-slip.
7. How To Install A Marley Dance Floor?
Installing a Marley dance floor is a popular choice for dance studios and home use. Marley floors provide a smooth, non-slip surface that is easy to maintain.
7.1. Prepare The Subfloor
Ensure the subfloor is clean, level, and free from debris. Repair any cracks or imperfections before installing the Marley flooring.
7.2. Unroll The Marley
Unroll the Marley flooring and allow it to acclimate to the room temperature for 24-48 hours. This will help prevent warping and ensure a proper fit.
7.3. Adhere The Marley
Apply adhesive to the subfloor using a trowel. Carefully lay the Marley flooring onto the adhesive, smoothing out any bubbles or wrinkles.
7.4. Trim The Edges
Trim the edges of the Marley flooring to fit the room. Use a sharp utility knife and a straightedge for clean, precise cuts.
7.5. Seal The Seams
Seal the seams of the Marley flooring with seam tape or a liquid seam sealer. This will prevent moisture from seeping underneath the flooring and causing damage.
8. What Are The Safety Considerations When Building A Dance Floor?
Safety should be a top priority when building a dance floor. Following safety guidelines can prevent injuries and ensure a safe dance environment.
8.1. Wear Protective Gear
Wear safety glasses, gloves, and a dust mask when cutting, sanding, and finishing the dance floor.
8.2. Use Proper Ventilation
Ensure adequate ventilation when working with adhesives, finishes, and other chemicals.
8.3. Secure The Floor
Ensure the dance floor is securely fastened to the subfloor or frame to prevent movement and tripping hazards.
8.4. Inspect Regularly
Regularly inspect the dance floor for damage, such as splinters, cracks, or loose fasteners. Repair any damage promptly to prevent injuries.
8.5. Provide Adequate Lighting
Ensure the dance floor is well-lit to prevent falls and collisions.
9. How To Maintain Your Dance Floor?
Proper maintenance is essential for extending the life of your dance floor and ensuring it remains safe and functional.
9.1. Clean Regularly
Clean the dance floor regularly with a mild detergent and water. Avoid using harsh chemicals or abrasive cleaners that can damage the surface.
9.2. Protect From Scratches
Protect the dance floor from scratches by using mats or rugs in high-traffic areas. Avoid wearing shoes with hard soles or sharp heels on the dance floor.
9.3. Repair Damage Promptly
Repair any damage, such as splinters, cracks, or loose fasteners, promptly to prevent injuries and further damage.
9.4. Resurface As Needed
Resurface the dance floor as needed to maintain a smooth, non-slip surface. This may involve sanding, refinishing, or replacing the Marley flooring.
9.5. Control Humidity
Control the humidity in the room to prevent warping and damage to the dance floor. Use a dehumidifier or humidifier as needed.
10. How Much Does It Cost To Build A Dance Floor?
The cost of building a dance floor can vary depending on the size, materials, and complexity of the design. Here’s a general overview of the expenses involved:
10.1. Materials Cost
The cost of wood, plywood, foam padding, fasteners, and finishing materials can range from $300 to $1000 or more, depending on the quality and quantity of materials used.
10.2. Tools Cost
If you don’t already own the necessary tools, you may need to purchase or rent them. The cost of tools can range from $100 to $500 or more, depending on the type and quality of tools.
10.3. Labor Cost
If you hire a contractor to build the dance floor, the labor cost can range from $50 to $100 per hour or more.
10.4. Total Cost
The total cost of building a dance floor can range from $500 to $2000 or more, depending on the factors mentioned above.
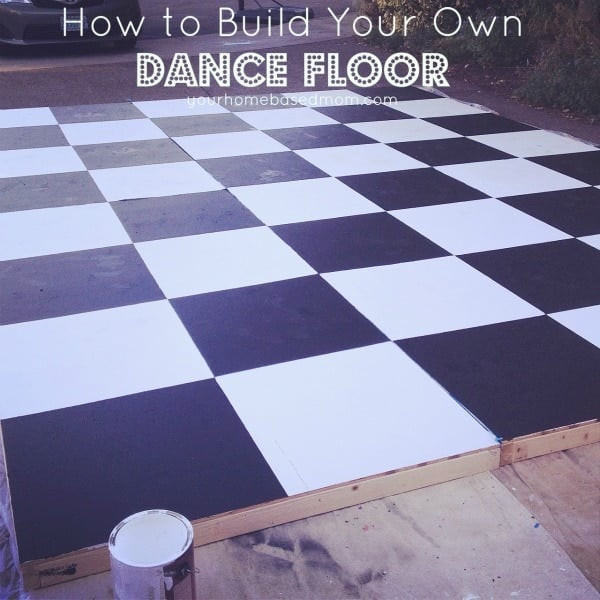
Dance Floor
The process of painting a DIY dance floor, adding a personal touch to the project and enhancing the dance space.
11. Where Can You Find Inspiration For Your Dance Floor?
Finding inspiration for your dance floor design can help you create a space that is both functional and aesthetically pleasing. Here are some resources to explore:
11.1. Dance Studios
Visit local dance studios to see the different types of dance floors they use. Pay attention to the materials, construction, and overall design.
11.2. Online Galleries
Browse online galleries of dance studios and home dance spaces. Look for ideas that match your style and budget.
11.3. Home Improvement Websites
Explore home improvement websites and magazines for inspiration on flooring materials, finishes, and design ideas.
11.4. Social Media Platforms
Follow dance-related accounts on social media platforms like Instagram and Pinterest. Many dancers and studios share photos of their dance spaces.
11.5. Dance Conventions
Attend dance conventions and workshops to see the types of dance floors used in professional settings.
12. What Are The Best Dance Floor Options For Different Dance Styles?
The best dance floor option depends on the specific dance style you practice. Here are some recommendations:
12.1. Ballet
Sprung floors with a Marley surface are ideal for ballet. They provide cushioning, support, and a smooth, non-slip surface.
12.2. Tap
Hardwood floors are best for tap dancing. They provide a firm surface that allows for clear, crisp sounds.
12.3. Jazz
Marley floors are a good option for jazz dance. They provide a smooth surface that allows for easy turns and slides.
12.4. Hip Hop
Hardwood floors or Marley floors are suitable for hip hop dance. They provide a surface that allows for dynamic movements and floor work.
12.5. Ballroom
Hardwood floors are ideal for ballroom dancing. They provide a smooth surface that allows for gliding and turns.
13. How Does Ten-Dance.Com Help You Find Dance Classes?
Ten-dance.com can help you find dance classes that match your interests, skill level, and location. Here are some of the ways we can assist you:
13.1. Comprehensive Directory
We have a comprehensive directory of dance classes and studios across the country. You can search by location, dance style, and skill level.
13.2. Detailed Class Listings
Our class listings provide detailed information about each class, including the instructor, schedule, price, and location.
13.3. User Reviews
Read user reviews of dance classes and studios to get an idea of the quality of instruction and overall experience.
13.4. Personalized Recommendations
Get personalized recommendations for dance classes based on your interests and skill level.
13.5. Easy Registration
Register for dance classes directly through our website. We make it easy to find and sign up for the classes you want to take.
14. What Are The Benefits Of Joining The Ten-Dance.Com Community?
Joining the ten-dance.com community can enhance your dance journey and provide you with valuable resources and support. Here are some of the benefits:
14.1. Connect With Fellow Dancers
Connect with fellow dancers from around the world. Share your experiences, ask questions, and get advice from others who share your passion for dance.
14.2. Access Exclusive Content
Access exclusive content, such as tutorials, articles, and videos, that can help you improve your dance skills.
14.3. Participate In Forums
Participate in forums and discussions on a wide range of dance-related topics. Share your knowledge and learn from others.
14.4. Stay Updated On Events
Stay updated on dance events, workshops, and competitions in your area.
14.5. Get Discounts And Deals
Get discounts and deals on dance classes, merchandise, and events.
15. What Are Some Tips For Decorating Your Home Dance Space?
Decorating your home dance space can create an environment that is both inspiring and functional. Here are some tips to consider:
15.1. Mirrors
Install mirrors on one or more walls to help you check your form and technique.
15.2. Lighting
Choose lighting that is bright and even to provide adequate visibility.
15.3. Sound System
Invest in a good-quality sound system to play music during your dance sessions.
15.4. Storage
Provide storage for your dance shoes, clothing, and accessories.
15.5. Décor
Add décor that reflects your personal style and inspires you to dance. This could include artwork, posters, or plants.
16. How To Choose The Right Size For Your Dance Floor?
Choosing the right size for your dance floor is essential for ensuring you have enough space to move comfortably and safely. Here are some factors to consider:
16.1. Available Space
Measure the available space in your home or studio. Choose a dance floor size that fits comfortably within the space without overcrowding it.
16.2. Dance Style
Consider the dance style you practice. Some dance styles, such as ballet and ballroom, require more space than others.
16.3. Number Of Dancers
If you plan to dance with others, choose a dance floor size that can accommodate multiple dancers comfortably.
16.4. Budget
Consider your budget. Larger dance floors will typically cost more than smaller ones.
16.5. Future Needs
Think about your future needs. If you plan to expand your dance practice or add more dancers, choose a dance floor size that can accommodate those changes.
17. What Are Some Common Mistakes To Avoid When Building A Dance Floor?
Avoiding common mistakes can save you time, money, and frustration when building a dance floor. Here are some mistakes to watch out for:
17.1. Inaccurate Measurements
Ensure you take accurate measurements and double-check them before cutting any materials.
17.2. Using Low-Quality Materials
Use high-quality materials to ensure the dance floor is durable and safe.
17.3. Ignoring Safety Precautions
Follow safety precautions to prevent injuries. Wear protective gear, use proper ventilation, and secure the floor properly.
17.4. Skipping The Sanding Process
Sand the surface of the dance floor thoroughly to remove any rough edges and prepare it for finishing.
17.5. Applying The Finish Incorrectly
Follow the manufacturer’s instructions when applying the finish. Use the correct tools and techniques to achieve a smooth, even surface.
18. How To Make Your Dance Floor Portable?
Making your dance floor portable can be a convenient option for events, home use, or traveling dancers. Here are some tips:
18.1. Modular Design
Design the dance floor in modular sections that can be easily assembled and disassembled.
18.2. Lightweight Materials
Use lightweight materials, such as plywood and aluminum, to reduce the weight of the dance floor.
18.3. Carrying Handles
Attach carrying handles to each section of the dance floor to make it easier to transport.
18.4. Storage Bags
Provide storage bags for each section of the dance floor to protect it during transport and storage.
18.5. Easy Assembly
Design the dance floor so that it can be assembled and disassembled quickly and easily, without the need for special tools.
19. How To Incorporate Lighting Into Your Dance Floor Design?
Incorporating lighting into your dance floor design can enhance the atmosphere and create a more immersive dance experience. Here are some ideas:
19.1. LED Strip Lights
Install LED strip lights around the perimeter of the dance floor to create a colorful and dynamic effect.
19.2. Spotlights
Use spotlights to highlight specific areas of the dance floor or to create dramatic lighting effects.
19.3. Dance Floor Lights
Install dance floor lights that are designed to sync with the music and create a synchronized light show.
19.4. Mood Lighting
Use mood lighting to create a relaxing and inviting atmosphere.
19.5. Dimmers
Install dimmers to control the brightness of the lights and create different lighting effects.
20. How To Choose The Right Finish For Your Dance Floor?
Choosing the right finish for your dance floor is essential for ensuring it is safe, durable, and aesthetically pleasing. Here are some factors to consider:
20.1. Slip Resistance
Choose a finish that provides adequate slip resistance to prevent falls and injuries.
20.2. Durability
Choose a finish that is durable and can withstand the wear and tear of dancing.
20.3. Appearance
Choose a finish that complements the overall design of your dance space.
20.4. Ease Of Maintenance
Choose a finish that is easy to clean and maintain.
20.5. Cost
Consider the cost of the finish. Some finishes are more expensive than others.
FAQ Section
Q1: What is the best type of dance floor for beginners?
A: A Marley floor over a sprung subfloor is generally recommended for beginners. It provides a good balance of cushioning, slip resistance, and ease of maintenance, making it suitable for various dance styles.
Q2: How can I make my dance floor less slippery?
A: Clean your dance floor regularly with a mild detergent and water. You can also use a specialized dance floor cleaner that is designed to increase slip resistance. Avoid using harsh chemicals or abrasive cleaners that can damage the surface.
Q3: Can I build a dance floor on carpet?
A: It is not recommended to build a dance floor directly on carpet. Carpet can be uneven and provide inadequate support, which can lead to injuries. It is best to install the dance floor on a hard, level surface.
Q4: How often should I clean my dance floor?
A: Clean your dance floor at least once a week, or more often if it is used frequently. Regular cleaning will help remove dirt, dust, and other debris that can make the floor slippery or damage the surface.
Q5: What is a sprung floor and why is it important?
A: A sprung floor is a dance floor that has a layer of elasticity to absorb impact. It is important because it reduces stress on joints and prevents injuries, making it ideal for high-impact dance styles like ballet and jazz.
Q6: How can I soundproof my dance space?
A: To soundproof your dance space, you can use soundproofing materials such as acoustic panels, soundproof curtains, and door seals. You can also add a layer of insulation to the walls and ceiling.
Q7: What is the ideal temperature and humidity for a dance space?
A: The ideal temperature for a dance space is between 68 and 72 degrees Fahrenheit (20-22 degrees Celsius). The ideal humidity is between 40% and 60%.
Q8: How can I prevent injuries while dancing at home?
A: To prevent injuries while dancing at home, warm up before each dance session, use proper technique, and dance on a safe, level surface. You should also listen to your body and take breaks when needed.
Q9: Can I use a portable dance floor outdoors?
A: Yes, you can use a portable dance floor outdoors, but you should protect it from the elements. Choose a location that is sheltered from the wind and rain, and use a tarp or cover to protect the floor from direct sunlight and moisture.
Q10: Where can I find dance communities and events near me?
A: Visit ten-dance.com to explore local dance classes, workshops, and events. Our comprehensive directory can help you find opportunities to connect with fellow dancers and enhance your dance journey.
Creating your own dance floor is an achievable and rewarding project that enhances your dance experience. With careful planning, the right materials, and a bit of effort, you can construct a safe, functional, and inspiring dance space tailored to your specific needs. Whether you’re a beginner or a professional, a dedicated dance floor supports your passion and helps you achieve your dance goals.
Ready to take your dance journey to the next level? Visit ten-dance.com today to explore a wide range of dance classes, connect with a vibrant community of dancers, and discover the resources you need to excel. Whether you’re looking to improve your technique, find local events, or simply share your love for dance, ten-dance.com is your ultimate destination. Join us now and let’s dance together!
